This is not just chocolate cake. This is warm, gooey, molten chocolate overload in a mug.
Crack into the center and it flows. Not dry. Not cakey. Just rich, liquid chocolate magic. That’s the goal here.
I’ve tested mug cakes that turned into rubber bricks. IMO, most fail because of overcooking and wrong ratios. This one fixes both.
Prep Time: 3 minutes
Cook Time: 1–2 minutes
Total Time: ~5 minutes
Servings: 1 mug cake
Why This Recipe Works
This works because of controlled structure. You want the edges set while the center stays molten, and that balance is everything.
Cocoa powder builds the base flavor while chocolate chips create the lava core. That combo gives both depth and texture instead of a flat chocolate taste.
Microwave timing is dialed in carefully. Too long and it’s dry, too short and it collapses, so precision matters here.
What Makes This Different
Most mug cakes are either dry or underwhelming. This one focuses on contrast—firm outside, molten inside.
Lava vs Regular Mug Cake
- Lava cake = soft edges + flowing center
- Regular mug cake = fully cooked, uniform texture
The difference is huge. Lava cake feels indulgent, while regular mug cake feels like a shortcut dessert.
FYI, the molten center is not optional here. That’s the entire point.
Ingredients You’ll Need
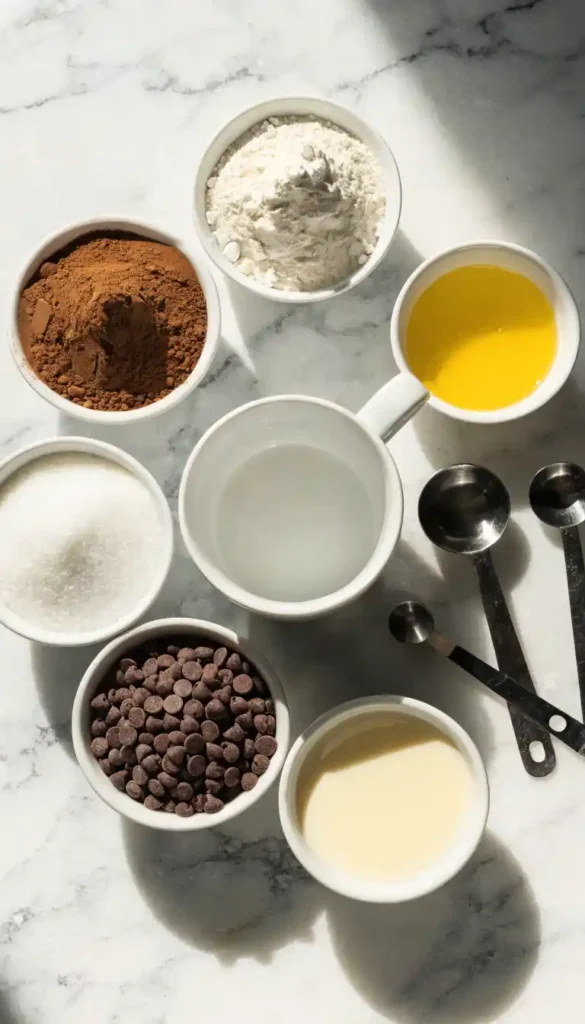
For the Cake Batter
- 4 tbsp all-purpose flour
- 2 tbsp cocoa powder
- 3 tbsp sugar
- 1/4 tsp baking powder
- Pinch of salt
These create the structure and base flavor. Measure properly because small changes affect texture fast.
For the Wet Ingredients
- 3 tbsp milk
- 2 tbsp oil or melted butter
- 1/4 tsp vanilla extract
These bring moisture and richness. Oil gives softer texture, butter adds more flavor—your call.
For the Lava Center
- 2 tbsp chocolate chips (dark or milk)
- Optional: 1 square chocolate for extra molten core
This is where the magic happens. Don’t skip or reduce it.
Equipment Needed
You only need a mug and a microwave, which is why this recipe is so popular. It’s fast, simple, and low cleanup.
- Microwave-safe mug (10–12 oz)
- Spoon or small whisk
- Measuring spoons
Avoid small mugs because batter needs room to rise without overflowing.
Step-by-Step Process
Mix the Dry Ingredients
Add flour, cocoa powder, sugar, baking powder, and salt directly into the mug. Stir until everything looks evenly combined.
Breaking up cocoa clumps is important here. If not mixed well, you’ll get bitter pockets in the final cake.
Add the Wet Ingredients
Pour in milk, oil, and vanilla extract. Mix until a smooth batter forms with no dry spots remaining.
Scrape the bottom and sides properly. Dry pockets = uneven cooking later.
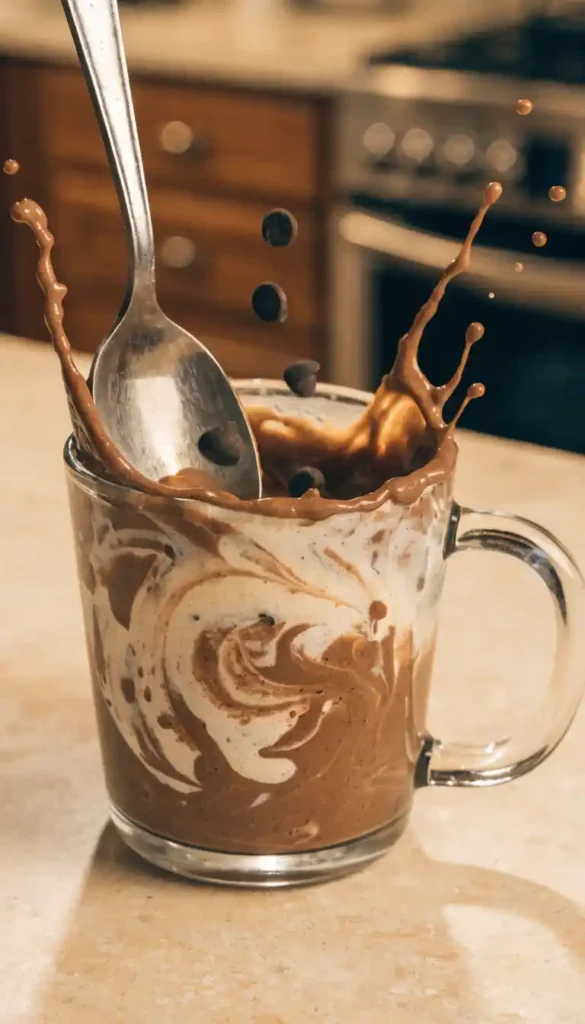
Create the Lava Center
Add chocolate chips into the center of the batter. Push them slightly down so they sit in the middle, not on top.
This ensures they melt into a flowing core instead of burning on the surface.
Microwave the Cake
Cook on high for about 60–90 seconds depending on your microwave power. Start with less time because you can always add more.
The top should look set while the center remains soft. Slight shine in the middle is exactly what you want.
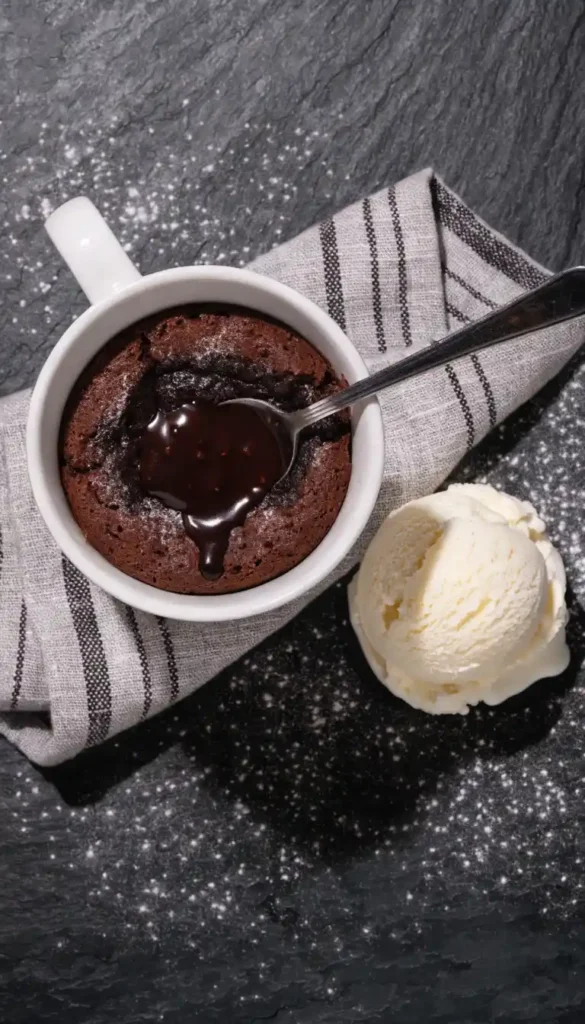
Rest Before Eating
Let it sit for 1 minute after microwaving. This allows the structure to stabilize while keeping the center molten.
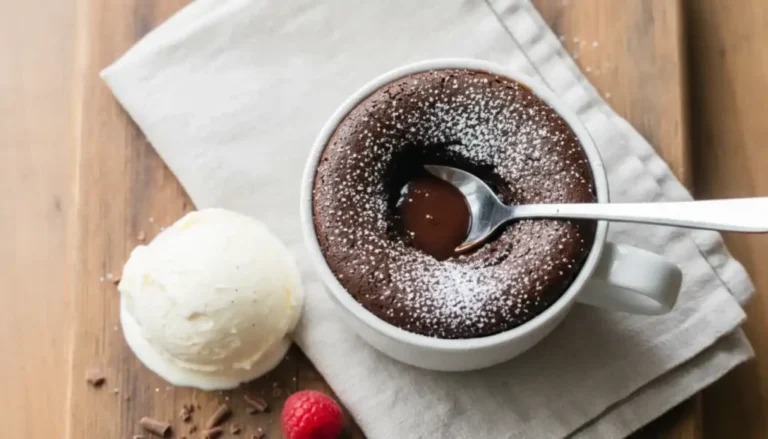
Cut into the middle with a spoon and watch the chocolate flow. That’s your success indicator.
Serving
Serve immediately while it’s warm because that’s when the lava effect is strongest. Waiting too long will cause the center to firm up.
You can add a scoop of vanilla ice cream or a dusting of powdered sugar if you want contrast. IMO, it’s already perfect on its own.
Storage Tips
This is not a make-ahead dessert. It’s meant to be eaten fresh right after cooking.
If you must store it, keep it covered at room temperature for a few hours. Reheating will reduce the molten effect significantly.
Variations Worth Trying
You can easily tweak this recipe for different flavors without changing the core method.
- Add peanut butter in the center for a nutty lava version
- Use white chocolate chips for contrast
- Add espresso powder for deeper chocolate flavor
Each variation works, but keep the structure intact.
Common Mistakes to Avoid
Overcooking is the biggest mistake. Even 10–15 seconds too long can ruin the molten center completely.
Not mixing properly can lead to uneven texture and dry patches. Always ensure the batter is smooth before cooking.
Using too small a mug can cause overflow and uneven cooking. Give the batter space to rise.
Why This Beats Alternatives
This recipe delivers actual lava, not just soft cake pretending to be lava. The difference is noticeable from the first spoonful.
It’s also faster and more reliable than oven-baked lava cakes. No preheating, no waiting, just instant dessert.
You control everything from sweetness to texture, which makes it more customizable than store-bought options.
Perfect For
This is perfect for late-night cravings when you want something quick but satisfying. It’s also great for single servings when you don’t want leftovers.
It works well for students, busy schedules, or anyone who wants dessert without effort. Minimal tools, maximum reward.
Budget or Nutrition Section
This recipe is extremely budget-friendly because it uses basic pantry ingredients. No expensive or specialty items required.
Calories are around 350–400 depending on ingredients used. It’s indulgent, but that’s the point.
FAQ Section
Can I make this without eggs?
Yes, this recipe is already egg-free, which keeps it simple and quick.
Why is my cake rubbery?
It was overcooked. Reduce microwave time next time.
Can I make it dairy-free?
Yes, use plant-based milk and dairy-free chocolate.
Can I double the recipe?
Not in one mug. Make separate servings for best results.
Final Thoughts
This recipe is proof that you don’t need complicated techniques to make something impressive. It’s all about understanding timing and balance.
Once you get the timing right, it becomes your go-to dessert for any quick craving. And honestly, it’s hard to go back to regular mug cakes after this.
If you want something fast, rich, and genuinely satisfying, this is it. Simple ingredients, perfect results, every time.
Molten Chocolate Lava Mug Cake
Ingredients
Method
- Add flour, cocoa powder, sugar, baking powder, and salt directly into a microwave-safe mug. Stir until evenly combined.
- Pour in milk, oil, and vanilla extract. Mix until a smooth batter forms with no dry spots remaining.
- Add chocolate chips into the center of the batter and push them slightly down so they sit in the middle.
- Microwave on high for 60-90 seconds, checking at 60 seconds for doneness. The top should look set while the center remains soft.
- Let sit for 1 minute to stabilize before cutting into the center to see the chocolate flow.
- Serve immediately while warm. Optionally top with vanilla ice cream or powdered sugar for contrast.