Servings: 10-12 slices | Prep Time: 30 minutes | Chill Time: 6-8 hours| Total Time: ~7-9 hours
Why This Red Velvet Oreo Cheesecake Will Ruin Every Other Dessert for You
You know that moment when you take one bite of something and everything else feels pointless? Yeah, this Red Velvet Oreo Cheesecake does exactly that. It is bold, creamy, crimson, and absolutely loaded with Oreo goodness.
IMO, combining red velvet and cheesecake was the best food decision anyone ever made. The tangy cream cheese filling, the chocolatey Oreo crust, and that gorgeous red color? Honestly, it should be illegal how good this looks on a plate.
I first made this for a birthday party and people literally stopped mid-conversation to stare at the slice. No exaggeration. So let us get into it, because you deserve this in your life.
Ingredients You Will Need
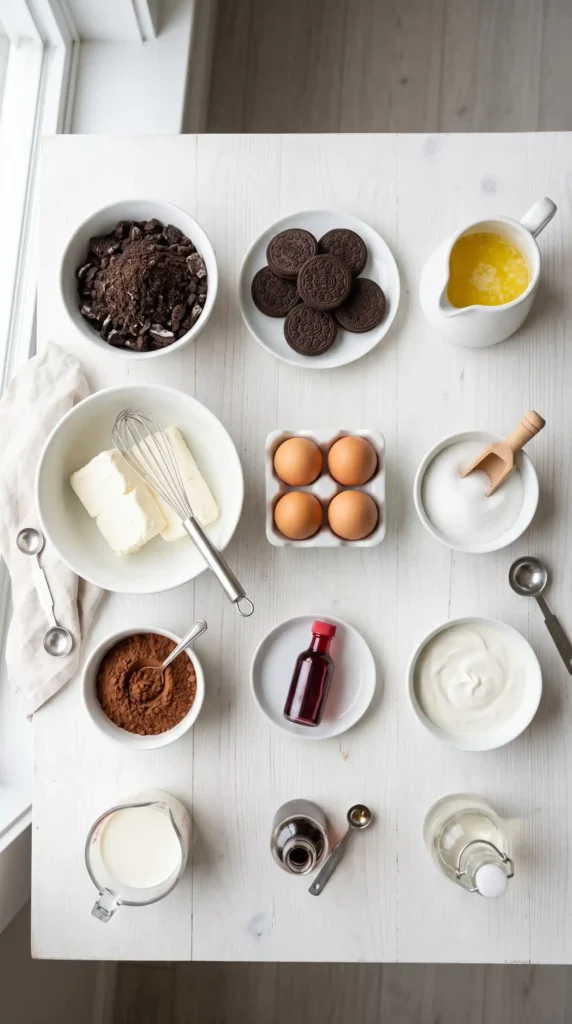
Let us keep things simple and organized. Here is everything you need to pull off this masterpiece:
For the Oreo Crust
- 24 Oreo cookies (whole, filling included)
- 5 tablespoons unsalted butter, melted
- 1 pinch of salt
For the Red Velvet Cheesecake Filling
- 24 oz (3 blocks) full-fat cream cheese, softened to room temperature
- 1 cup granulated sugar
- 3 large eggs, at room temperature
- 1/2 cup full-fat sour cream
- 1/4 cup heavy cream
- 2 tablespoons unsweetened cocoa powder
- 2 tablespoons red food coloring (gel-based preferred)
- 1 teaspoon pure vanilla extract
- 1 teaspoon white vinegar
Now For the Topping (Optional but Recommended)
- 1 cup heavy whipping cream
- 3 tablespoons powdered sugar
- 1 teaspoon vanilla extract
- 6-8 extra Oreo cookies, crushed or whole for garnish
Equipment You Need
Before you start, make sure you have these on hand:
- 9-inch springform pan
- Food processor or zip-lock bag with rolling pin
- Electric hand mixer or stand mixer
- Large mixing bowls
- Rubber spatula
- Aluminum foil (for water bath)
- Large roasting pan
How to Make Red Velvet Oreo Cheesecake: Step-by-Step
Okay, here is where the magic happens. Do not rush this. Cheesecake is one of those things that rewards patience. Trust the process and you will thank yourself later.
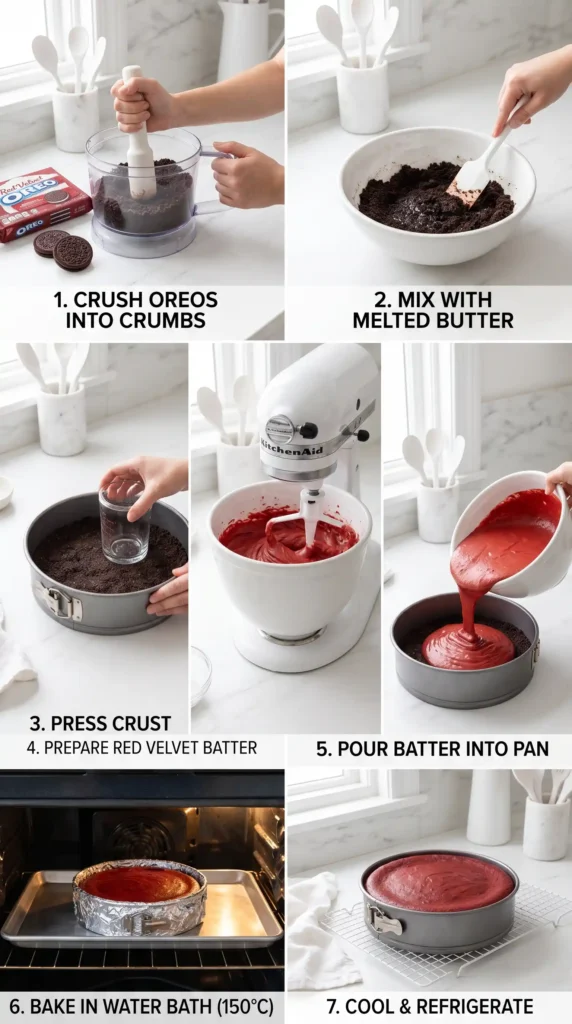
Step 1: Make the Oreo Crust
Start by preheating your oven to 325 degrees Fahrenheit (163 degrees Celsius). Take your 24 Oreo cookies and toss them into a food processor. Blitz them until you get fine, even crumbs. No big chunks. Those chunks are the enemy of a good crust.
Pour the crumbs into a bowl and add your 5 tablespoons of melted butter and that pinch of salt. Mix it all together with a fork until the crumbs look like wet sand. You want them to clump slightly when you press them between your fingers.
Now press this mixture firmly into the bottom of your springform pan. Use the flat bottom of a measuring cup to really pack it down. This step matters. A loose crust means a crumbly slice, and nobody wants that. Pop it in the oven for 10 minutes, then set it aside to cool completely.
Step 2: Prepare the Red Velvet Cheesecake Filling
Here comes the fun part. Grab your softened cream cheese and beat it on medium speed for about 2 minutes until it is completely smooth and lump-free. This step is non-negotiable. Cold or lumpy cream cheese will ruin the texture of your final cheesecake.
Add the 1 cup of granulated sugar and beat again for another 2 minutes on medium speed. You want the mixture to turn fluffy and light. Scrape down the sides of the bowl with your rubber spatula as you go.
Now add the 3 eggs, one at a time. Mix on low speed after each addition, just until combined. Do not overmix once the eggs go in. Overbeating the eggs incorporates too much air, and that leads to cracks. And cracked cheesecake is a heartbreak no one needs, right?
Add the 1/2 cup sour cream, 1/4 cup heavy cream, 2 tablespoons cocoa powder, 2 tablespoons red food coloring, 1 teaspoon vanilla extract, and 1 teaspoon white vinegar. Mix everything on low until just combined. The batter should be this gorgeous, deep red color that looks almost too pretty to bake.
Step 3: Assemble and Prepare for Baking
Pour your red velvet filling over the cooled Oreo crust. Use your spatula to smooth out the top evenly. Tap the pan gently on the counter a few times to pop any air bubbles hiding in there.
Now, wrap the outside of your springform pan tightly with two layers of aluminum foil. This is important for the water bath. Place the foil-wrapped pan inside a large roasting pan. Fill the roasting pan with hot water until it reaches about halfway up the sides of the springform pan.
The water bath keeps the oven humid, which prevents the cheesecake from drying out and cracking on top. Skip this step at your own risk. FYI, I skipped it once. Once. The cheesecake cracked right down the middle and I was devastated.
Step 4: Bake the Cheesecake
Slide everything carefully into your preheated 325-degree oven. Bake for 55 to 65 minutes. You will know it is done when the edges are set but the center still has a slight jiggle to it. Think Jell-O, not soup. That gentle wobble in the center is actually exactly what you want.
Once it hits that point, turn off the oven. Leave the cheesecake inside with the oven door cracked open for about 1 hour. This slow cooldown prevents sudden temperature changes that cause cracking. Patience is a virtue, especially with cheesecake.
Step 5: Chill and Set
After that oven rest, remove the cheesecake and let it cool completely at room temperature. Then cover it loosely with plastic wrap and refrigerate for at least 6 to 8 hours. Overnight is honestly better if you can manage it.
I know, the waiting is brutal. But chilling gives the cheesecake time to fully set and develop its flavor. A warm cheesecake is a messy cheesecake. So be patient and let the fridge do its job.
Step 6: Add the Whipped Cream Topping
Once your cheesecake has chilled and set completely, it is time for the topping. Pour 1 cup of heavy whipping cream into a cold mixing bowl. Beat it on medium-high speed until it starts to thicken.
Add 3 tablespoons of powdered sugar and 1 teaspoon of vanilla extract, then keep beating until stiff peaks form. Do not overdo it or you will end up with butter instead of whipped cream. That is a different recipe entirely
Spread or pipe the whipped cream over the top of your chilled cheesecake. Garnish with crushed Oreos, whole cookies, or however you want to style it. Make it look as dramatic as it tastes.
Tips for the Perfect Red Velvet Oreo Cheesecake
Use room temperature ingredients. Cold cream cheese leads to lumps. Lumps lead to bad texture. Bad texture leads to regret.
Do not skip the water bath. It is the single most effective trick for a smooth, crack-free top.
Use gel food coloring. Liquid coloring can thin the batter. Gel gives you that rich, vibrant red without changing the consistency.
Chill overnight if possible. The texture improves dramatically after a full night in the fridge.
Run a knife around the edge. Before releasing the springform pan, run a thin knife around the perimeter to prevent tearing.
How to Store Your Cheesecake
Store your Red Velvet Oreo Cheesecake in an airtight container in the refrigerator for up to 5 days. If you want to freeze it, wrap individual slices in plastic wrap and then foil, and freeze for up to 2 months. Thaw overnight in the fridge before serving.
Why This Red Velvet Oreo Cheesecake Recipe Actually Works
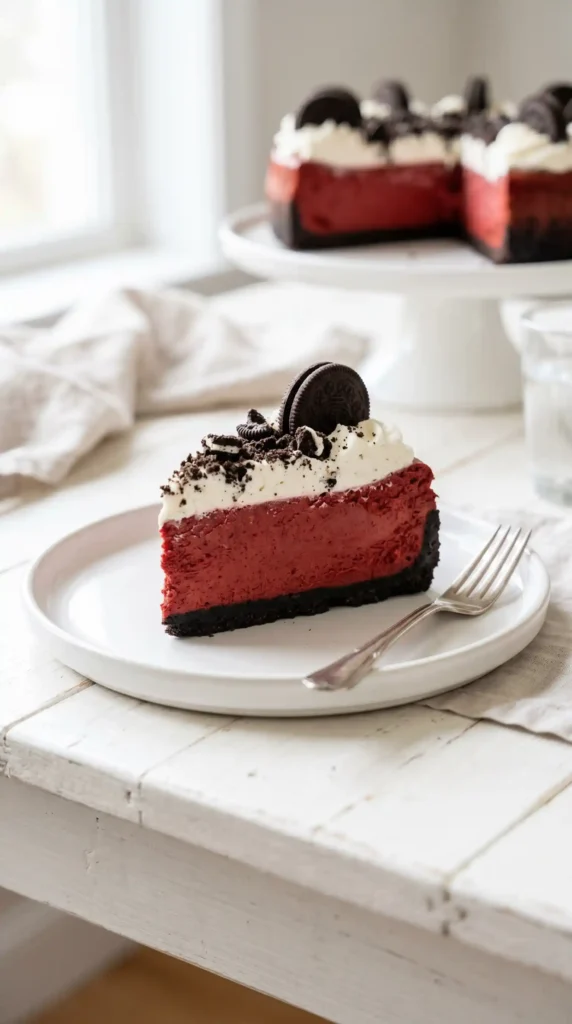
The Oreo crust gives you a chocolatey, slightly salty base that balances the rich, tangy filling perfectly. The red velvet batter brings cocoa depth and that beautiful color, while the cream cheese keeps everything creamy and lush.
Have you ever had a dessert that looked as good as it tasted? That is this cheesecake. The white whipped cream against the deep red filling and dark Oreo crust makes for a stunning presentation every single time.
The combination of red velvet and Oreo is not just about looks either. The slightly bitter chocolate from the cocoa and Oreos cuts through the sweetness of the filling. It is a genuinely well-balanced dessert, not just a pretty one.
Frequently Asked Questions
Can I make this Red Velvet Oreo Cheesecake without a water bath?
Technically yes, but you risk cracks and uneven baking. The water bath creates steam that keeps the oven moist and helps the cheesecake bake evenly. If you skip it, lower the oven temp slightly and keep a closer eye on it.
Can I use a different crust instead of Oreos?
Absolutely. Graham cracker crust works well and gives a more classic cheesecake flavor. Chocolate digestive biscuits are another great option. But honestly, the Oreo crust is what makes this recipe stand out, so I would not swap it out unless you have to.
Why did my cheesecake crack on top?
Cracks usually happen for three reasons: overmixing the eggs, skipping the water bath, or cooling it too quickly. Make sure you mix on low speed once the eggs go in, use the water bath, and let the cheesecake cool gradually in the oven before refrigerating.
Can I make this recipe ahead of time?
Yes, and you actually should. This cheesecake tastes even better the next day. Make it the day before your event and let it chill overnight. Add the whipped cream topping and Oreo garnish right before serving so everything looks fresh.
Can I use low-fat cream cheese to make it lighter?
You can, but I would not recommend it. Full-fat cream cheese gives you that thick, rich, creamy texture that defines a good cheesecake. Low-fat versions tend to be watery and may not set as firmly. If you want a lighter version, try reducing the portion size instead
How do I know when the cheesecake is fully baked?
The cheesecake is done when the edges are set and firm, but the center still has a slight wobble, like Jell-O. It will firm up completely as it cools and chills in the fridge. If the entire cheesecake jiggles, it needs more time. If it does not jiggle at all, it might be slightly overbaked.
Final Thoughts: Make This Red Velvet Oreo Cheesecake Now
Honestly, this Red Velvet Oreo Cheesecake is one of those recipes that feels fancy but is genuinely manageable for any home baker. It takes patience, sure, but every single step is straightforward.
The bold red color, the creamy filling, the crunchy Oreo crust, and that cloud of whipped cream on top make this a showstopper for any occasion. Birthdays, holidays, dinner parties, or just a Tuesday when you feel like doing something nice for yourself.
So go get your ingredients, set aside a day, and make this happen. I promise you will not regret it. And neither will anyone lucky enough to get a slice.

Red Velvet Oreo Cheesecake
Ingredients
Method
- Preheat your oven to 325°F (163°C).
- In a food processor, blend 24 Oreo cookies into fine crumbs.
- Mix the crumbs with 5 tablespoons of melted butter and a pinch of salt until it resembles wet sand.
- Press the mixture into the bottom of a 9-inch springform pan and bake for 10 minutes. Let it cool completely.
- Beat 24 oz cream cheese on medium speed until smooth and lump-free.
- Add 1 cup granulated sugar and beat for another 2 minutes.
- Add 3 eggs one at a time, mixing on low speed after each addition until just combined.
- Mix in 1/2 cup sour cream, 1/4 cup heavy cream, 2 tablespoons cocoa powder, 2 tablespoons red food coloring, 1 teaspoon vanilla extract, and 1 teaspoon white vinegar until just combined.
- Pour the red velvet filling over the cooled Oreo crust and smooth the top.
- Wrap the springform pan in two layers of aluminum foil and place in a large roasting pan.
- Fill the roasting pan with hot water halfway up the sides of the springform pan.
- Bake in the preheated oven for 55 to 65 minutes until the edges are set and the center has a slight jiggle.
- Turn off the oven, crack the door, and let the cheesecake cool inside for 1 hour.
- Remove the cheesecake from the oven and let it cool completely at room temperature.
- Cover loosely with plastic wrap and refrigerate for at least 6 to 8 hours or overnight.
- Beat 1 cup heavy whipping cream until it thickens.
- Add 3 tablespoons powdered sugar and 1 teaspoon vanilla extract, then continue beating until stiff peaks form.
- Spread or pipe the whipped cream over the top of the cheesecake and garnish as desired.