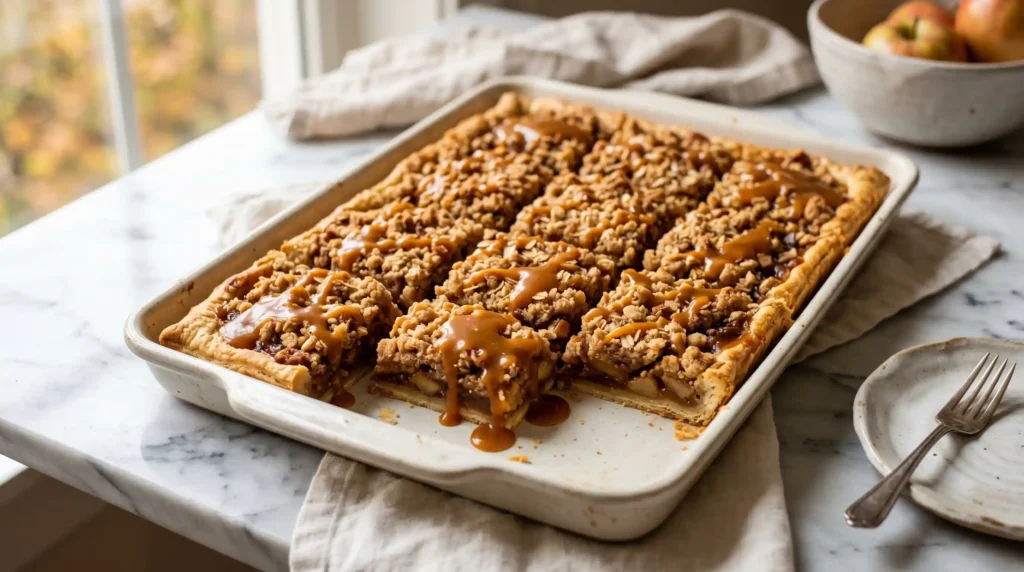
You know that moment at a party when someone pulls out a dessert and the whole room goes quiet? That’s what a Caramel Apple Slab Pie does. It’s big, it’s gorgeous, and it feeds a crowd without any of the fuss of making individual pies.
I made this for a fall family gathering last year and genuinely ran out before I got a second slice. Lesson learned: always make two.
Servings: 24 squares Prep Time: 45 minutes Bake Time: 45–50 minutes Total Time: About 1 hour 35 minutes
What Makes a Slab Pie Better Than a Regular Pie?
Have you ever tried to cut a round pie for 20 people? It’s a geometric nightmare. A slab pie solves that problem completely. You bake it in a rimmed sheet pan, and it cuts into neat little squares that everyone can grab without drama.
The slab format is genuinely superior for group settings. More surface area means more caramelized filling edges, more crumb topping coverage, and more of that golden, flaky crust per square. It’s basically a pie that decided to grow up and feed a crowd.
IMO, once you make a slab pie, you’ll never go back to round.
Ingredients You’ll Need
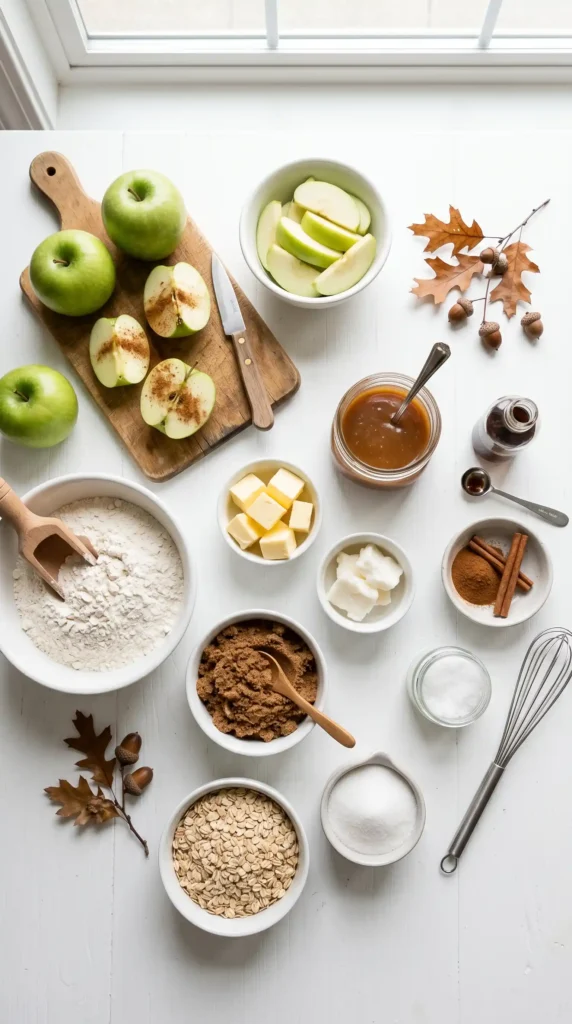
Here’s everything that goes into this showstopper. The ingredient list looks long, but each component is simple and totally worth it.
For the Crust:
- 3 1/3 cups all-purpose flour
- 1 teaspoon salt
- 1 cup butter-flavored shortening
- 12 tablespoons cold water
For the Apple Filling:
- 2/3 cup sugar
- 1/3 cup all-purpose flour
- 1 teaspoon ground cinnamon
- 3 1/2 pounds Granny Smith apples, peeled, cored, and sliced
Now For the Crumb Topping:
- 1 cup quick-cooking rolled oats
- 1 cup packed brown sugar
- 1/2 cup all-purpose flour
- 1/2 cup butter, softened
Now For the Caramel Sauce:
- 1 cup brown sugar
- 4 tablespoons butter
- 1/2 cup half-and-half
- 1 tablespoon vanilla extract
- Pinch of salt
How to Make Caramel Apple Slab Pie (Detailed Step by Step)
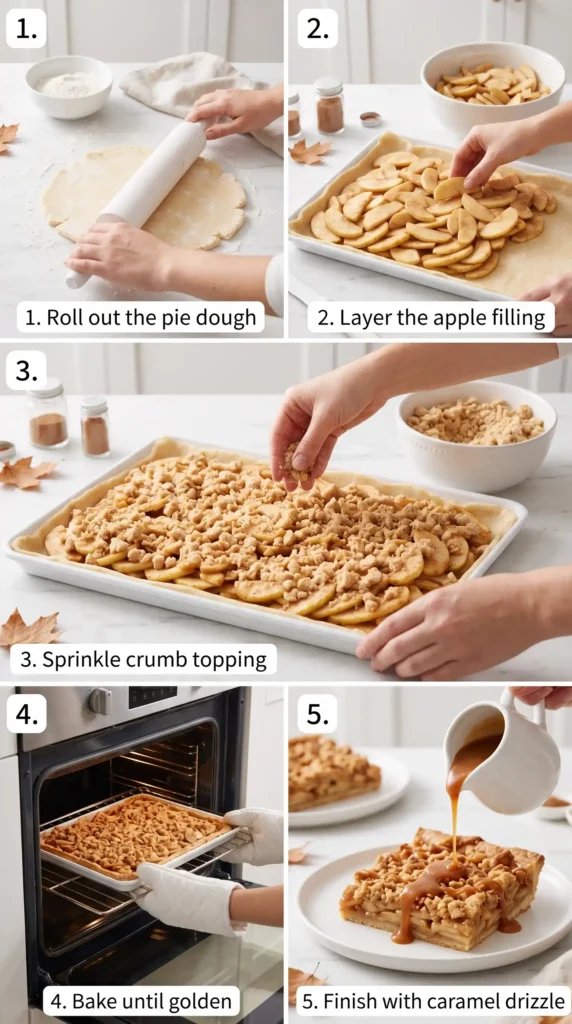
Step 1: Make the Crust Dough
Start by combining 3 1/3 cups of all-purpose flour and 1 teaspoon of salt in a large mixing bowl. Whisk them together briefly so the salt distributes evenly throughout the flour. This small step prevents any random salty bites later.
Add 1 cup of butter-flavored shortening to the flour mixture. Using a pastry cutter or your fingertips, cut the shortening into the flour until the mixture looks like rough, pea-sized crumbs. Work quickly here — warm hands melt the shortening and make the crust tough.
Add 12 tablespoons of cold water, one tablespoon at a time, mixing gently with a fork after each addition. Stop adding water when the dough just starts to hold together. It should feel slightly tacky but not sticky. Divide the dough into two equal portions, flatten each into a disc, and refrigerate for at least 20 minutes.
Step 2: Prepare the Apple Filling
While the dough chills, prepare your apples. Peel, core, and slice 3 1/2 pounds of Granny Smith apples into thin, even slices — about 1/4 inch thick. Even slices ensure consistent cooking, so no bite gives you a raw, crunchy surprise.
In a large bowl, combine 2/3 cup of sugar, 1/3 cup of flour, and 1 teaspoon of ground cinnamon. Whisk them together until evenly mixed. Add the apple slices and toss everything together thoroughly until every single slice gets coated in that sugar-cinnamon mixture.
Let the coated apples sit for about 10 minutes. They’ll release some natural juices, and the flour will begin to absorb them. This prevents a watery, soggy filling in your finished pie. Trust the process here.
Step 3: Make the Crumb Topping
In a medium bowl, combine 1 cup of quick-cooking rolled oats, 1 cup of packed brown sugar, and 1/2 cup of all-purpose flour. Stir them together until evenly combined.
Add 1/2 cup of softened butter, cut into small pieces. Use your fingers to rub the butter into the dry ingredients until the mixture forms rough, clumpy crumbs. You want visible butter chunks in there — they melt during baking and create those irresistible golden, crispy clusters on top.
Set the crumb topping aside at room temperature while you assemble the pie.
Step 4: Roll Out the Crust
Preheat your oven to 375°F. Lightly grease a large rimmed baking sheet — approximately 15×10 inches works perfectly for this recipe.
Take one disc of chilled dough and roll it out on a lightly floured surface into a rectangle just slightly larger than your baking sheet. Roll from the center outward in all directions to keep the thickness even. Aim for about 1/8-inch thickness.
Carefully transfer the rolled crust to your prepared baking sheet. Press it gently into the corners and up the sides of the pan, trimming any excess that hangs over. Patch any tears with leftover dough scraps — it genuinely doesn’t matter, because the filling covers everything.
Step 5: Add the Filling and Crumb Topping
Pour the apple filling evenly over the bottom crust. Spread it out all the way to the edges so every square gets a fair share of apple. Press the apples down slightly so they lay flat and don’t create an uneven surface.
Scatter the crumb topping evenly over the entire surface of the apple layer. Cover every inch of the filling with crumbs. This topping creates a beautiful texture contrast with the tender apples underneath, and it protects the filling from drying out during baking.
Step 6: Bake Until Golden
Place the baking sheet in the preheated oven on the middle rack. Bake for 45 to 50 minutes, or until the crumb topping turns deep golden brown and the apple filling bubbles around the edges. Those bubbling edges tell you the filling is fully cooked and the juices have thickened properly.
If the crumb topping starts browning too quickly before the 40-minute mark, loosely tent the pan with aluminum foil for the remaining bake time. Don’t open the oven repeatedly — every peek drops the temperature and extends your bake time.
Remove the pan from the oven and place it on a wire rack. Allow it to cool for at least 20–30 minutes before adding the caramel sauce.
Step 7: Make the Homemade Caramel Sauce
While the pie cools slightly, make the caramel sauce. In a medium saucepan over medium heat, combine 1 cup of brown sugar and 4 tablespoons of butter. Stir constantly as the butter melts and the sugar dissolves. The mixture will start to bubble — that’s exactly what you want.
Once the sugar and butter fully combine, carefully pour in 1/2 cup of half-and-half. The mixture will bubble up aggressively for a moment, so stand back slightly and keep stirring. Reduce the heat to medium-low and continue stirring for about 3–4 more minutes until the sauce thickens noticeably.
Remove from heat and stir in 1 tablespoon of vanilla extract and a pinch of salt. The vanilla rounds out the sweetness beautifully, and the salt makes the caramel flavor pop. Let the sauce cool for 5 minutes before drizzling.
Step 8: Drizzle and Serve
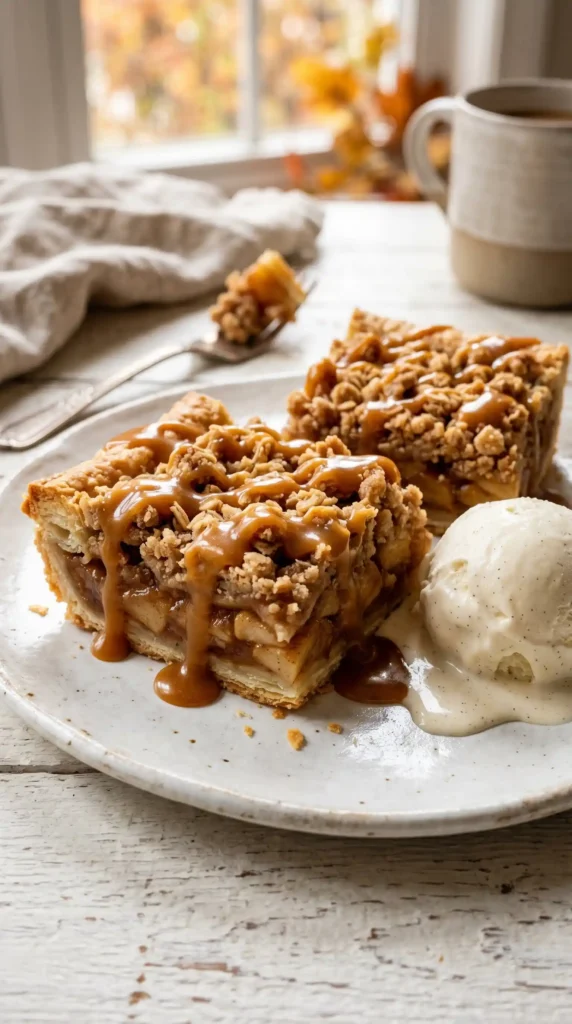
Using a spoon or a small piping bag, drizzle the warm caramel sauce generously over the entire surface of the cooled slab pie. Be generous — this is not the time for restraint. The caramel seeps into the crumb topping and creates a sticky, glossy finish that looks absolutely stunning.
Cut into squares and serve warm or at room temperature. A scoop of vanilla ice cream alongside each square turns this from great to unforgettable
Tips for the Best Caramel Apple Slab Pie
A few things I’ve learned the hard way so you don’t have to:
- Use Granny Smith apples. Their tartness balances the sweet caramel and sugar topping perfectly. Sweeter apples turn the whole thing cloying.
- Keep everything cold when making the crust. Cold shortening, cold water, cold bowl if possible. This is the difference between flaky and tough.
- Don’t skip the resting time. Letting the apple filling sit before adding it to the crust makes a huge difference in texture.
- Drizzle caramel while the pie is still slightly warm. It flows more evenly and soaks in better than on a completely cold pie.
- Cut clean squares with a sharp knife. Wipe the blade between cuts for neat, professional-looking pieces.
How to Store Leftovers
Cover the pan tightly with plastic wrap or aluminum foil and store at room temperature for up to 2 days. For longer storage, refrigerate for up to 5 days. Reheat individual squares in a 300°F oven for 8–10 minutes to revive the crispy topping.
FYI, this pie actually freezes well too. Freeze cut squares on a baking sheet first, then transfer to a freezer bag. They keep well for up to 2 months.
Why Granny Smith Apples Are the Right Choice
Could you use a different apple? Sure. Would I recommend it? Probably not
Granny Smith apples hold their shape during baking instead of turning into applesauce. They also bring enough tartness to cut through the richness of the caramel and brown sugar. Softer, sweeter varieties like Fuji or Gala tend to get mushy and make the filling too sweet.
Stick with Granny Smith for the best texture and flavor balance.
FAQs About Caramel Apple Slab Pie
Q1: Can I use store-bought pie crust instead of homemade? Yes, absolutely. Use two refrigerated rolled pie crusts and press them together to fit your sheet pan. The homemade version tastes better, but store-bought works perfectly fine when you’re short on time. No judgment here.
Q2: What size baking sheet works best for a slab pie? A standard rimmed half-sheet pan measuring 15×10 inches works best. This size gives you the right crust thickness and enough depth to hold the filling without it overflowing during baking.
Q3: Can I make this ahead of time? Yes — you can bake the slab pie a day ahead and store it covered at room temperature. Make the caramel sauce fresh and drizzle it right before serving for the best presentation and flavor.
Q4: Can I use a different topping instead of crumb topping? You can add a second layer of rolled-out pie crust on top instead of the crumb topping for a more traditional look. Cut slits or a lattice pattern in the top crust to let steam escape during baking.
Q5: How do I prevent the crust from getting soggy? Two things help: letting your apple filling sit for 10 minutes before assembling (so the flour absorbs the juices), and making sure your oven is fully preheated before the pie goes in. A hot oven sets the bottom crust quickly.
Q6: Can I make the caramel sauce in advance? Yes. Make it up to 3 days ahead and store it in a sealed jar in the refrigerator. Warm it gently in a saucepan or microwave before drizzling.
Final Thoughts
This Caramel Apple Slab Pie is the kind of recipe that earns you a reputation. It looks impressive, it tastes incredible, and it feeds a crowd without any extra complexity. The homemade caramel sauce puts it completely over the top.
Make it for your next gathering. Watch it disappear in minutes. Then take all the credit — you earned it.
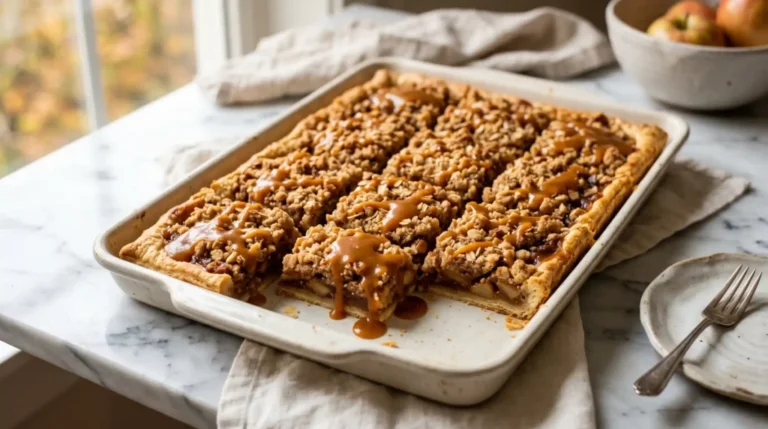
Caramel Apple Slab Pie
Ingredients
Method
- In a large mixing bowl, combine flour and salt. Whisk together to distribute salt evenly.
- Add butter-flavored shortening and cut into flour until mixture resembles pea-sized crumbs.
- Gradually add cold water one tablespoon at a time while mixing gently with a fork until dough starts to hold together.
- Divide dough into two portions, flatten into discs, and refrigerate for at least 20 minutes.
- Peel, core, and slice apples into thin slices.
- In a bowl, mix sugar, flour, and cinnamon. Add apple slices and toss until coated.
- Let apples sit for 10 minutes to release juices.
- Combine oats, brown sugar, and flour in a bowl.
- Add softened butter and rub into the dry ingredients until clumpy.
- Preheat oven to 375°F and grease a baking sheet.
- Roll out one disc of chilled dough into a rectangle slightly larger than the baking sheet.
- Transfer crust to the baking sheet, pressing into corners and trimming excess.
- Pour apple filling over the crust and spread evenly.
- Scatter crumb topping over the filling.
- Bake for 45 to 50 minutes until topping is golden and filling is bubbling.
- If topping browns too quickly, tent with aluminum foil.
- In a saucepan over medium heat, combine brown sugar and butter, stirring until melted.
- Carefully add half-and-half and stir until thickened.
- Remove from heat and stir in vanilla and salt.
- Drizzle caramel sauce over the cooled slab pie.
- Cut into squares and serve warm or at room temperature.