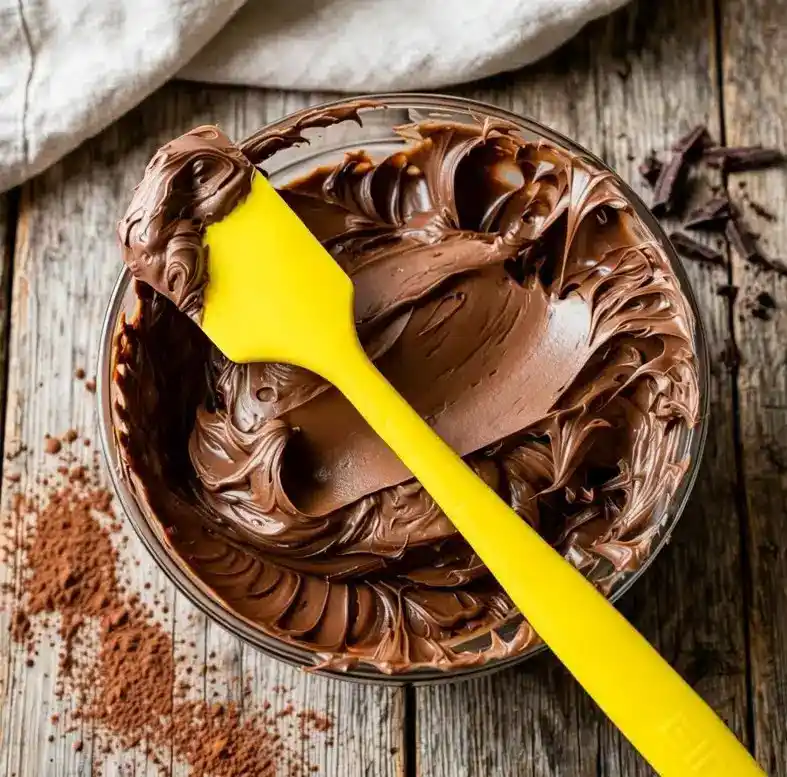
Some recipes make you work for it. This one doesn’t. Chocolate Frosting made the one-minute way gives you a glossy, rich topping without dragging out a mixer or waiting around for butter to soften.
I stumbled onto this method years ago when I forgot to plan ahead for a birthday cake. Now it’s the only frosting recipe I actually trust myself to make under pressure.
Servings: frosts one 9×13-inch cake or a dozen cupcakes (about 12-16 servings) Prep time: 5 minutes Cook time: 3-5 minutes Total time: about 10 minutes, plus a few minutes to set
Why This Chocolate Frosting Beats the Classic Buttercream
Buttercream is great, sure, but it demands softened butter, a stand mixer, and patience you might not have on a Tuesday night. This frosting skips all of that.
You just boil a few ingredients, whisk in chocolate, and pour. IMO, that’s the kind of recipe every home baker needs in their back pocket for last-minute dessert emergencies.
The texture turns out glossy and smooth, almost like a ganache but faster to make. Have you ever needed frosting in under ten minutes? This recipe exists for exactly that moment.
What You’ll Need
Nothing complicated here, just a handful of ingredients most kitchens already have on hand.
- milk – ⅓ cup
- butter – ⅓ cup
- granulated sugar – 1¼ cups
- vanilla extract – 1 teaspoon
- semi-sweet chocolate chips – 1 cup
Five ingredients, one saucepan, zero excuses for skipping homemade frosting ever again.
How to Make Chocolate Frosting
Let’s walk through this slowly, because even a “one-minute” recipe deserves a proper explanation so nothing goes wrong.
Step 1: Combine the Base Ingredients
Grab a small saucepan and add the butter, milk, and granulated sugar together. Keep the heat off for now while you gather everything, since this step moves fast once it starts.
Set the saucepan over medium-high heat on your stovetop. Stir occasionally as the butter melts and the sugar begins to dissolve into the milk.
Step 2: Bring It to a Boil
Watch closely as the mixture heats up, because it climbs to a boil faster than you’d expect. Once bubbles break the surface consistently, you’ve hit a full boil.
Let the mixture boil for exactly 45 seconds while stirring occasionally to prevent scorching on the bottom. This short boil is what gives the frosting its glossy, set-up texture later.
Don’t wander off during this step. Forty-five seconds sounds tiny, but it’s enough time to burn sugar if you’re not paying attention.
Step 3: Remove From Heat and Add Chocolate
Pull the saucepan off the burner right after the 45 seconds ends. Add the vanilla extract and chocolate chips directly into the hot mixture.
Whisk continuously until the chocolate melts completely and the frosting turns smooth and shiny. This part genuinely takes about a minute, so don’t stress if your arm gets a mini workout.
Step 4: Pour Immediately
Here’s the part where speed actually matters. Pour the frosting over your cake, brownies, or cupcakes right away, since it starts setting up within minutes.
Spread it quickly with an offset spatula or the back of a spoon if you want an even layer. Waiting too long turns this glossy frosting into a stiff, hard-to-spread mess.
Step 5: Let It Set
Once your dessert is fully coated, let it sit at room temperature until the frosting firms up completely. This usually takes about 15-20 minutes depending on your kitchen’s temperature.
Slice and serve once it’s set for the cleanest edges. Cutting too early just smears everything, and nobody wants a chocolate frosting crime scene on their cake plate.
Tips for Getting This Chocolate Frosting Right Every Time
A few small details make a big difference between a glossy success and a grainy disappointment.
- Use a small saucepan so the mixture boils evenly without spreading too thin.
- Stir constantly once the chocolate goes in to avoid lumps.
- Pour immediately, since this frosting sets faster than most.
- Work with a dessert that’s fully cooled before pouring for the best finish.
Storage and Reheating
Got leftover frosted dessert sitting around? Store it in an airtight container at room temperature for up to 2 days without any issues.
Need it to last longer? Refrigerate frosted desserts for up to 5 days, then bring them back to room temperature before serving for the best texture.
Want to save it for a special occasion later? Freeze frosted baked goods for up to 2 months and thaw overnight in the refrigerator before digging in.
Fun Variations to Try
Once you’ve mastered the base recipe, switching things up becomes way too easy.
- Dark chocolate version: swap in dark chocolate chips for a deeper, more intense flavor.
- Espresso version: stir in a teaspoon of instant espresso powder to boost the chocolate taste.
- Salted version: mix in a pinch of sea salt for that sweet-and-salty combo everyone loves.
- Mint version: replace vanilla with peppermint extract for a cool, refreshing twist.
- Peanut butter version: whisk in a couple tablespoons of creamy peanut butter for extra richness.
Why stick with plain chocolate when five minutes of extra effort gets you a completely new flavor?
FAQs
Why does this chocolate frosting set so quickly? Boiling the sugar mixture creates a glossy frosting that firms up naturally as it cools, so speed is part of the process.
Can I use salted butter instead of unsalted? Yes, just skip adding any extra salt elsewhere in the recipe to keep the flavor balanced.
Can I use chocolate chunks instead of chocolate chips? Absolutely, as long as they melt smoothly into the hot mixture without leaving lumps behind.
Is this frosting good for cupcakes? Definitely. Pour or spread it over cupcakes while it’s still warm for the smoothest coverage.
Can I make this frosting ahead of time? Not really recommended, since it sets fast and works best when poured fresh right after cooking.
Can I double this recipe for a bigger cake? Yes, just double every ingredient while keeping the boiling time the same at 45 seconds.
Final Thoughts
Chocolate Frosting doesn’t need to be complicated to taste incredible. This one-minute method gives you a glossy, rich topping using five ingredients and one saucepan.
FYI, once you try this version, going back to a slow buttercream recipe feels unnecessary most weeknights. Give it a shot on your next batch of brownies and see how fast “homemade frosting” becomes your new go-to move



