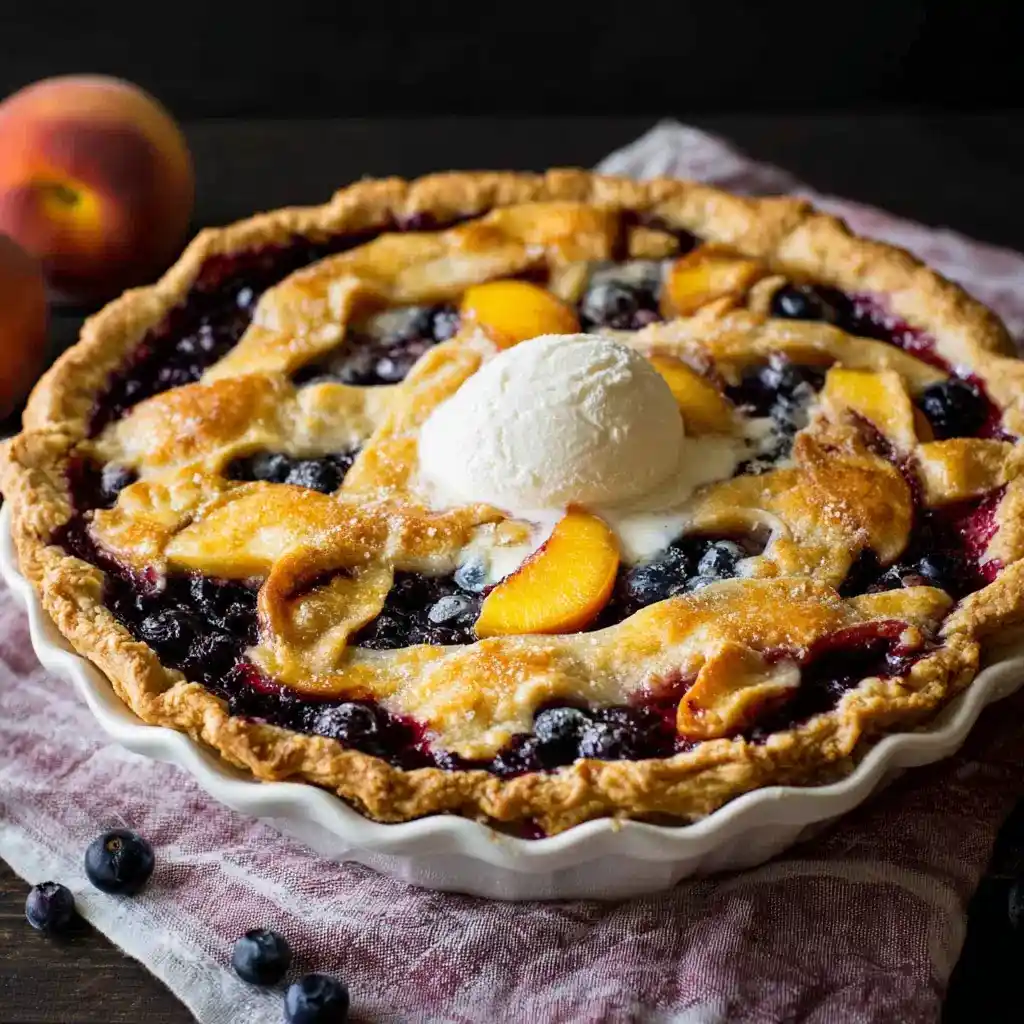
Craving a dessert that tastes like summer in every bite? Peach Blueberry Pie combines juicy peaches, sweet blueberries, and a silky custard filling inside a flaky homemade crust.
I made this pie for the first time at a family cookout, and it vanished before the burgers even hit the grill. Now it’s my go-to whenever peaches show up at the farmers market.
Servings: 8 Prep time: 30 minutes, plus 1 hour chill time Bake time: 35-40 minutes Total time: about 2 hours, including cooling
Why This Pie Feels Like Magic
Ever heard of an “impossible” pie? The custard mixture forms layers around the fruit as it bakes, creating a texture that looks far more complicated than it actually is.
IMO, that’s the coolest part of this recipe. You pour a thin batter over fruit, and the oven somehow sorts everything into distinct, gorgeous layers on its own.
Have you ever wanted a dessert that impresses guests without demanding hours of technique? This pie delivers exactly that combination of ease and payoff.
What You’ll Need
This recipe splits into three parts: the crust, the filling, and a few toppings for serving. Let’s go through each one.
For the Pie Crust:
- all-purpose flour – 1⅓ cups
- salt – ¼ teaspoon
- sugar – 2 teaspoons
- cold unsalted butter, cut into small cubes – ½ cup
- ice water – 2 to 4 tablespoons
For the Filling:
- medium peaches – 3 to 4
- fresh blueberries – 1¼ cups
- eggs – 3
- whole milk – ¾ cup plus 2 tablespoons
- all-purpose flour – ½ cup
- sugar – ½ cup
- unsalted butter, melted and slightly cooled – 2½ tablespoons
- vanilla extract – 1½ teaspoons
- sanding sugar – 2 tablespoons
For Serving:
- whipped cream
- vanilla ice cream
Nothing exotic here, just simple baking staples doing some seriously impressive work.
How to Make Peach Blueberry Pie
Let’s break this down step by step, since a few small details make a big difference in how the final pie turns out.
Step 1: Make the Pie Dough
Combine the flour, sugar, and salt in a food processor. Pulse a few times just to blend the dry ingredients together evenly.
Add the cold, cubed butter and pulse until the mixture looks like coarse, sandy crumbs. Cold butter matters here, since warm butter melts too fast and ruins the flaky texture you’re after.
Add 2 tablespoons of ice water and pulse again. If the dough still looks dry and crumbly, add more water one tablespoon at a time until it holds together when squeezed.
Step 2: Chill the Dough
Shape the dough into a flat disc using your hands. Wrap it tightly in plastic wrap so it doesn’t dry out in the fridge.
Refrigerate the dough for at least 1 hour before rolling it out. This resting period lets the gluten relax and firms the butter back up, both of which lead to a flakier crust.
Step 3: Roll and Shape the Crust
Lightly flour your work surface so the dough doesn’t stick while rolling. Roll the chilled dough into a circle about 12 to 13 inches wide.
Transfer the dough carefully into a 10-inch pie dish, pressing it gently into the corners. Fold the excess edges under themselves and crimp them for a decorative border.
Pop the crust back into the fridge while you prepare the filling. Keeping it cold prevents shrinking once it hits the hot oven.
Step 4: Whisk the Custard Filling
Grab a large bowl and whisk together the eggs, milk, flour, sugar, melted butter, and vanilla extract. Mix until everything looks smooth and fully combined.
The batter should turn out fairly thin, almost like pancake batter. Don’t worry if it looks too liquidy right now, since baking transforms the texture completely.
Step 5: Prep the Fruit
Peel your peaches if you prefer a smoother texture, though it’s completely optional. Slice each peach in half and remove the pit carefully.
Cut each peach half into thin, even slices. Try to keep the slices similar in thickness so they cook at the same rate inside the pie.
Step 6: Assemble the Pie
Arrange the peach slices inside your chilled crust, trying to maintain the shape of each original peach half. Place one full peach half right in the center for a pretty visual effect.
Arrange the remaining peach slices around that center piece. Pour half of your custard mixture evenly over the peaches, letting it settle into the gaps.
Scatter half of the blueberries throughout the pie, tucking some beneath the custard. Pour the remaining custard over everything, then top with the rest of the blueberries.
Sprinkle sanding sugar evenly across the entire top. This little touch adds a subtle crunch and a bit of sparkle once baked.
Step 7: Bake to Golden Perfection
Preheat your oven to 350°F before sliding the pie inside. Bake for 35 to 40 minutes, watching for the center to look mostly set with just a slight jiggle.
Have you ever pulled a custard pie too early and ended up with a soupy mess? Trust the jiggle test here instead of guessing, since it’s the most reliable sign of doneness.
Step 8: Cool Completely
Remove the pie from the oven once it’s set and golden. Let it cool completely at room temperature before slicing, since the custard needs time to firm up fully.
Rushing this step usually means a runny slice instead of that clean, layered cut you’re hoping for. Patience genuinely pays off here.
Tips for Getting This Pie Right Every Time
A handful of small habits separate a great pie from a mediocre one.
- Keep your butter and dough cold throughout the crust-making process for maximum flakiness.
- Slice peaches evenly so they cook at the same rate inside the pie.
- Use the jiggle test instead of a timer alone to judge doneness.
- Let the pie cool completely before cutting for clean, layered slices.
Serving Suggestions
This pie tastes great warm or chilled, so serve it however fits your mood.
- Top with freshly whipped cream for extra richness.
- Pair with a scoop of vanilla ice cream.
- Garnish with fresh peach slices and a few extra blueberries.
- Drizzle honey over the top for added sweetness.
Storage and Reheating
Store leftovers covered in the refrigerator for up to 4 days. Keep it in an airtight container to maintain the best texture and freshness.
Avoid leaving the pie at room temperature for more than 2 hours, since the custard filling needs consistent refrigeration. Serve slices cold or let them sit out briefly before eating.
Want to save it longer? Freeze individual slices for up to 2 months and thaw overnight in the refrigerator before serving.
Fun Variations to Try
Once you’ve nailed the classic version, a few swaps keep this pie interesting all season long.
- Peach raspberry version: replace blueberries with fresh raspberries for a tarter bite.
- Mixed berry version: combine strawberries, blackberries, and blueberries for extra color.
- Cinnamon version: stir a teaspoon of cinnamon into the custard for warmth.
- Almond version: add almond extract and top with sliced almonds before baking.
- Lemon version: mix in lemon zest and juice for a brighter, tangier filling.
Why settle for one flavor combo when peach season gives you so many directions to explore?
FAQs
Why is this called an impossible pie? The custard mixture separates into distinct layers while baking, creating a unique texture without any complicated technique required.
Can I use frozen peaches instead of fresh? Yes, just thaw and drain them thoroughly first to avoid adding excess liquid to the pie.
Can I use frozen blueberries? Yes, but don’t thaw them beforehand, since frozen berries hold their shape better throughout baking.
Do I need to peel the peaches? No, peeling stays completely optional and comes down to personal preference for texture.
How do I know when the pie is fully done baking? The center should look mostly set with just a slight jiggle remaining when you gently shake the dish.
Can I use a store-bought pie crust instead? Absolutely. Store-bought crust works well here and saves you a solid chunk of prep time.
Final Thoughts
Peach Blueberry Pie brings together buttery crust, silky custard, and fresh summer fruit in one genuinely impressive dessert. The steps take some patience, but the final result earns every bit of that effort.
FYI, this pie has become my official signature dessert for every summer gathering I attend Give it a try during peach season and see how quickly it becomes a favorite in your house too.



