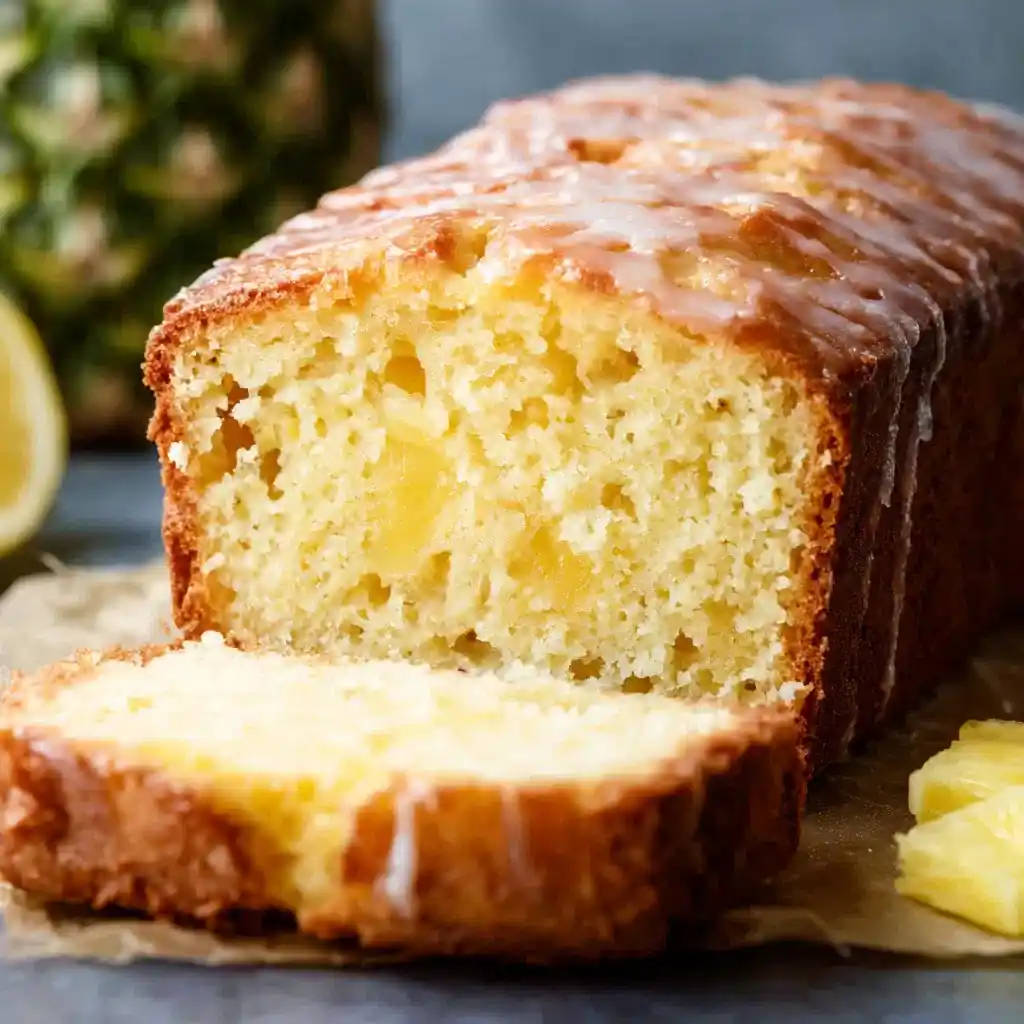
Got a can of crushed pineapple sitting in your pantry with no real plan for it? This Pineapple Bread is exactly the excuse you need. I make this loaf on repeat, and it disappears faster than any quick bread has a right to.
Prep time: 15 minutes | Cook time: 50 minutes | Total time: about 1 hour 15 minutes (plus cooling) | Servings: 10 slices
Why This Pineapple Bread Works So Well
I used to think quick breads were kind of boring compared to actual cakes. This one changed my mind completely. The crushed pineapple and reserved syrup work together to keep the crumb incredibly moist without any complicated technique.
Have you ever bitten into a fruit bread that tasted more like sugar than actual fruit? This isn’t that loaf. Real pineapple flavor comes through in every bite, and the light glaze on top just seals the deal.
IMO the glaze is what pushes this from “nice breakfast bread” to “why did I only make one loaf” territory. Nobody at brunch will believe how simple it actually is to throw together 🙂 That’s our little secret.
What You’ll Need: Ingredients List
Nothing here requires a special grocery run. Most of it is already sitting in your kitchen.
For the Bread
- ¾ cup granulated sugar
- ½ cup unsalted butter, softened
- 2 large eggs
- 1 ½ cups all-purpose flour
- 2 teaspoons baking powder
- ⅛ teaspoon salt
- ¼ cup pineapple syrup (from the can of crushed pineapple)
- 2 tablespoons whole milk
- 1 cup crushed pineapple, drained, with the syrup reserved
For the Pineapple Glaze
- 1 cup powdered sugar
- 1 teaspoon vanilla extract
- 2 tablespoons pineapple syrup, plus more as needed
Quick note: don’t toss that pineapple syrup down the drain. It’s doing double duty here, flavoring both the bread itself and the glaze on top.
How to Make Pineapple Bread
Let’s slow this down and go step by step, because a quick bread can go from perfect to dense pretty fast if you rush it.
Step 1: Prep Your Pan and Oven
Preheat your oven to 350°F while you get everything else ready. Grease an 8×4-inch loaf pan thoroughly, or line it with parchment paper for easier removal later. Either method works fine, so just pick whichever feels less messy to you.
Step 2: Cream the Butter and Sugar
In a large mixing bowl, cream together the softened butter and granulated sugar. Beat them until the mixture turns light, fluffy, and noticeably paler in color. This step usually takes a couple of minutes with a hand mixer, so don’t rush past it.
Step 3: Add the Eggs One at a Time
Crack in one egg first and mix it in thoroughly before adding the second. Adding them one at a time helps everything blend smoothly instead of curdling or separating. Scrape down the sides of the bowl as needed to keep things even.
Step 4: Whisk the Dry Ingredients Separately
In a separate bowl, whisk together the flour, baking powder, and salt. Whisking these dry ingredients on their own first ensures the baking powder distributes evenly throughout the batter. Skipping this step can leave you with weird pockets of bitterness in random bites.
Step 5: Combine Half the Dry Mix with the Pineapple Syrup
Add half of your dry ingredient mixture into the wet mixture, along with the ¼ cup of reserved pineapple syrup. Mix everything gently, just until it starts coming together. Going easy here keeps the final texture soft instead of tough.
Step 6: Finish Combining Wet and Dry
Add the remaining dry ingredients along with the 2 tablespoons of milk. Stir just until everything is combined, and resist the urge to keep mixing past that point. Overmixing at this stage is the number one cause of dense, gummy quick bread.
Step 7: Fold in the Crushed Pineapple
Gently fold the drained crushed pineapple into the batter using a spatula or large spoon. Use slow, careful folds rather than vigorous stirring to avoid breaking down the batter’s structure. A few gentle folds is all it takes to distribute the fruit evenly.
Step 8: Pour and Smooth the Batter
Pour the finished batter into your prepared loaf pan and smooth the top with your spatula. An even surface here helps the loaf bake with a nice, level top instead of a lopsided one. Give the pan a gentle tap on the counter to release any air bubbles.
Step 9: Bake Until Golden and Set
Slide the pan into your preheated oven and bake for 45 to 55 minutes. You’re looking for a toothpick inserted into the center to come out clean with no wet batter clinging to it. If the top starts browning too fast, tent it loosely with foil partway through.
Step 10: Cool Before Glazing
Let the bread cool in the pan for about 10 minutes once it comes out of the oven. Then transfer it to a wire rack to cool completely before adding any glaze. Glazing a warm loaf just melts everything right off, so patience matters here.
Step 11: Whisk and Add the Glaze
Whisk together the powdered sugar, vanilla extract, and pineapple syrup until smooth. Add a touch more syrup if the glaze feels too thick to spread easily. Once your loaf has cooled fully, spread the glaze evenly over the top and let it set before slicing.
Tips for the Best Pineapple Bread Every Time
A handful of small habits genuinely make a difference in how this loaf turns out.
- Don’t skip draining the pineapple. Excess liquid in the batter leads to a soggy, underbaked center.
- Mix gently once flour goes in. Overmixing is the fastest way to end up with tough, dense bread.
- Save every drop of that syrup. It’s the flavor backbone for both the bread and the glaze.
- Let the loaf cool fully before glazing. A warm loaf turns your glaze into a runny puddle.
- Tent with foil if needed. This keeps the top from burning while the center finishes baking.
Storage and Reheating
This bread holds up nicely, which makes it a solid grab-and-go option throughout the week.
- Serve slightly warm or at room temperature for the best flavor
- Store tightly wrapped at room temperature for up to 2 days
- Refrigerate for up to 5 days if you want it to last longer
- Freeze individual slices for up to 3 months, thawing at room temperature when ready
FYI, this bread pairs really well with a simple cup of coffee or tea for an easy afternoon snack. It also holds up fine without the glaze if you’re going for a lighter, breakfast-style loaf.
Fun Variations to Try
Once you’ve made the classic loaf, there’s plenty of room to switch things up.
- Pineapple Coconut – fold in shredded coconut for a tropical twist
- Pineapple Banana – swap one egg for mashed ripe banana for extra moisture
- Pineapple Cream Cheese – swirl sweetened cream cheese into the batter
- Pineapple Walnut or Pecan – fold in chopped nuts for crunch
- Pineapple Orange – add orange zest and swap milk for orange juice
- Pineapple Muffins – bake the same batter in a muffin tin for 18 to 22 minutes
- Pineapple Lemon – add lemon zest to the batter and lemon juice to the glaze
- Pineapple Spice – stir in cinnamon and nutmeg for warm, cozy notes
Have you ever swapped one fruit combo for another and ended up liking it better than the original? That’s basically what happens with the banana version here. Same method, completely different personality.
Frequently Asked Questions
Can I use fresh pineapple instead of canned? Yes, just crush it finely and create a syrup using juice or a bit of sugar.
Why did my bread turn out dense? Overmixing the batter after adding the flour is usually the main culprit.
Can I make this without the glaze? Absolutely, the bread tastes great on its own as a lighter breakfast option.
Can I use salted butter instead of unsalted? Yes, just reduce or skip the added salt in the recipe.
How do I know when the bread is fully baked? A toothpick inserted into the center should come out completely clean.
Does this bread freeze well? Yes, wrap it tightly and freeze individual slices for up to 3 months.
Why should I save the pineapple syrup? It adds concentrated pineapple flavor to both the batter and the glaze.
Final Thoughts
This Pineapple Bread proves that a few pantry staples and a can of crushed pineapple can produce something genuinely special. The moist crumb, real fruit flavor, and light glaze all come together for a reason. Once you bake this, regular banana bread might start feeling a little one-note.
Give this recipe a try this week, and don’t be shocked when the loaf vanishes before you even get a second slice. If you experiment with one of the variations, I’d genuinely love to hear which one becomes your new favorite.