Servings: 12 nests | Prep Time: 25 minutes | Cook Time: 20-25 minutes | Total Time: About 50 minutes
Mashed potatoes are already one of life’s great comfort foods. But stuffed mashed potato nests? That is mashed potatoes that went to college, got a degree, and came back ready to impress at every dinner table.
I first made these for a holiday gathering when I needed something that looked fancy but did not require a culinary degree to pull off. They disappeared within minutes — faster than anything else on the table, and yes, I am still a little smug about it.
Stuffed mashed potato nests are crispy on the outside, creamy on the inside, and completely customizable with whatever filling you love most. If you are looking for a recipe that works as an appetizer, side dish, or showstopper, keep reading.
What Are Stuffed Mashed Potato Nests Exactly?
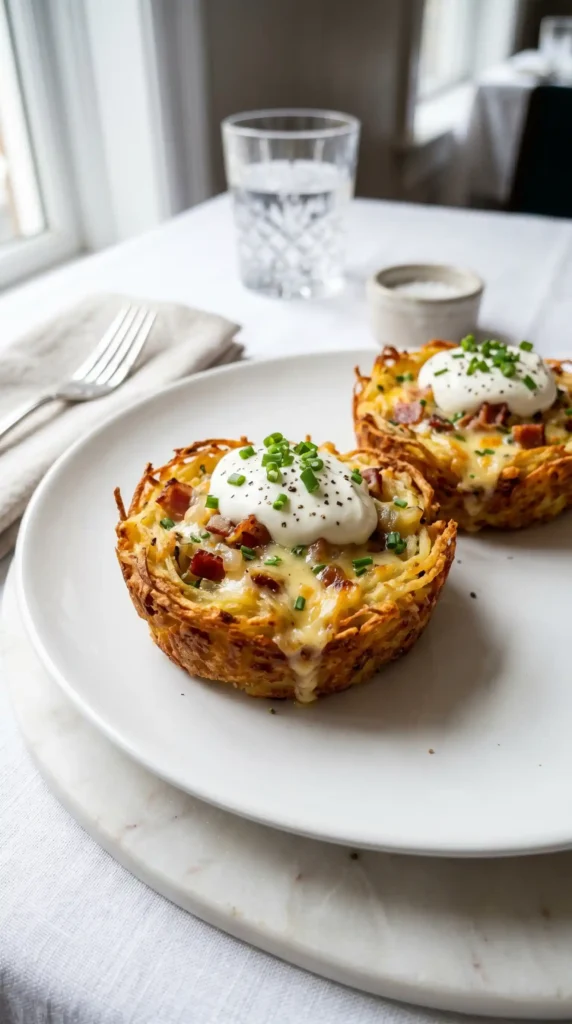
Think of these as individual mashed potato cups shaped into little nests, baked until golden and crispy, then filled with a savory mixture. The nest shape creates a natural pocket that holds the filling perfectly in every bite.
The outer potato shell gets a slight crunch from the oven while the inside stays soft and buttery. The filling can be anything from cheesy bacon bits to sauteed vegetables or even pulled chicken. The versatility is genuinely one of the best things about this recipe.
Stuffed mashed potato nests work beautifully as a party appetizer, a creative holiday side dish, or an all-in-one weeknight dinner. They look far more complicated than they actually are, which is always a win in my book. FYI, they photograph beautifully too.
Ingredients You Need
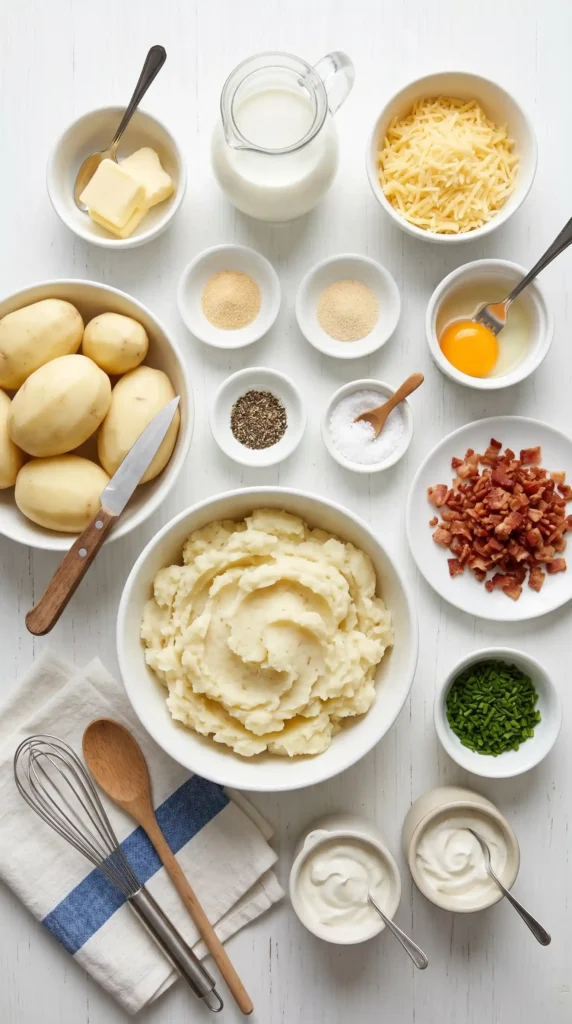
Nothing on this list is hard to find. These are all everyday kitchen staples that come together into something genuinely special.
For the Potato Nests
- 2.5 lbs (about 4-5 medium) russet potatoes, peeled and cubed
- 4 tablespoons unsalted butter
- 1/3 cup whole milk or heavy cream, warmed
- 1/2 cup shredded cheddar cheese
- 1 large egg yolk
- 1/2 teaspoon garlic powder
- 1/2 teaspoon onion powder
- Salt and black pepper to taste
- Cooking spray for the muffin tin
For the Classic Bacon and Cheese Filling
- 6 strips bacon, cooked crispy and crumbled
- 1/2 cup shredded sharp cheddar cheese
- 1/4 cup sour cream
- 2 tablespoons chives or green onions, finely chopped
- Salt and black pepper to taste
Optional Toppings
- Extra sour cream for serving
- Additional chopped chives
- Hot sauce or paprika for garnish
Equipment That Makes This Easier
You do not need any fancy tools, but having the right equipment on hand before you start makes the whole process smoother and faster.
- 12-cup standard muffin tin: This is what shapes your nests. Grease it generously to prevent any sticking when you unmold.
- Potato masher or hand mixer: A masher gives you a slightly textured mash that holds its shape better. A hand mixer gives you ultra-smooth results.
- Piping bag or zip-lock bag: Optional but helpful for piping the mashed potato mixture into the muffin cups neatly.
- Large pot: For boiling the potatoes until fully tender.
- Baking sheet: Place it under your muffin tin to catch any drips in the oven.
How to Make Stuffed Mashed Potato Nests — Full Step-by-Step
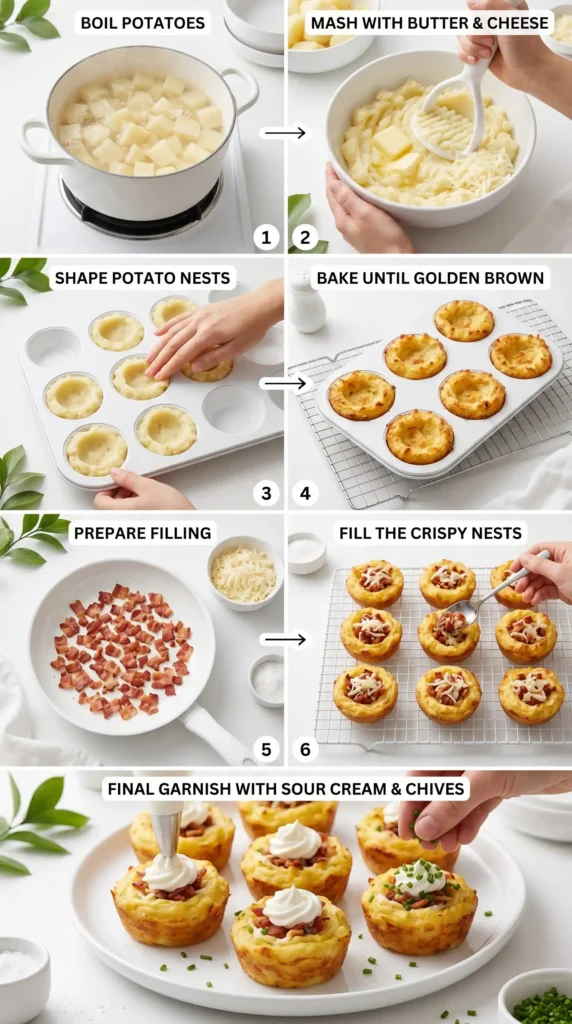
Let us walk through every step in detail. I want you to feel completely confident going into this, whether it is your first time or your tenth.
Step 1: Cook and Mash the Potatoes
Start by peeling and cubing your 2.5 lbs of russet potatoes into roughly 1-inch pieces. Consistent sizing matters here because it ensures all the cubes cook at the same rate. Uneven pieces mean some go mushy while others stay hard.
Place the cubed potatoes into a large pot and cover them with cold salted water. Bring the water to a boil over high heat, then reduce to a medium boil and cook the potatoes for 15 to 18 minutes. You want them completely tender — a fork should slide through with zero resistance.
Drain the potatoes thoroughly and return them to the hot pot. Let them sit on the warm burner for about 1 to 2 minutes to steam off any remaining moisture. Wet potatoes make soggy nests, and soggy nests do not hold their shape well in the muffin tin.
Now mash the potatoes with a potato masher until mostly smooth. Add the 4 tablespoons of butter and let it melt into the hot potatoes before mixing. Then add the warmed milk or cream a little at a time, mashing and stirring until you reach a smooth but thick consistency.
Step 2: Season and Enrich the Mash
Once your mashed potatoes are smooth, season them well. Add the garlic powder, onion powder, a generous pinch of salt, and black pepper. Taste as you go — well-seasoned mash is the foundation of a great nest.
Stir in the 1/2 cup of shredded cheddar cheese while the mash is still hot. The residual heat melts the cheese right into the mixture, making it creamy, rich, and deeply savory. This cheese also helps the nests hold together during baking.
Add the egg yolk and mix it in thoroughly. The yolk acts as a binder that firms up the potato mixture during baking. Without it, the nests can crack or collapse when you try to fill them. Mix everything until fully combined and uniform.
Let the mashed potato mixture cool slightly for about 10 minutes before handling. It should still be warm and pliable but not so hot that it burns your hands when you shape it. This is a good time to preheat your oven to 400 degrees Fahrenheit.
Step 3: Prepare the Muffin Tin
Spray every cup of your 12-cup muffin tin generously with cooking spray. Get the sides and the bottom of each cup. These nests will stick if you skip this step, and nothing is more heartbreaking than a perfectly golden nest that tears apart during unmolding.
For extra insurance, you can also lightly dust the greased cups with a small pinch of grated parmesan or breadcrumbs. This creates a thin crust between the potato and the pan that helps them release cleanly and adds a pleasant extra crunch on the outside.
Step 4: Shape the Potato Nests
Scoop about 3 to 4 tablespoons of the mashed potato mixture into each muffin cup. Use your fingers or the back of a spoon to press the mixture firmly up the sides and across the bottom, creating a cup or nest shape with walls about 1/2 inch thick.
Make sure the walls are an even thickness all the way around. Thin spots will bake faster and may crack, while thick spots stay soft and undercooked. Take your time shaping each one — this step directly affects how your nests look and hold their filling.
Once all 12 cups are shaped, refrigerate the muffin tin for 10 minutes before baking. This quick chill helps the nests firm up so they hold their shape better in the hot oven. It is a small step that makes a real difference in the final texture.
Step 5: Bake the Nests Until Golden
Place the muffin tin on a baking sheet and slide it into your preheated 400-degree oven. Bake for 20 to 25 minutes, or until the edges and tops of the nests turn a deep golden brown and feel firm to the touch.
Check them at the 20-minute mark. The nests should look crispy on the exposed edges and pull slightly away from the sides of the muffin cups. If they still look pale, give them another 3 to 5 minutes and check again.
Remove the muffin tin from the oven and let the nests cool in the tin for 5 minutes before filling. This resting time allows the outer crust to firm up further, making them much easier to fill without collapsing. Do not skip this cool-down step.
Step 6: Make the Filling
While the nests bake, prepare your filling. For the classic bacon and cheese version, combine the crumbled crispy bacon, shredded sharp cheddar, sour cream, and chopped chives in a small bowl. Season with a pinch of salt and black pepper and stir until evenly mixed.
The sour cream adds tanginess and moisture that balances the richness of the bacon and cheese. If you want a spicier filling, add a dash of hot sauce or a pinch of smoked paprika right into the mix. Taste the filling before you spoon it into the nests.
Step 7: Fill, Garnish, and Serve
Carefully unmold each nest by running a thin knife around the edge of each muffin cup and lifting gently with a spoon. Place the nests on a serving plate or baking sheet. They should look golden, sturdy, and perfectly cup-shaped.
Spoon 1 to 2 tablespoons of filling into each nest. Do not overfill — the filling should sit proudly in the cup without overflowing. Overfilled nests lose the visual appeal of the nest shape and can make them messy to eat.
Top each nest with a small dollop of extra sour cream and a sprinkle of fresh chives. Serve them warm for the best texture. Have you ever seen a plate of golden potato nests disappear faster than you can say “I made these”? Because that is exactly what happens
Tips for Perfect Stuffed Mashed Potato Nests Every Time
- Use russet potatoes specifically. They have the right starch content to mash smoothly and hold their shape when baked. Waxy potatoes like red or Yukon Gold can work but do not get as crispy.
- Do not over-mash. Over-mashing releases too much starch and makes the mixture gluey. Mash just until smooth with a few small lumps remaining.
- Chill before baking. That 10-minute fridge rest before the oven makes the nests hold their cup shape beautifully.
- Season generously. Potatoes need more seasoning than you think. Under-seasoned nests taste flat no matter how good the filling is.
- Make them ahead. You can shape and bake the nests a few hours ahead, then reheat in a 350-degree oven for 8 minutes before filling and serving.
Filling Variations Worth Trying
Once you master the basic nest shape, the filling options are basically endless. Here are a few that work really well.
- Spinach and Feta: Saute 1 cup of baby spinach with garlic, let it cool, then mix with crumbled feta and a spoonful of cream cheese for a Mediterranean twist.
- Pulled Chicken and BBQ: Mix shredded rotisserie chicken with your favorite BBQ sauce and a little shredded mozzarella. Hearty, smoky, and crowd-pleasing.
- Broccoli and Cheddar: Finely chop steamed broccoli florets, mix with sharp cheddar and a dollop of sour cream. A classic combination that kids and adults both love.
- Mushroom and Thyme: Saute finely chopped mushrooms with butter, thyme, and a splash of cream. This filling is rich, earthy, and absolutely elegant.
How to Store and Reheat
Store leftover stuffed mashed potato nests in an airtight container in the refrigerator for up to 3 days. Keep the nests and filling separate if possible — storing them already filled can make the nests soggy over time.
To reheat, place the nests on a baking sheet in a 350-degree oven for 8 to 10 minutes. This brings back the crispy exterior much better than the microwave does. The microwave works in a pinch but produces a softer, less defined crust.
You can also freeze the unbaked, shaped nests on a baking sheet until solid, then transfer to a freezer bag for up to 2 months. Bake straight from frozen at 400 degrees for 28 to 32 minutes. The results are nearly as good as fresh.
Frequently Asked Questions
Can I make stuffed mashed potato nests ahead of time?
Yes, absolutely. Shape and bake the nests up to 4 hours ahead, then store them at room temperature covered loosely with foil. Right before serving, reheat in a 350-degree oven for 8 minutes, then fill and garnish. IMO this make-ahead approach actually reduces stress at serving time.
Why are my potato nests falling apart?
This usually happens when the mash is too wet, the egg yolk was skipped, or the nests were not chilled before baking. Make sure to steam off all moisture after draining, include the egg yolk as a binder, and refrigerate the shaped nests for 10 minutes before they go in the oven.
Can I use leftover mashed potatoes for this recipe?
Absolutely. Leftover mashed potatoes work great. If they are very soft or buttery, stir in an extra egg yolk and a couple tablespoons of flour to firm them up. The nests need enough body to hold their shape, so slightly stiffer mash produces the best results.
What is the best potato variety to use for this recipe?
Russet potatoes are the top choice because they are starchy and mash smoothly with a fluffy texture that crisps up well in the oven. Yukon Gold potatoes work as a second option and produce a creamier, slightly denser nest. Avoid red or waxy potatoes — they stay too firm and do not crisp up well.
Can I make stuffed mashed potato nests without a muffin tin?
Yes. You can shape the nests by hand on a parchment-lined baking sheet using a spoon or your fingers. They will be slightly less uniform in shape but taste identical. Chill the shaped nests on the baking sheet for 10 minutes before baking for better shape retention.
Final Thoughts
Stuffed mashed potato nests take something familiar and comforting and turn it into something genuinely impressive. They are versatile, approachable, and deliver every time — whether you are feeding a crowd or just treating yourself to something a little extra on a weeknight.
The crispy outside, creamy inside, and customizable filling make these a recipe you will come back to again and again. Once you get the basic technique down, you can swap the filling endlessly and never get bored.
So go grab those potatoes, grease that muffin tin, and get started. Your next favorite party dish is about 50 minutes away. And when people ask you where you got the recipe, you can smile and say it was all you.

Stuffed Mashed Potato Nests
Ingredients
Method
- Peel and cube the russet potatoes into roughly 1-inch pieces. Place them in a large pot and cover with cold salted water.
- Bring the water to a boil over high heat, then reduce to a medium boil and cook the potatoes for 15 to 18 minutes until completely tender.
- Drain thoroughly and return to the pot, allowing to sit to steam off moisture for 1-2 minutes.
- Mash the potatoes until mostly smooth, then mix in the butter until melted, followed by the warmed milk or cream until thick and creamy.
- Add garlic powder, onion powder, salt, and pepper. Stir in the cheddar cheese and mix well. Finally, add the egg yolk and mix until fully combined.
- Let the mashed potato mixture cool slightly for about 10 minutes.
- Preheat the oven to 400°F (200°C).
- Spray each cup of a 12-cup muffin tin with cooking spray. Optionally, dust with parmesan or breadcrumbs.
- Scoop 3-4 tablespoons of the potato mixture into each muffin cup and press firmly to shape nests with 1/2 inch thick walls.
- Refrigerate the muffin tin for 10 minutes before baking to help the nests firm up.
- Place the muffin tin on a baking sheet and bake for 20-25 minutes, until golden brown and firm to touch.
- Cool in the tin for 5 minutes before unmolding.
- While the nests bake, prepare the filling by mixing bacon, shredded cheddar, sour cream, and chives in a bowl. Season to taste.
- Carefully unmold each nest and fill with 1-2 tablespoons of the filling. Top with extra sour cream and chives.
- Serve warm.