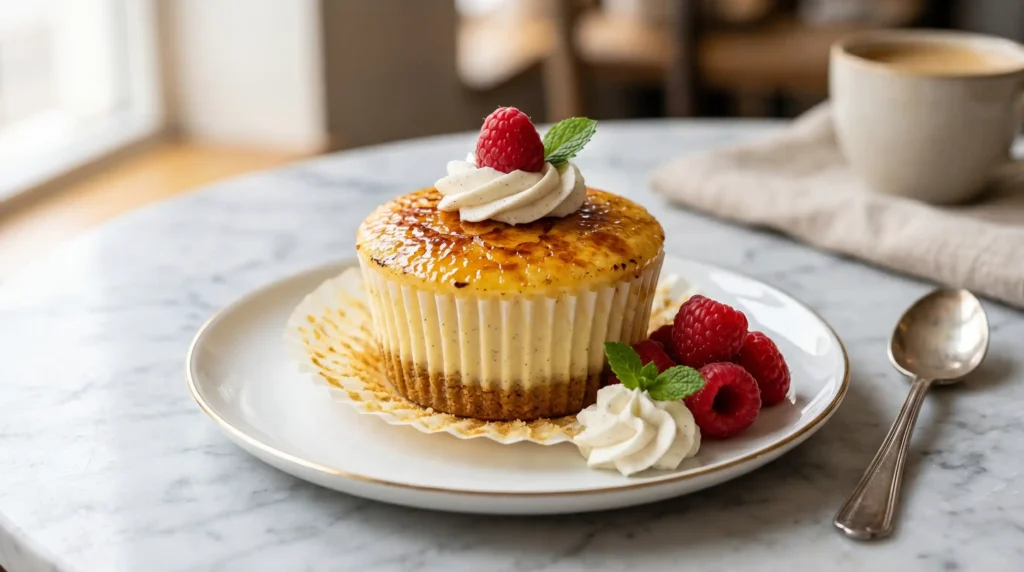
Prep Time: 25 minutes | Bake Time: 20-22 minutes | Chill Time: 2 hours | Servings: 12 cupcakes
What happens when you take three of the greatest desserts ever created and combine them into one neat, handheld package? You get Vanilla Bean Creme Brulee Cheesecake Cupcakes — and honestly, nothing else you bake this year will get a better reaction.
I served these at a small dinner gathering once. Someone literally picked one up, took a bite, paused, and said, “Wait, what IS this?” That’s exactly the response you want from a dessert. Confused delight. Mission accomplished.
The concept is simple: a buttery graham cracker base, a dense vanilla bean cheesecake filling, and a torched caramelized sugar top that cracks exactly like a classic creme brulee. All of it in a cupcake format. Individual portions. No slicing required.
Why Vanilla Bean Creme Brulee Cheesecake Cupcakes Work So Well
The genius of this recipe isn’t just the flavor — it’s the format. Individual cupcakes mean every guest gets a perfectly portioned dessert with their own intact sugar crust. No sharing. No messy slicing. Just pick it up and crack right through that caramel top.
The vanilla bean is what takes this from good to exceptional. Real vanilla bean paste or scraped vanilla pods add those little black specks that tell everyone this dessert means business. IMO, vanilla extract alone just doesn’t deliver the same depth of flavor or visual effect.
And the creme brulee element? That torched sugar top adds a textural dimension that no other cupcake can claim. Creamy underneath, crackly on top — it’s the kind of contrast that makes people immediately reach for a second one.
What Each Element Brings to the Table
- Graham cracker crust — buttery, slightly sweet, with a sturdy texture that holds the cheesecake filling without getting soggy
- Vanilla bean cheesecake filling — dense, creamy, and richly flavored with real vanilla specks throughout
- Caramelized sugar top — thin, glass-like, satisfying to crack, and adds a subtle bittersweet caramel note
- The cupcake format — individual servings mean consistent presentation and no-fuss plating for parties or gatherings
Ingredients for Vanilla Bean Creme Brulee Cheesecake Cupcakes
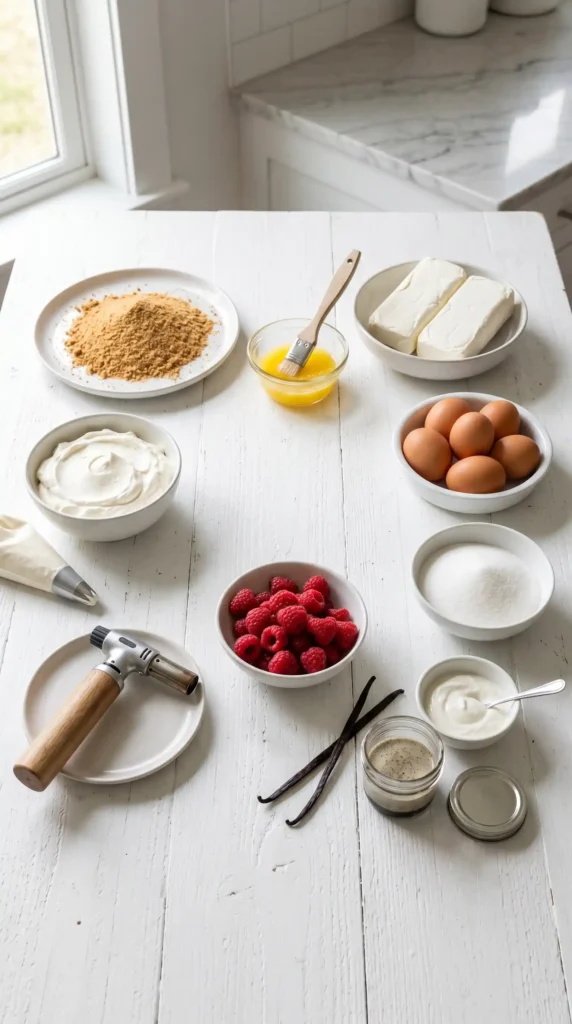
Three components, clear quantities, no mystery ingredients. Here’s everything you need to make 12 cupcakes.
For the Graham Cracker Crust
- 1 and 1/4 cups graham cracker crumbs (about 10 full graham cracker sheets, finely crushed)
- 3 tablespoons granulated sugar
- 5 tablespoons unsalted butter, melted
- A pinch of fine sea salt
For the Vanilla Bean Cheesecake Filling
- 2 packages (8 oz each) full-fat cream cheese, softened to room temperature
- 3/4 cup granulated sugar
- 2 large eggs, at room temperature
- 1/4 cup full-fat sour cream
- 1 tablespoon vanilla bean paste (or seeds from 2 vanilla pods)
- 1 teaspoon pure vanilla extract
- 1 tablespoon all-purpose flour
- A pinch of fine sea salt
Now For the Creme Brulee Sugar Top
- 12 teaspoons (4 tablespoons) granulated white sugar — exactly 1 teaspoon per cupcake
Optional Garnish
- Lightly sweetened whipped cream for piping around the edges
- Fresh berries — raspberries or blueberries pair beautifully
- A light dusting of powdered sugar for extra visual elegance
Equipment You Need
A few specific items make this recipe much easier:
- 12-cup standard muffin tin
- Paper cupcake liners — parchment-lined liners work best for clean removal
- Stand mixer or hand electric mixer
- Food processor or zip-lock bag and rolling pin for crushing crackers
- Kitchen torch — this is essential for the brulee top (a broiler works in a pinch, but a torch gives better control)
- Rubber spatula and offset spatula
- Measuring cups and spoons
A kitchen torch is the one tool that really defines this recipe. If you don’t own one, they run between $15-25 at most kitchen stores and are wildly useful for all kinds of desserts. FYI, the broiler method works but requires very close attention — the sugar can go from perfect to burnt in about 10 seconds.
How to Make Vanilla Bean Creme Brulee Cheesecake Cupcakes — Step by Step
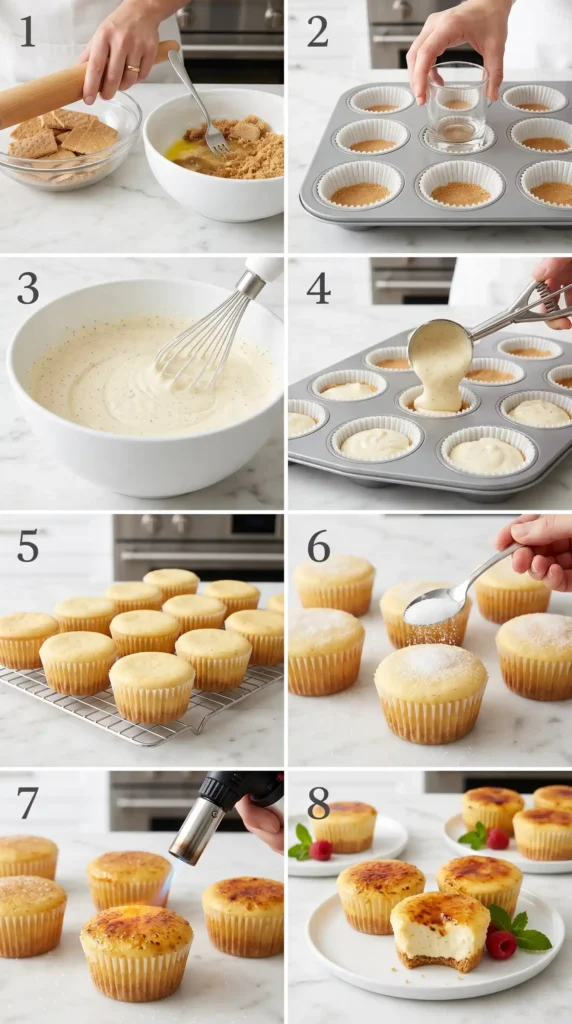
Take your time here. I’m walking you through every step clearly so nothing surprises you halfway through. This recipe rewards patience and attention to detail — both of which you absolutely have.
Step 1: Prepare Your Setup
Start by pulling your cream cheese and eggs out of the fridge. They need to reach room temperature before you begin mixing — plan for at least 45-60 minutes on the counter. Cold cream cheese creates lumps that never fully smooth out, no matter how long you mix.
Preheat your oven to 325 degrees Fahrenheit (163 Celsius). Line your 12-cup muffin tin with paper cupcake liners. Parchment-style liners peel away more cleanly than regular paper ones, which matters when you’re serving something this pretty.
Step 2: Make the Graham Cracker Crust
Crush your graham crackers into fine, even crumbs. A food processor gives the most uniform result — just pulse until you get a sandy texture with no large pieces remaining. No food processor? Seal them in a zip-lock bag and crush firmly with a rolling pin.
In a medium bowl, combine your graham cracker crumbs, 3 tablespoons of granulated sugar, a pinch of sea salt, and the melted butter. Stir everything together until the mixture resembles damp sand. When you press a small handful between your fingers, it should hold together without falling apart.
Divide the crust mixture evenly among your 12 lined muffin cups. Each cup gets roughly 1 and a half tablespoons of crumb mixture. Use the bottom of a small glass or a flat-bottomed measuring cup to press the crumbs down firmly and evenly.
The goal is a compact, flat crust layer that sits snugly at the bottom of each liner. A loose crust falls apart when you try to remove the cupcake later, so press with real intention. Once all 12 are done, set the tin aside while you prepare the filling.
Step 3: Make the Vanilla Bean Cheesecake Filling
Add your softened cream cheese to your stand mixer bowl or a large mixing bowl. Beat on medium speed for 2 full minutes until it’s completely smooth, creamy, and free of any lumps. Stop to scrape down the sides and bottom of the bowl at least once during this time.
Add the granulated sugar and beat on medium for another 1-2 minutes until the mixture looks lighter and feels completely uniform. This step is more important than it sounds — properly creamed sugar and cream cheese creates the foundation for that classic dense, smooth cheesecake texture.
Now add the vanilla bean paste and vanilla extract. If you’re using real vanilla pods, slice them lengthwise, scrape out all the seeds with the back of your knife, and add those directly to the bowl. Beat briefly to distribute the vanilla throughout the batter.
Add the eggs one at a time, beating on low speed after each addition. Low speed matters here — overmixing eggs incorporates too much air into the batter. Too much air means the cupcakes puff up dramatically in the oven and then sink and crack as they cool.
Add the sour cream, flour, and pinch of salt. Mix on low speed just until everything is incorporated and smooth. Run a spatula around the bottom and sides of the bowl one final time to catch anything hiding. Your batter should look silky, uniform, and pourable.
Step 4: Fill and Bake
Spoon or pour the cheesecake filling evenly over each crust-lined cup. Each cup should be filled about three-quarters full — leave about 1/4 inch of space at the top. This gives the filling room to expand slightly during baking without spilling over the edges.
Tap the muffin tin gently on the counter a few times to release any air bubbles sitting in the batter. If you see bubbles on the surface, pop them gently with a toothpick. Air bubbles can cause uneven surfaces and small craters that make the brulee step less effective.
Place the muffin tin in the preheated oven and bake for 20-22 minutes. The cupcakes are done when the edges look fully set and the centers have just a slight jiggle — similar to how a well-baked cheesecake looks. They will firm up completely as they cool.
Remove the tin from the oven and let the cupcakes cool at room temperature in the pan for 30 minutes. Then transfer them (still in the liners, still in the tin) to the refrigerator. Chill for a minimum of 2 hours, though 4 hours gives noticeably better results.
Step 5: Create the Creme Brulee Sugar Top
This is the moment everyone waits for, and it’s genuinely satisfying to do. Remove your chilled cupcakes from the fridge. Peel back the liner just enough to expose the full top surface of each cupcake. You want a clear, flat canvas for the sugar.
Sprinkle exactly 1 teaspoon of granulated white sugar evenly over the top of each cupcake. Tilt and gently tap the cupcake so the sugar spreads into a thin, uniform layer that covers the entire surface right to the edges. Uneven sugar means uneven caramelization.
Fire up your kitchen torch. Hold the flame about 2-3 inches above the sugar surface and move it in slow, steady circular motions. Watch closely as the sugar first melts, then bubbles, and finally turns a rich amber caramel color. The whole process takes about 30-45 seconds per cupcake.
Stop torching when the sugar reaches a deep golden-amber color. Any darker and it tips into burnt territory, which tastes bitter rather than caramel-sweet. Let each cupcake sit for 60-90 seconds after torching — the sugar hardens into a thin, glass-like sheet as it cools.
Give the top a gentle tap with a spoon to confirm that satisfying crack. If it shatters cleanly and reveals the creamy vanilla cheesecake beneath, you nailed it. Your Vanilla Bean Creme Brulee Cheesecake Cupcakes are ready to serve and impress.
Tips That Make a Real Difference
Keep these in mind every time you make this recipe:
- Always torch the sugar top as close to serving time as possible. The brulee softens if it sits too long, losing that satisfying crack.
- Use full-fat cream cheese exclusively. Reduced-fat versions contain more water and produce a softer, less stable filling that can’t hold the brulee top properly.
- Vanilla bean paste over vanilla extract every time. The paste delivers visible specks and a deeper, more complex flavor. It’s worth the extra cost.
- Don’t skip the chilling step. Two hours minimum — four is better. Warm cheesecake filling doesn’t hold the sugar layer the same way.
- Practice your torch technique on a small plate of sugar first if you’ve never used one before. It takes about 30 seconds to get the feel for the right distance and speed.
Storing Your Cupcakes
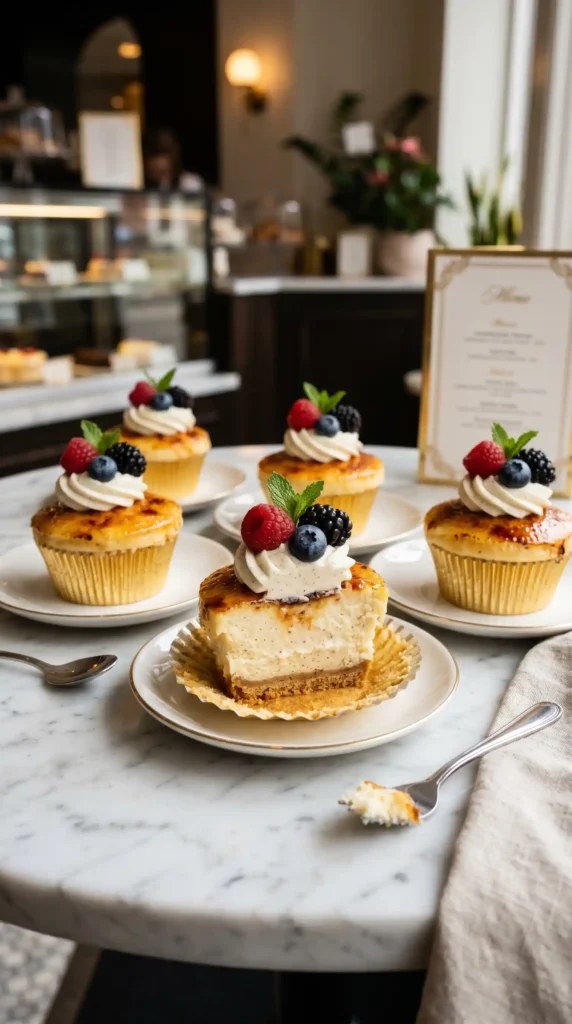
Store the unfilled, un-bruleed cupcakes in the fridge in an airtight container for up to 4 days. Only add the sugar top right before serving — once torched, the caramel softens within a few hours in the fridge due to moisture.
You can also freeze the baked, chilled cupcakes (without the sugar top) for up to 6 weeks. Wrap them individually in plastic wrap and then foil. Thaw overnight in the fridge, then torch the sugar top fresh before serving.
Frequently Asked Questions
1. Can I make these without a kitchen torch?
Yes, but it requires careful attention. Place the sugar-topped cupcakes on a baking sheet and position them under your oven broiler on the top rack. Broil on high for 2-4 minutes, watching constantly. The sugar goes from unmelted to perfect to burnt very quickly under a broiler, so don’t walk away.
2. Why did my brulee top not crack properly?
Two common reasons: the sugar layer was too thick, or you didn’t let it cool long enough before testing. Use exactly 1 teaspoon per cupcake and give it at least 60-90 seconds to fully harden after torching. Humidity also affects how well the sugar sets, so avoid making these on very humid days if possible.
3. Can I make these ahead of time for a party?
Absolutely. Bake and chill the cupcakes up to 2 days in advance and keep them refrigerated. Store the bruleed cupcakes separately from unbruleed ones. Torch the sugar tops 10-15 minutes before guests arrive for the best texture and presentation.
4. What if I don’t have vanilla bean paste?
Use the seeds scraped from 2 whole vanilla bean pods — that’s the closest substitute. If you can’t find real vanilla pods either, use 2 teaspoons of pure vanilla extract instead of 1. You won’t get the visible black specks, but the flavor will still be excellent.
5. Why did my cheesecake filling sink or crack after baking?
This usually happens from overmixing the eggs (too much air) or baking at too high a temperature. Mix eggs on low speed just until combined, and make sure your oven is actually at 325 F — use an oven thermometer to verify, since many ovens run hot.
6. Can I make a larger cheesecake version of this recipe?
Yes. Scale the filling by 1.5x and use a 9-inch springform pan. Bake at 325 F for 55-65 minutes in a water bath. The brulee top works the same way — spread sugar evenly over the chilled, set cheesecake and torch in sections.
Final Thoughts
These Vanilla Bean Creme Brulee Cheesecake Cupcakes sit at the intersection of three extraordinary desserts, and they deliver on every level. The vanilla flavor is genuine and deep. The cheesecake texture is dense and creamy. And that sugar top cracks in a way that makes everyone at the table stop and pay attention.
The recipe asks for patience — room temperature ingredients, careful mixing, a proper chill, and a steady torch hand. None of it is difficult. All of it is worth it. The result looks like something from a professional pastry kitchen. Make these once and they’ll become your go-to dinner party dessert. You’ll know it happened when someone asks you for the recipe and you smile and say, “I’ll think about it
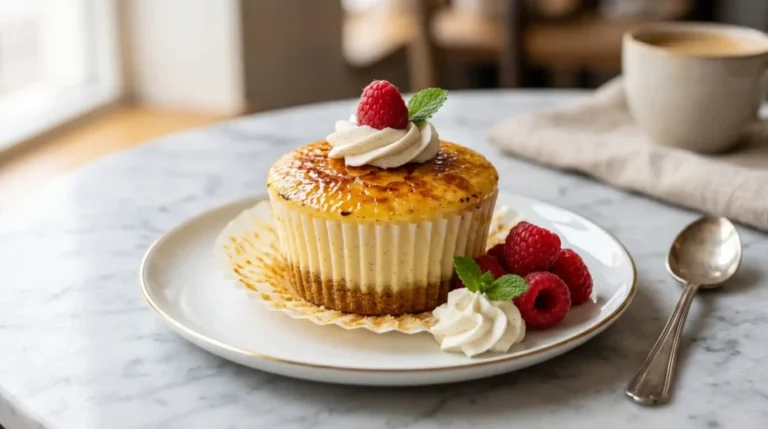
Vanilla Bean Creme Brulee Cheesecake Cupcakes
Ingredients
Method
- Start by pulling your cream cheese and eggs out of the fridge to reach room temperature.
- Preheat your oven to 325°F (163°C). Line your 12-cup muffin tin with paper cupcake liners.
- Crush graham crackers into fine crumbs using a food processor or a rolling pin in a zip-lock bag.
- In a medium bowl, combine graham cracker crumbs, sugar, a pinch of salt, and melted butter.
- Mix until the mixture resembles damp sand, then evenly divide among the 12 muffin cups.
- Press down firmly to form a compact crust.
- In a stand mixer, beat cream cheese on medium speed for 2 minutes until smooth.
- Add sugar and beat on medium speed for another 1-2 minutes until uniform.
- Incorporate vanilla bean paste and extract, then add eggs one at a time on low speed.
- Add sour cream, flour, and a pinch of salt, mixing until smooth.
- Pour cheesecake filling evenly over crusts, filling each cup about three-quarters full.
- Gently tap the muffin tin to release air bubbles, and pop any large bubbles with a toothpick.
- Bake for 20-22 minutes until the edges are set but the centers still jiggle slightly.
- Allow cupcakes to cool for 30 minutes in the pan, then chill in the refrigerator for a minimum of 2 hours.
- Remove chilled cupcakes from the fridge and expose the tops by peeling back the liner.
- Sprinkle 1 teaspoon of sugar evenly over each cupcake.
- Using a kitchen torch, caramelize the sugar until it reaches a deep golden-amber color.
- Allow the sugar to cool for 60-90 seconds until hardened, then serve.



