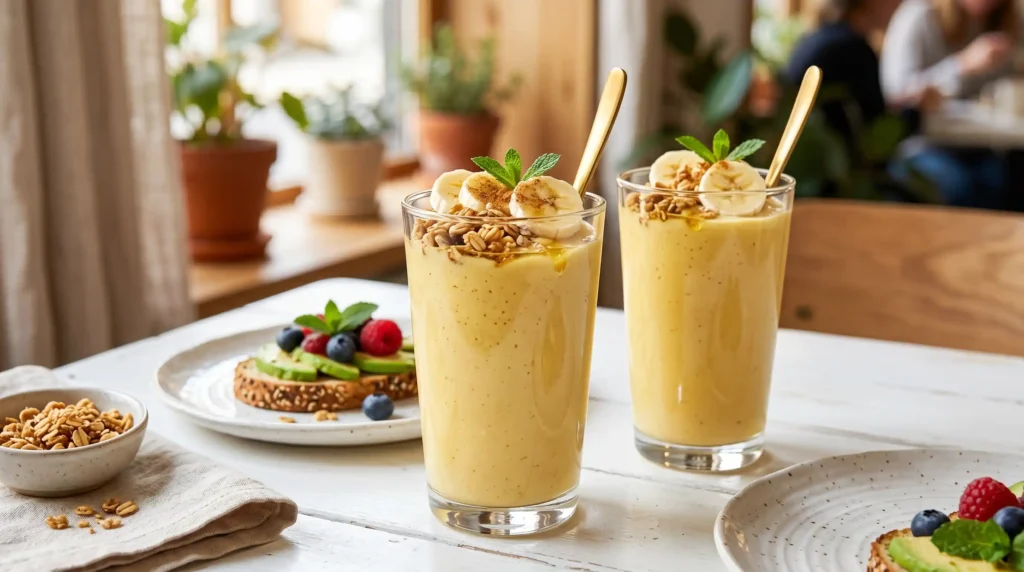
Servings: 2 | Prep Time: 5 minutes | Total Time: 5 minutes
A Smoothie That Looks As Good As It Tastes
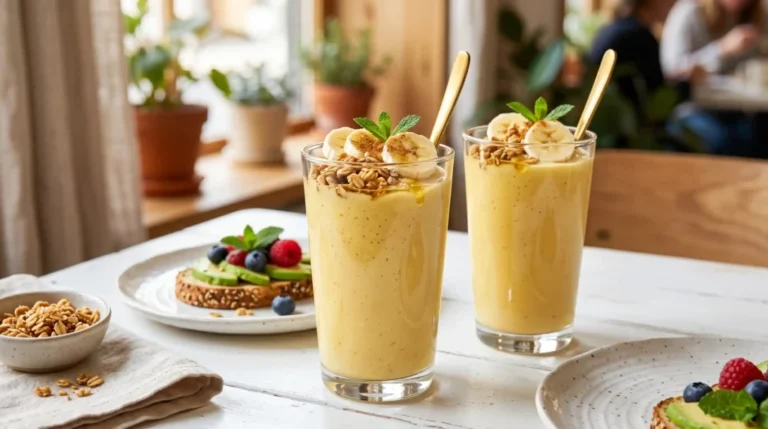
Okay, real talk. You’ve seen those gorgeous, creamy yellow smoothies all over social media, haven’t you? The ones that look like sunshine in a glass? That’s the banana smoothie aesthetic, and honestly, it’s way easier to pull off than you think.
I made my first banana smoothie aesthetic recipe on a lazy Sunday morning, and I’ve never looked back. It hits different when your breakfast actually looks beautiful. Let’s get into it.
What You Need: Ingredients List
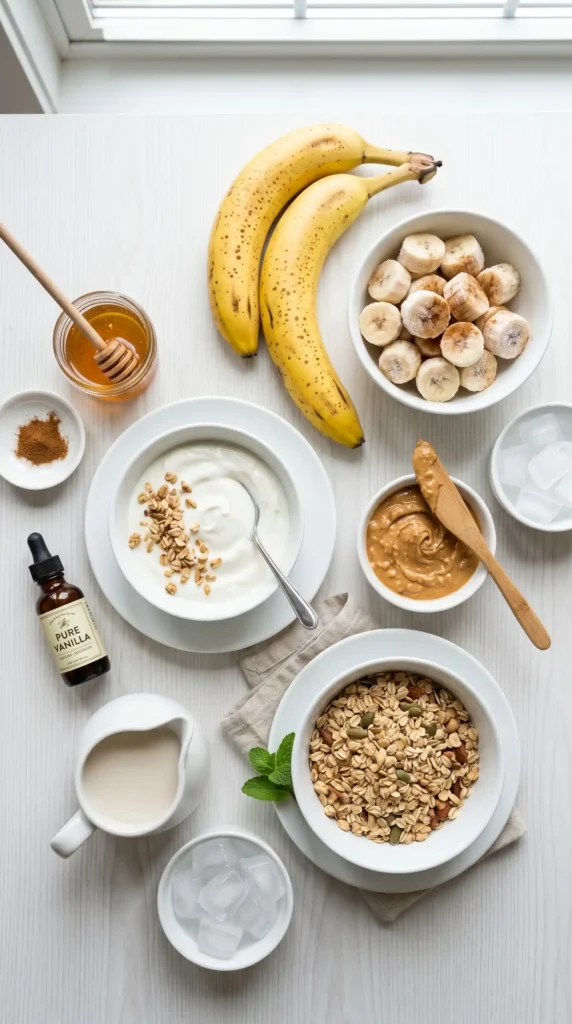
Here’s everything you’ll need to make 2 servings:
- 2 large ripe bananas (frozen works best for that thick, creamy texture)
- 1 cup (240 ml) whole milk or any plant-based milk of your choice
- 1/2 cup (120 ml) plain Greek yogurt
- 2 tablespoons honey or maple syrup
- 1/2 teaspoon vanilla extract
- 1/2 cup (about 4-5 cubes) ice cubes
- 1 pinch of cinnamon (optional but chef’s kiss)
- 1 tablespoon peanut butter (optional, for extra richness)
For the aesthetic topping (the fun part):
- Banana slices for garnish
- A light dusting of cinnamon powder
- A drizzle of honey
- A few granola clusters (optional but gorgeous)
Equipment You’ll Need
Nothing fancy here, promise. You don’t need a $500 blender or a professional kitchen setup. A good standard blender handles this perfectly.
- A blender (any standard countertop blender works)
- Two tall glasses
- A knife for banana slicing
- Measuring cups and spoons
- A small spoon for drizzling honey on top
How to Make It: Step-by-Step Process
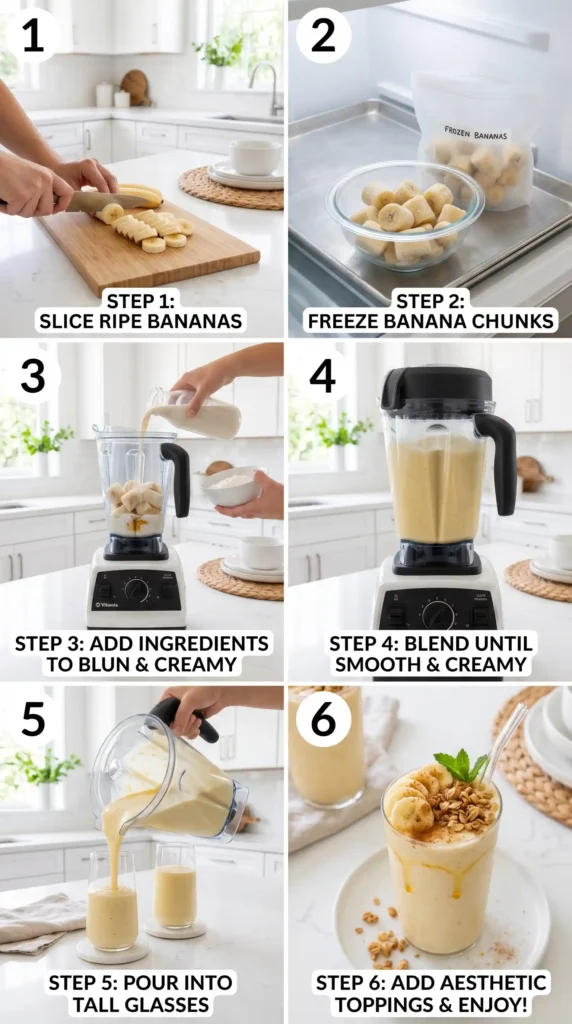
Here’s where I go into full detail, because honestly the making process matters just as much as the ingredients. Follow these steps carefully and you’ll nail the banana smoothie aesthetic every single time.
Step 1: Prep Your Bananas
Start by peeling your 2 large bananas. If they’re fresh, slice them up and pop them in the freezer for at least 2 hours before blending. Why? Because frozen bananas give you that incredibly thick, ice-cream-like texture that makes the banana smoothie aesthetic so drool-worthy.
If you’re in a hurry (we’ve all been there :/), fresh bananas work too. Just add a few more ice cubes to compensate for the consistency. The smoothie will still taste amazing, just slightly less thick.
Make sure your bananas are ripe. I mean really ripe. Those spotty, almost-too-ripe bananas? Those are gold. They’re sweeter, creamier, and blend way more smoothly than firm ones.
Step 2: Measure and Add Ingredients
Now add your 1 cup of milk into the blender first. This is important because adding the liquid first helps the blender grab everything more easily and prevents air pockets from forming.
Next, add your 1/2 cup of Greek yogurt. This is what gives the smoothie that rich, protein-packed creaminess. IMO, full-fat Greek yogurt makes a noticeably better smoothie than low-fat versions.
Drop in your frozen banana slices. Then add 2 tablespoons of honey or maple syrup and 1/2 teaspoon of vanilla extract. If you’re adding the optional peanut butter, throw in 1 tablespoon now too.
Finally, add your ice cubes. If your bananas were already frozen solid, you might want to reduce the ice to just 2-3 cubes so it doesn’t get too icy and watered down.
Step 3: Blend It to Perfection
This step is where the magic actually happens. Start your blender on low speed for about 15 seconds. This gently breaks up the frozen banana pieces and prevents everything from splashing around like a disaster zone.
Once the big chunks break down, increase the speed to medium-high. Blend for another 30 to 45 seconds until everything is completely smooth. You’ll know it’s ready when the blender sounds consistent and even, with no chunky interruptions.
Stop the blender and use a spatula to scrape down the sides if needed. Then blend again on high for a final 10-15 seconds. This last burst ensures the smoothie is perfectly uniform with zero lumps.
Taste it at this point. Does it need more sweetness? Add another teaspoon of honey. Too thick? Splash in a tiny bit more milk. Too thin? Toss in another ice cube and blend for 10 more seconds.
Step 4: Pour and Create the Aesthetic
Here’s the part that separates a regular smoothie from a banana smoothie aesthetic masterpiece. Pour your smoothie into two tall, clear glasses. Clear glasses are key because you want people to see that beautiful golden color.
Pour slowly and let it settle for a second. The thick texture should hold its shape slightly at the top rather than immediately going flat. If your smoothie is too runny to hold any shape, your bananas probably weren’t frozen enough.
Now for the garnish: lay 2-3 thin banana slices along the rim of each glass or fan them on top of the smoothie. Drizzle a small amount of honey in a thin zigzag pattern over the surface. Dust lightly with cinnamon powder using a tiny sieve or just your fingertips.
If you’re adding granola, sprinkle just a small cluster on top for texture. This whole topping process takes less than 60 seconds but completely transforms how the smoothie looks. FYI, a quick photo before drinking is basically mandatory at this point.
Step 5: Serve Immediately
Banana smoothies are best enjoyed right away. The texture starts to change after about 10-15 minutes as the ice melts and the banana oxidizes slightly. It still tastes fine, but that gorgeous thick, airy texture is best fresh out of the blender.
Stick a reusable straw in there, hand one to a friend or family member, and enjoy. Trust me, watching someone else’s eyes light up when they take the first sip is one of life’s small but very real pleasures.
Pro Tips for the Perfect Banana Smoothie Aesthetic
Want to take yours to the next level? Here are my go-to tips:
- Always freeze your bananas in advance. Peel them, slice them, and freeze in a zip-lock bag overnight.
- Use ripe or overripe bananas. The riper they are, the sweeter and creamier your smoothie will be.
- Add the liquid before the solids when blending. This saves your blender motor and gets a smoother blend.
- For a vegan version, swap Greek yogurt for coconut yogurt and use oat milk or almond milk.
- For extra protein, add one scoop of vanilla protein powder with the other ingredients.
- Use a clear glass. Presentation is everything when you’re going for that aesthetic look.
Fun Variations to Try
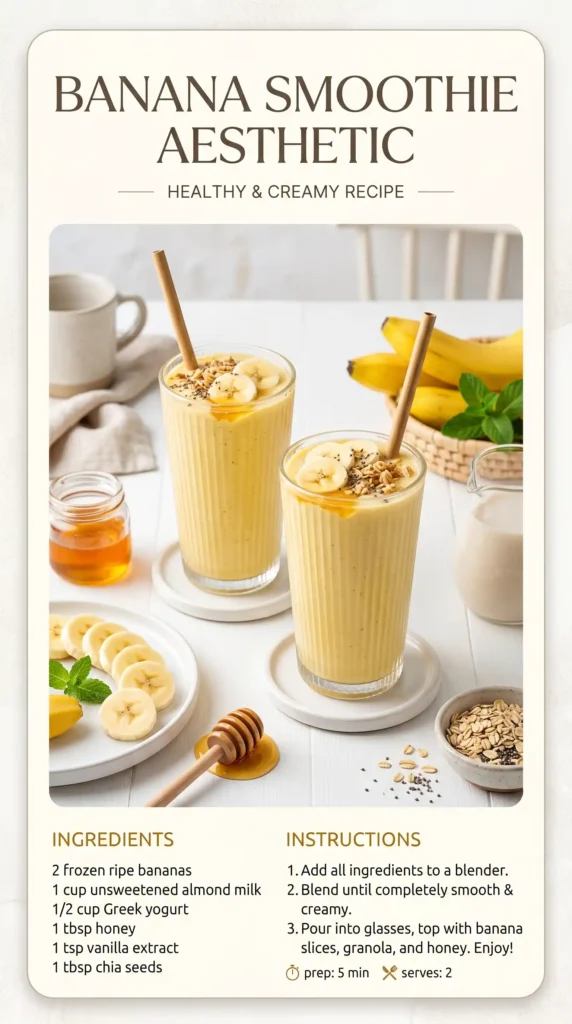
Once you’ve mastered the classic banana smoothie aesthetic recipe, why not experiment a little? Here are a few twists I personally love and come back to often.
Tropical Banana Smoothie
Replace half the milk with coconut cream and add 1/2 cup of frozen mango chunks. This version tastes like a vacation. Seriously.
Chocolate Banana Smoothie
Add 1 tablespoon of unsweetened cocoa powder and a drizzle of chocolate sauce on top for a dessert-level treat that still feels somewhat healthy. Kind of.
Berry Banana Smoothie
Toss in 1/2 cup of frozen mixed berries. The color contrast between the purple berries and the yellow banana base looks absolutely stunning and tastes even better.
Nutritional Snapshot (Per Serving)
This smoothie isn’t just pretty. It packs a solid nutritional punch too.
- Calories: approximately 280-320 kcal
- Protein: 8-10g (thanks to the Greek yogurt)
- Carbohydrates: 50-55g
- Fat: 4-6g
- Fiber: 3-4g
- Natural Sugars: 30-35g
These numbers vary slightly based on the type of milk and whether you add peanut butter. But overall, it’s a balanced, energizing option for breakfast or post-workout fuel.
FAQs About Banana Smoothie Aesthetic Recipe
1. Can I make this banana smoothie ahead of time?
You can, but I don’t recommend it for aesthetic purposes. The texture changes after 15-20 minutes. If you must prep ahead, store it in a sealed jar in the fridge and give it a quick stir or re-blend before serving.
2. What milk works best for this recipe?
Whole milk gives the richest, creamiest result. Oat milk is my favorite plant-based alternative because it adds a subtle sweetness. Almond milk works too but makes the smoothie slightly thinner.
3. Do I have to use frozen bananas?
No, you don’t have to. Fresh bananas work fine. But frozen bananas create a noticeably thicker, colder smoothie without needing as much ice. The texture is closer to a soft-serve consistency, which is exactly what makes the banana smoothie aesthetic so irresistible.
4. How do I make it thicker?
Use more frozen banana and less milk. You can also add 1/4 of an avocado for extreme creaminess without affecting the flavor much. Reducing the ice and increasing the frozen fruit ratio always helps too.
5. Can I make this without yogurt?
Absolutely. Swap Greek yogurt for a handful of cashews (soaked overnight) for a dairy-free creaminess, or just skip it entirely and add an extra half banana. The smoothie will be slightly less protein-rich but still delicious.
6. Why does my smoothie turn brown?
Bananas oxidize when exposed to air, which causes browning. To prevent this, drink your smoothie immediately after blending. A small squeeze of lemon juice also helps preserve the color if you need to store it briefly.
Final Thoughts: Your New Morning Ritual
There you have it. A full, detailed guide to pulling off the perfect banana smoothie aesthetic from scratch. It’s quick, it’s creamy, it’s nutritious, and it looks like something from a fancy cafe menu.
The key takeaways are simple: freeze your bananas, use ripe fruit, blend in the right order, and take your time with the garnish. That last part takes one minute but makes a huge visual difference.
Whether you’re making this for yourself on a quiet weekday morning or showing it off on social media, this recipe delivers every time. Now go blend something beautiful. You’ve got this.
Banana Smoothie
Ingredients
Method
- Peel the bananas. If fresh, slice them and freeze for at least 2 hours for thickness.
- If in a hurry, use fresh bananas with more ice cubes to adjust consistency.
- Add milk to the blender first to prevent air pockets.
- Add Greek yogurt, followed by frozen banana slices, honey/maple syrup, vanilla extract, and peanut butter (if using).
- Add ice cubes last.
- Start blending on low for 15 seconds, then increase to medium-high for 30-45 seconds until smooth.
- Scrape the sides with a spatula if needed and blend on high for an additional 10-15 seconds.
- Taste and adjust sweetness or thickness as needed.
- Pour the smoothie into two tall, clear glasses for presentation.
- Garnish with banana slices, a drizzle of honey, a dusting of cinnamon, and granola clusters if desired.
- Serve immediately for the best texture.



