Yield: About 12 eclairs | Prep Time: 30 minutes | Bake Time: 25 to 30 minutes | Cooling Time: 45 minutes | Total Time: About 1 hour 45 minutes
The French Pastry That Looks Hard but Really Is Not
Some desserts are all beauty and no personality. Chocolate Lightning is neither. These long, golden choux pastry shells filled with silky vanilla cream and dipped in dark chocolate glaze are the kind of thing that makes people think you secretly trained in Paris. You did not. But they do not need to know that.
I made my first batch of Chocolate Lightning on a Sunday afternoon expecting disaster. What came out of the oven was a tray of perfectly puffed, hollow pastry shells that smelled incredible. Once filled and glazed, they looked like something from a proper patisserie window. I have been making them ever since.
The name says it all. These pastries are shaped like lightning strikes — long, slightly curved oblongs that bake up dramatically. Filled with cool pastry cream and topped with glossy chocolate icing, they hit your taste buds with the same sudden intensity. IMO, no other pastry delivers this combination of texture and flavor quite like this one.
What Makes Chocolate Lightning Different From Other Pastries
Chocolate Lightning belongs to the family of choux pastry desserts. Choux dough is unusual compared to most pastry doughs because you cook it on the stove before baking it in the oven. This double-cooking process creates steam inside the shells during baking, which puffs them up and creates a hollow center.
That hollow center is the whole point. Without it there is nowhere to pipe the pastry cream. The shell itself is light, slightly crisp on the outside, and almost completely hollow inside. Once you fill it with cold cream and top it with warm chocolate, you get three completely different textures in every single bite.
Have you ever bitten into an eclair and marveled at how something so light can feel so indulgent? That is the magic of choux. The shell weighs almost nothing but the combination of buttery dough, rich cream filling, and chocolate glaze makes every Chocolate Lightning feel like a full dessert experience on its own.
Ingredients for Chocolate Lightning
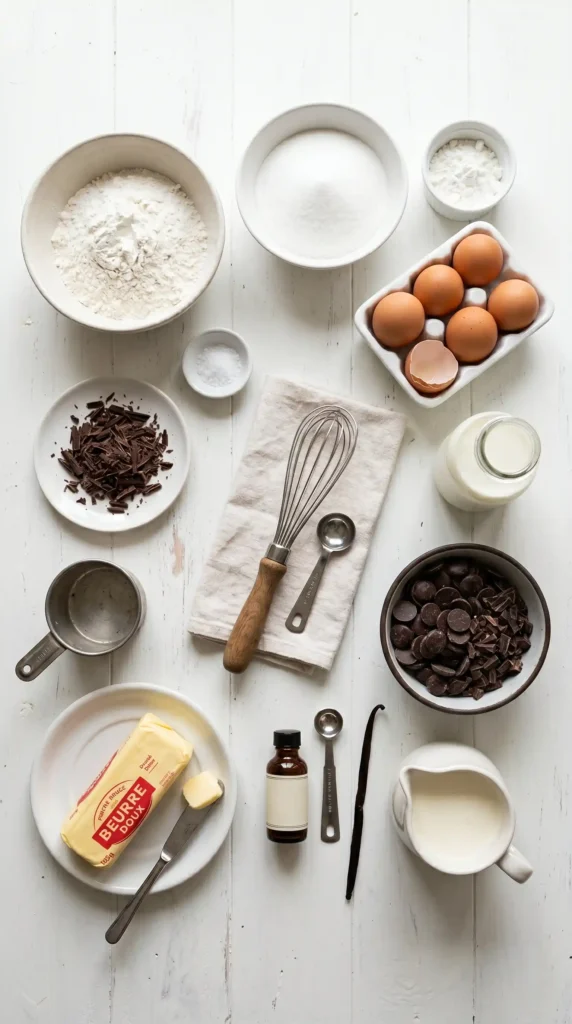
Three components make up this recipe: the choux shell, the vanilla pastry cream filling, and the chocolate glaze. Each one is simple on its own. Together they create something that tastes genuinely special. Here is everything you need to make about 12 eclairs:
For the Choux Pastry Shell
- 250 ml water
- 100 g unsalted butter, cut into cubes
- 150 g all-purpose flour, sifted
- 4 large eggs, room temperature
- 1 pinch of salt
For the Vanilla Pastry Cream Filling
- 500 ml whole milk
- 4 large egg yolks
- 100 g granulated sugar
- 40 g cornstarch
- 1 teaspoon pure vanilla extract
For the Chocolate Glaze
- 150 g dark chocolate (70% cocoa or higher), finely chopped
- 100 ml heavy liquid cream
How to Make Chocolate Lightning Step by Step

Let us go through each component carefully. I want you to feel completely confident at every stage of this process. There are three separate parts to make but none of them is complicated. Take your time and follow each step closely.
Part One: Make the Choux Pastry Dough
Step 1: Boil the Water, Butter, and Salt
Combine the water, butter cubes, and salt in a medium saucepan over medium heat. Stir occasionally as the butter melts. Bring the mixture to a full rolling boil. You want both the butter fully melted and the water actively boiling at the same moment before the flour goes in.
Do not let the water boil and evaporate before the butter melts. If the water boils off too much before the butter fully melts, the ratio of liquid to flour changes and the dough will not come together correctly. Keep the heat at medium and watch it closely during this first step.
Step 2: Add the Flour All at Once
The moment the mixture hits a full boil, remove the pan from the heat and add all the sifted flour at once in one quick pour. Immediately start stirring vigorously with a wooden spoon or a firm spatula. Stir in fast, strong circles and scrape the sides and bottom of the pan constantly.
Within about 30 seconds the dough will pull away from the sides of the pan and come together into a single smooth ball. This is exactly what you want to see. Return the pan to medium heat and keep stirring for another 1 to 2 minutes to dry out any excess moisture from the dough.
You will know the dough is ready when it no longer sticks to the sides of the pan and a thin, dry film starts forming on the bottom of the saucepan. The dough should look smooth, slightly shiny, and hold together as one cohesive mass. Remove the pan from the heat again.
Step 3: Add the Eggs One at a Time
Let the dough cool in the pan for 5 minutes. This is important. If the dough is too hot when you add the eggs, they will begin to cook and scramble rather than incorporate smoothly. You want the dough warm but not steaming hot. A quick stir will help release heat faster.
Add the eggs one at a time, beating vigorously after each addition. The dough will look slippery and separated when you first add each egg. Keep beating and it will come back together within 20 to 30 seconds. Use a wooden spoon or switch to a hand mixer on low speed for easier mixing.
After all four eggs go in, the dough should look smooth, glossy, and thick enough to hold a shape. Test it by scooping some dough on the spoon and letting it fall back. It should fall in a slow, thick ribbon and hold a soft V-shape at the tip of the spoon. If it is too stiff, add one more egg.
Step 4: Pipe and Bake the Lightning Shapes
Preheat your oven to 180 degrees Celsius or 350 degrees Fahrenheit. Line a baking sheet with parchment paper. Transfer the choux dough into a piping bag fitted with a large round or star tip, about 1 to 1.5 centimeters in diameter.
Pipe straight lines of dough onto the prepared baking sheet, each about 10 to 12 centimeters long. Leave at least 4 centimeters of space between each one because they expand significantly during baking. Wet your fingertip with water and gently press down any pointed tips at the ends of each piped line to smooth them.
Slide the tray into the oven and do not open the oven door for the first 20 minutes. This is the most important rule for choux pastry. Opening the door releases steam and causes the shells to collapse before they have set. After 25 to 30 minutes the shells should look deeply golden, feel hollow when tapped, and sound crisp.
Remove the tray from the oven and use a small sharp knife to poke a small hole in the side or bottom of each shell immediately. This releases the steam trapped inside and prevents the shells from going soggy as they cool. Place them on a wire rack and let them cool completely before filling.
Part Two: Make the Vanilla Pastry Cream
Step 5: Heat the Milk
Pour the milk into a medium saucepan and heat it over medium heat until it just begins to simmer. Small bubbles will appear around the edges of the pan. Do not let it boil. Remove from the heat. While the milk heats, work on the egg mixture in the next step.
Step 6: Whisk the Egg Yolks, Sugar, and Cornstarch
In a medium bowl, whisk together the egg yolks and sugar until the mixture turns pale yellow and slightly thick. This takes about 2 minutes of active whisking. Add the cornstarch and whisk it in completely. The cornstarch thickens the cream as it cooks and prevents it from becoming too runny.
Pour the warm milk slowly into the egg mixture while whisking constantly. Add it in a thin, steady stream at first to temper the eggs. Pouring it all in at once would scramble the yolks. Once about half the milk is in, you can pour the rest more quickly.
Step 7: Cook the Pastry Cream
Pour the combined mixture back into the saucepan. Cook over medium heat, whisking constantly and reaching into the corners of the pan. After 3 to 5 minutes the cream will suddenly thicken very quickly. Keep whisking through this stage and do not stop or the bottom will scorch.
Cook for another full minute after it thickens to ensure the cornstarch is fully cooked out. Under-cooked cornstarch gives the cream a starchy, floury taste. Remove from heat, stir in the vanilla extract, and press a sheet of plastic wrap directly onto the surface of the cream to prevent a skin from forming.
Refrigerate the pastry cream for at least 45 minutes until completely cold and firm. Cold cream pipes much more neatly than warm cream. If you are in a hurry, set the bowl over a larger bowl filled with ice and cold water and stir occasionally to speed up the cooling.
Part Three: Make the Chocolate Glaze
Step 8: Make the Chocolate Ganache
Place the finely chopped dark chocolate in a heatproof bowl. Heat the heavy cream in a small saucepan over medium heat until it just begins to simmer at the edges. Do not boil it. Pour the hot cream directly over the chopped chocolate and let it sit undisturbed for 2 minutes.
Stir slowly from the center outward until the chocolate and cream combine into a smooth, glossy ganache. If any unmelted pieces remain, place the bowl over a pot of barely simmering water for 30 seconds and stir again. Let the ganache cool for about 10 minutes until slightly thickened but still pourable.
Step 9: Fill and Glaze the Chocolate Lightning
Transfer the cold pastry cream into a piping bag fitted with a small round tip. Push the tip into the hole you made in each cooled shell and pipe cream inside until you feel resistance. Each shell will feel noticeably heavier when it is full. Wipe away any cream that squeezes out.
Dip the top of each filled shell face-down into the chocolate ganache. Hold it there for 2 seconds, then lift it and let any excess drip off before turning it right-side up. Place the glazed Chocolate Lightning on a wire rack or plate and let the ganache set for about 15 minutes before serving.
The One Rule You Must Not Break
Never open the oven door during the first 20 minutes of baking. Choux pastry rises entirely on steam. The trapped steam inside the shells pushes the dough outward and upward as it bakes. Opening the door drops the oven temperature and releases that steam before the shells have set.
Without that sustained heat and steam, the shells collapse back down and bake flat. Flat shells have no hollow center, which means no room for the cream filling. You end up with sad little pancakes instead of dramatic lightning-shaped pastries. Keep that oven closed and trust the process.
Extra Tips for Perfect Results
- Sift the flour before adding it to the boiling liquid. Lumps in the dough are very difficult to remove after the fact.
- Pipe the shells in one continuous, steady movement without stopping to get clean, even shapes.
- Poke the steam-release holes immediately when the shells come out of the oven while they are still hot.
- Always fill and glaze on the same day you plan to serve. Filled shells go soft in the refrigerator overnight.
- Use good quality dark chocolate for the glaze. Higher cocoa content means a richer, less sweet finish that balances the sweet cream beautifully.
Why Chocolate Lightning Tastes So Extraordinary

Have you ever thought about why certain pastries feel so satisfying to eat? Chocolate Lightning works because every element provides contrast. The shell is light and slightly crisp. The cream inside is cold, smooth, and richly flavored. The chocolate on top is dense, glossy, and intense.
The temperature contrast also plays a role. A chilled pastry cream inside a room-temperature shell under a slightly warm ganache creates a layered sensory experience that a single-texture dessert never delivers. Each component needs the others to work. Remove any one of them and the magic disappears.
This is exactly why Chocolate Lightning has stayed a staple of French patisseries for centuries. It is a technically brilliant dessert hiding behind a deceptively simple appearance. Once you understand how each component works, you realize every step has a specific purpose and none of them can be skipped.
Frequently Asked Questions
Why did my choux shells collapse after baking?
The oven door opened too early. This is the most common reason for collapsed shells. The steam inside the shells needs to stay trapped until the pastry walls set firm enough to hold their shape. Always wait until at least 20 minutes have passed before checking on them.
Can I make the pastry cream ahead of time?
Yes. Make the pastry cream up to 2 days ahead and store it in the refrigerator with plastic wrap pressed directly onto the surface. Stir it well before piping because it firms up considerably in the fridge. Do not fill the shells more than a few hours before serving.
What is cornstarch for in the pastry cream?
Cornstarch is the thickening agent that turns the egg and milk mixture into a firm, pipeable cream. Without it the mixture stays liquid even after cooking. The 40 grams in this recipe creates a cream that is thick enough to hold its shape inside the shells without spilling out.
Can I use milk chocolate instead of dark chocolate for the glaze?
You can, but IMO dark chocolate works better here. The bitterness of dark chocolate balances the sweetness of the vanilla cream and the buttery shell. Milk chocolate glaze makes the whole pastry taste very sweet and one-dimensional. If you prefer milder chocolate, use 50% cocoa rather than going all the way to milk chocolate.
How do I store leftover Chocolate Lightning?
Store filled and glazed Chocolate Lightning in the refrigerator for up to 24 hours. After that the shells absorb moisture from the cream and go soft. Unfilled baked shells can be stored in an airtight container at room temperature for up to 2 days or frozen for up to 1 month.
Make These and Watch the Room Go Quiet
Chocolate Lightning is one of those recipes that earns you genuine, wide-eyed admiration from everyone who eats it. The crisp choux shell, the cold vanilla cream, and the dark chocolate glaze come together into something that feels far more complex than the ingredient list suggests. That is the beauty of it.
Three components, one stunning result. Once you make these for the first time and watch people reach for a second one before finishing the first, you will understand why this recipe has stayed beloved for generations. It is not just a dessert. It is a small, very delicious performance. Preheat that oven, keep the door shut, and go make some lightning. Your kitchen is about to smell absolutely incredible

Chocolate Lightning
Ingredients
Method
- Combine the water, butter cubes, and salt in a medium saucepan over medium heat. Stir occasionally and bring it to a full rolling boil.
- Remove the pan from heat and add all the sifted flour at once. Stir vigorously until the dough comes together.
- Return the pan to medium heat and stir for another 1 to 2 minutes to dry out any excess moisture.
- Let the dough cool for 5 minutes before adding the eggs, one at a time, beating vigorously after each addition.
- Preheat your oven to 180 degrees Celsius. Pipe the dough onto a baking sheet and bake for 25-30 minutes, without opening the oven during the first 20 minutes.
- Poke a small hole in each shell immediately after baking to release steam.
- Heat the milk in a saucepan until it just begins to simmer.
- In a bowl, whisk together egg yolks, sugar, and cornstarch until pale. Temper with the warm milk.
- Pour the mixture back into the saucepan and cook over medium heat, whisking constantly until thickened. Remove from heat, stir in vanilla, and refrigerate.
- Heat the heavy cream until it just begins to simmer. Pour over the chopped chocolate and let it sit for 2 minutes.
- Stir until smooth and let cool slightly.
- Fill each choux shell with cooled pastry cream.
- Dip the top of each filled shell into the chocolate ganache and let set.