Servings: 12 squares | Prep Time: 10 minutes | Cook Time: 15–20 minutes | Total Time: ~30 minutes
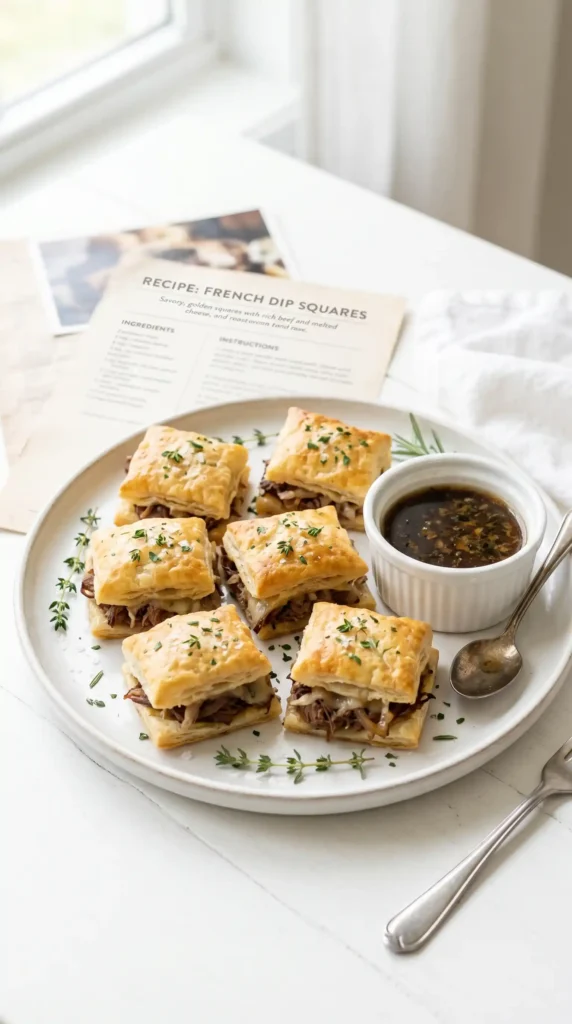
You know those recipes that look impressive but take almost zero effort? French Dip Squares are exactly that. Buttery crescent roll dough, tender roast beef, melted Swiss cheese, and a savory butter drizzle — all baked into pull-apart squares and served with warm beef broth for dipping.
I brought these to a game day gathering once. They were gone in twelve minutes flat. I timed it because I barely got one myself.
Why French Dip Squares Are the Ultimate Crowd-Pleaser
Classic French dip sandwiches are great, but they require actual sandwich assembly for every single person. French Dip Squares solve that problem entirely. You make one big bake, cut it into portions, and let everyone grab and dip as they please. It is the definition of low-effort, high-reward cooking.
The combination of flaky crescent dough, savory beef, and melty cheese hits every comfort food button at once. Add a cup of warm beef broth for dipping and you have a dish that genuinely excites people.
Ingredients You’ll Need
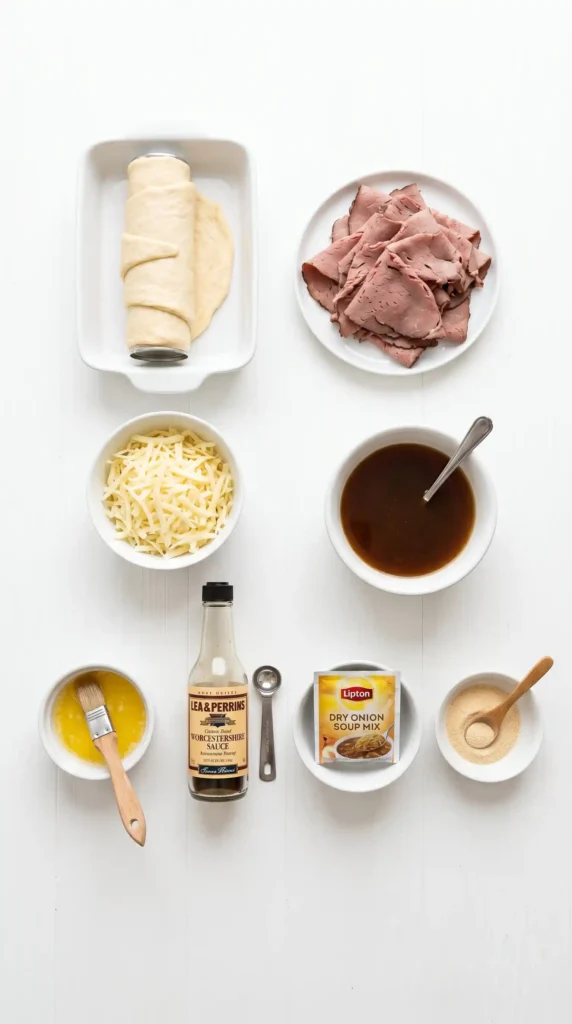
Main Ingredients
- 2 cans refrigerated crescent rolls
- 1/2 pound deli-sliced roast beef
- 1 cup grated Swiss cheese
- 1 packet dry onion soup mix
- 1/4 cup melted butter
- 1 tablespoon Worcestershire sauce
- 1 teaspoon garlic powder
- 1 cup beef broth (for dipping sauce)
Picking the Right Ingredients
Choosing Your Crescent Roll Dough
Both Pillsbury and store-brand crescent rolls work well here. The key is using refrigerated dough, not the pre-separated triangles. The flat sheet version (sometimes labeled “crescent roll dough sheet”) is actually easier to work with since there are no perforations to deal with. Either works — just press seams together firmly if you use the standard version.
Make sure your dough is cold when you work with it. Warm crescent roll dough gets sticky and tears easily. Take it straight from the fridge and work quickly.
Roast Beef — Deli Counter vs. Pre-Packaged
FYI — deli counter roast beef almost always tastes better than the pre-packaged variety. Ask for it sliced thin so it layers evenly and bites cleanly without pulling the whole square apart when you eat it. If you only have access to pre-packaged, that is absolutely fine — just separate the slices before layering.
Aim for medium-rare roast beef if you have the choice. It stays tender and juicy through the baking process rather than drying out.
Swiss vs. Provolone vs. Mozzarella
Swiss cheese is the classic choice for French dip flavor. It melts beautifully and adds a slightly nutty, savory quality that pairs perfectly with the beef. Provolone gives you a milder, creamier melt and works well if you have guests who find Swiss too sharp. Mozzarella delivers the best stretch factor if you want that dramatic cheese pull effect.
Honestly, any of the three work great here. Use whatever you have, or mix two together.
Making French Dip Squares: Step-by-Step
Step 1 — Get the Oven and Dish Ready
Preheat your oven to 375°F (190°C). This temperature gives the crescent roll dough enough heat to puff and turn golden without the butter drizzle burning before the center cooks through. Do not rush to a higher temp — patience here gives you that even golden crust.
Lightly spray a 9×13 inch baking dish with non-stick cooking spray. Cover the bottom and sides evenly. The butter in the topping drizzle can cause sticking around the edges if you skip this step, and nobody wants to lose half their squares to the pan.
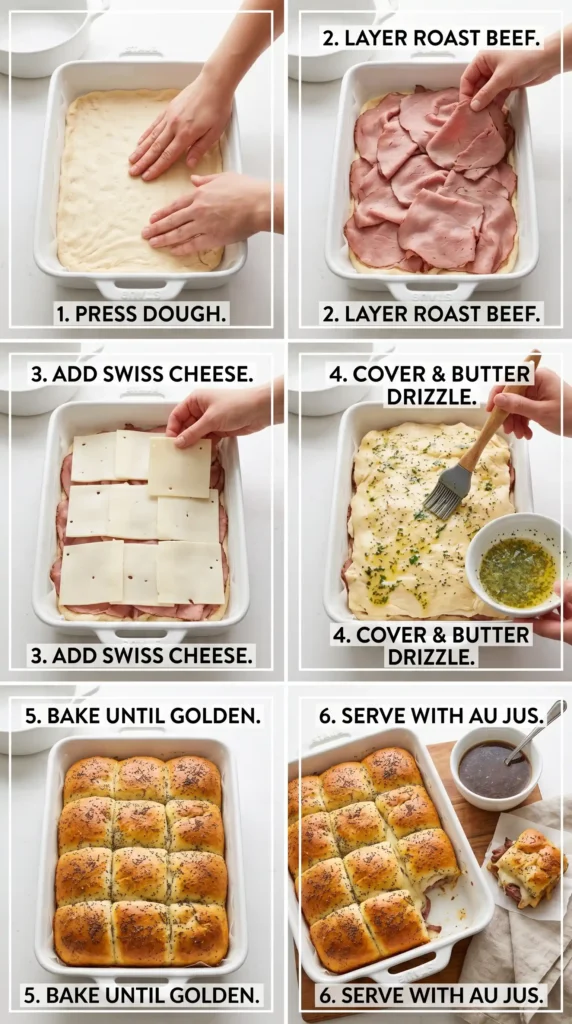
Step 2 — Press Down the First Layer of Dough
Open the first can of crescent rolls and unroll the dough carefully onto the bottom of the baking dish. Press it out to cover the entire base of the dish, pushing it gently into the corners. If you are using the standard perforated version, press all the seams firmly together until you have one solid, smooth sheet.
Take your time here. Gaps or thin spots in the bottom layer can cause the roast beef and cheese to sink through during baking. A solid, even base makes a big difference in the final result.
Step 3 — Layer the Roast Beef
Take your 1/2 pound of deli-sliced roast beef and layer it evenly across the crescent dough base. Spread the slices out so the entire surface gets covered — fold or overlap slices as needed to fill any bare spots. Do not pile all the beef in the center and hope for the best.
Even coverage ensures every square has a proper amount of beef. Think of it like building a pizza — distribution matters. A square with no beef in the corner is a sad square indeed.
Step 4 — Add the Cheese
Sprinkle 1 cup of grated Swiss cheese evenly over the roast beef layer. Grating your own cheese always melts better than pre-shredded, since pre-shredded varieties contain anti-caking agents that can make the melt slightly grainy. That said, pre-shredded absolutely works and saves time — no judgment here.
Make sure the cheese reaches all the way to the edges of the dish. The cheese along the edges gets slightly crispy and caramelized during baking, and those edge squares are genuinely the best ones IMO.
Step 5 — Mix and Drizzle the Butter Topping
In a small bowl, combine 1/4 cup of melted butter, 1 packet of dry onion soup mix, 1 tablespoon of Worcestershire sauce, and 1 teaspoon of garlic powder. Stir until everything is well combined. The mixture should look like a dark, fragrant, buttery sauce.
Drizzle this mixture slowly and evenly over the entire cheese layer. Use a spoon to guide it across the surface so every area gets some coverage. This topping is what gives French Dip Squares their deep, savory, caramelized flavor — do not rush it or dump it all in one spot.
Step 6 — Add the Top Crescent Layer
Open your second can of crescent rolls and carefully lay the dough over the top of the entire filling. Just like the bottom layer, press the seams together firmly and stretch the dough gently to reach the edges and corners of the dish. You want a complete, sealed top layer.
Pinch the edges of the top and bottom dough layers together around the perimeter of the dish. This creates a sealed pocket that keeps all the cheese and beef juices inside the squares while they bake, rather than bubbling out and burning on the sides of the pan.
Step 7 — Bake Until Golden
Slide the dish into your preheated 375°F oven and bake for 15 to 20 minutes. Start checking at the 15-minute mark. You are looking for a deep golden-brown surface across the entire top layer — not just the edges. The center should look fully puffed and cooked, not pale or doughy.
If the edges are browning faster than the center, loosely cover the edges with small strips of foil and let the center finish catching up. Every oven runs slightly differently, so keep your eye on it during the final few minutes.
Step 8 — Warm the Dipping Broth
While the squares bake, pour 1 cup of beef broth into a small saucepan and warm it over medium-low heat. Do not boil it — you want it hot enough to steam slightly and feel warm on your hands when you hold the bowl, but aggressive boiling evaporates too much liquid. Taste it and add a pinch of salt or a small splash of Worcestershire if it needs more depth.
Keep the broth warm on the lowest heat setting until the squares come out of the oven. Serve it in individual small bowls or ramekins alongside each portion.
Step 9 — Rest, Cut, and Serve
Pull the dish from the oven and let it rest for 5 minutes before cutting. Cutting too early means the cheese is still fully molten and everything slides apart. Five minutes of resting lets things firm up just enough to cut cleanly into neat squares.
Use a sharp knife or pizza cutter to slice into a 3×4 grid for 12 squares. Serve each square with a small cup of the warm beef broth on the side for dipping
Tips for Getting the Best Results
A few things I have learned from making French Dip Squares multiple times:
- Do not skip the non-stick spray. The butter drizzle can cause significant sticking, especially around the edges.
- Press seams tightly. Gaps in the dough create weak spots where filling leaks out during baking.
- Let it rest before cutting. Even 5 minutes makes a big difference in how cleanly the squares hold together.
- Taste the broth. Store-bought beef broth varies in saltiness. Add a splash of Worcestershire or a pinch of onion powder if it needs more flavor.
- Serve immediately. These squares are best right out of the oven. They soften as they sit, which affects the texture of the crescent dough.
Variations Worth Trying
The base recipe works as a starting point for a lot of creative variations:
- Add caramelized onions between the beef and cheese layer for extra savory sweetness
- Swap roast beef for turkey and Swiss for a French-dip-style turkey melt version
- Add a thin layer of Dijon mustard on the bottom dough before layering the beef
- Use horseradish sauce as a spread for a bolder, tangier flavor profile
- Mix provolone and Swiss for a more complex cheese flavor in every bite
Storing and Reheating
Store leftover French Dip Squares in an airtight container in the fridge for up to 3 days. To reheat, place them on a baking sheet in a 350°F oven for 8 to 10 minutes. This method brings back the crispy top layer that the microwave kills instantly.
Store leftover dipping broth separately in a covered container. Reheat it gently on the stovetop before serving again.
Frequently Asked Questions
Q: Can I make French Dip Squares ahead of time? You can assemble the entire dish up to 4 hours in advance, cover it with plastic wrap, and refrigerate it until ready to bake. Add 3 to 5 extra minutes to the bake time to account for the cold start. Do not assemble it the night before — the dough can become soggy from the moisture in the filling.
Q: What can I use instead of dry onion soup mix? Mix together 1 tablespoon of dried minced onion, 1 teaspoon of beef bouillon powder, 1/2 teaspoon of onion powder, and 1/4 teaspoon of garlic powder. This homemade blend gives you very similar flavor without the packet. It also lets you control the sodium level, which store-bought onion soup mix can be quite high in.
Q: Can I use a different type of cheese? Yes — provolone, mozzarella, Gruyere, or even sharp cheddar all work in this recipe. Swiss is traditional for French dip flavor, but the recipe handles substitutions well. Gruyere is an especially good upgrade if you want a more complex, nutty flavor.
Q: Can I make this recipe with homemade dough instead of crescent rolls? You can use store-bought puff pastry as a swap — it gives you a flakier, more buttery result. Homemade dough works too, but refrigerated crescent rolls are genuinely hard to beat for speed and consistency in this recipe. The convenience factor is the whole point.
Q: How do I keep the squares from getting soggy? The main cause of soggy squares is too much moisture in the roast beef layer. Pat deli beef slices lightly with a paper towel before layering to remove excess moisture. Also, do not use overly wet or heavily marinated beef. Keeping the filling dry before baking is the key to a crispy bottom crust.
Final Thoughts
French Dip Squares pack all the flavor of a classic French dip sandwich into a shareable, crowd-friendly format that takes under 30 minutes to pull together. Flaky crescent dough, tender roast beef, melted cheese, and that rich butter-onion drizzle create something genuinely hard to resist.
Press the seams well. Build your layers evenly. Let it rest before cutting. And make sure you grab a square before everyone else does — because if my experience means anything, you will not get a second chance

French Dip Squares
Ingredients
Method
- Preheat your oven to 375°F (190°C) and lightly spray a 9x13 inch baking dish with non-stick cooking spray.
- Open the first can of crescent rolls and press the dough onto the bottom of the baking dish, sealing seams together well.
- Layer the deli-sliced roast beef evenly over the crescent dough.
- Sprinkle grated Swiss cheese uniformly over the roast beef layer.
- In a small bowl, mix melted butter, onion soup mix, Worcestershire sauce, and garlic powder.
- Drizzle the butter mixture over the cheese layer.
- Open the second can of crescent rolls and lay it over the filling, sealing the seams tightly.
- Bake in the preheated oven for 15 to 20 minutes until top layer is golden brown.
- While baking, warm beef broth in a saucepan without boiling.
- Remove from oven and let rest for 5 minutes before cutting into 12 squares.
- Serve each square with a cup of warm beef broth for dipping.