Servings: 16 bars | Prep Time: 15 minutes | Bake Time: 25 to 28 minutes | Chill Time: 2 hours | Total Time: About 3 hours
All the Pie, None of the Fuss
Key lime pie is a classic for a reason. That sharp citrus hit, the creamy custard filling, the buttery crumbly base. But let us be real for a second. Whole pies are tricky to slice cleanly, awkward to transport, and honestly a little intimidating to make.
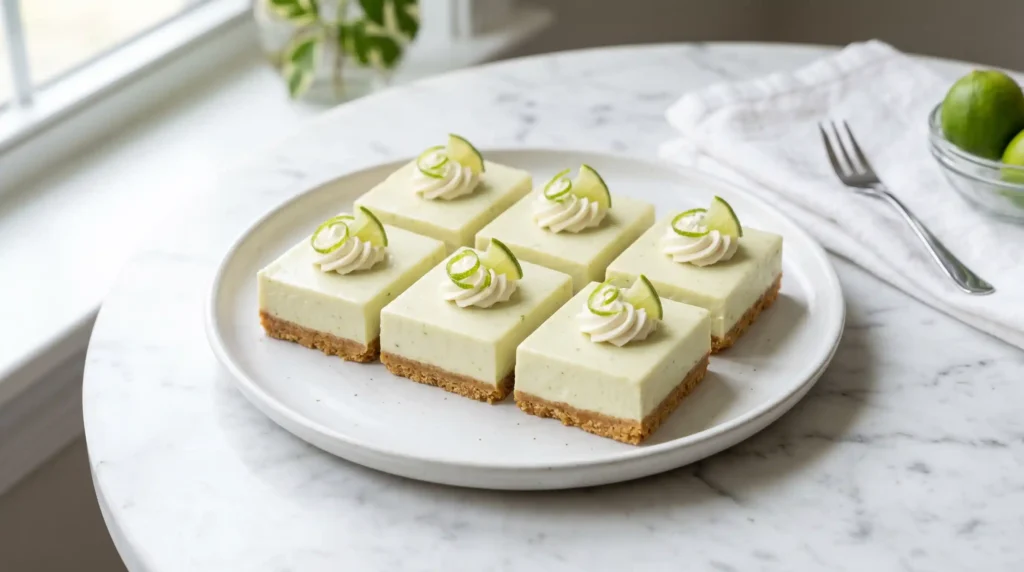
Key Lime Pie Bars solve every single one of those problems. Same incredible flavor. Same silky texture. Same buttery crust. But now you get neat, portable, grab-and-go squares that take the stress completely out of the equation.
I started making these for summer cookouts when I got tired of watching a gorgeous pie crumble apart at the serving table. Now I make them year-round because there is genuinely no bad time to eat something this good. Let me walk you through everything.
Why Key Lime Pie Bars Beat a Whole Pie Every Time
This might be a spicy take, but IMO bars are just the smarter format for key lime. Hear me out before you throw anything.
- Perfect portions every time: No uneven slices, no first-slice disaster, no filling sliding everywhere. Sixteen clean bars every single time.
- Easier to transport: Bars travel in a pan with a lid. A whole pie travels with anxiety and a prayer.
- Better crust-to-filling ratio: More crust edge in every piece means more of that buttery graham cracker goodness per bite.
- Simpler to make: No pie dish, no blind baking drama, no crimping. A square pan and a mixing bowl handle everything.
- Easier to store: Stack them in a container and refrigerate. Done. No dome cover, no pie-sized space required.
Have you ever tried to transport a cream pie to a party without destroying it? Then you already understand why bars exist. They are the practical, delicious answer to that problem.
Ingredients for Key Lime Pie Bars
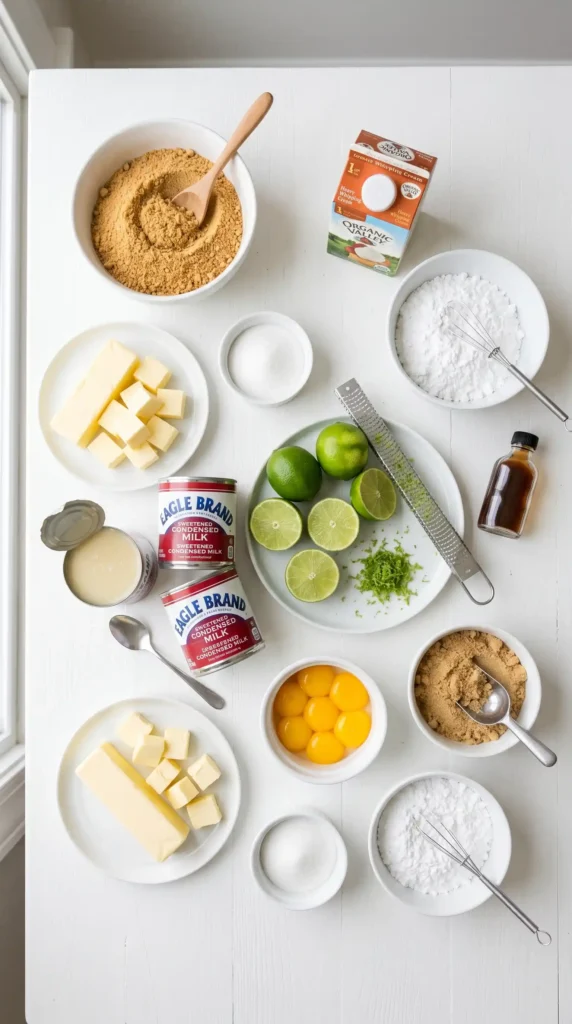
Short list, simple stuff, and nothing you need to hunt down at a specialty store. Here is everything you need to make 16 bars.
For the Graham Cracker Crust
- 1 and 3/4 cups graham cracker crumbs (about 12 full cracker sheets)
- 3 tablespoons granulated sugar
- 1/4 teaspoon salt
- 7 tablespoons unsalted butter, melted
For the Key Lime Filling
- 4 large egg yolks, room temperature
- 2 teaspoons key lime zest
- Two 14 oz cans sweetened condensed milk
- 3/4 cup fresh key lime juice (about 20 to 25 key limes, or bottled works)
For Topping (Optional)
- 1 cup heavy whipping cream
- 2 tablespoons powdered sugar
- 1/2 teaspoon vanilla extract
- Thin lime slices and extra zest for garnish
Fresh Key Lime Juice vs Bottled: The Honest Answer
People argue about this more than necessary. Here is the real answer. Fresh key lime juice tastes brighter, more floral, and slightly more complex. It is the gold standard if you have the time and patience to juice 20-plus tiny limes.
Bottled key lime juice is a completely legitimate shortcut. Look for 100 percent pure key lime juice with no added sugar or preservatives. Nellie and Joe’s Famous Key West Lime Juice is the one most bakers reach for, and it genuinely works very well in this recipe.
My honest take? Use fresh if you are making these for a special occasion. Use bottled on a regular Tuesday when you just want great Key Lime Pie Bars without juicing two dozen tiny limes. Both produce excellent results.
How to Make Key Lime Pie Bars From Start to Finish
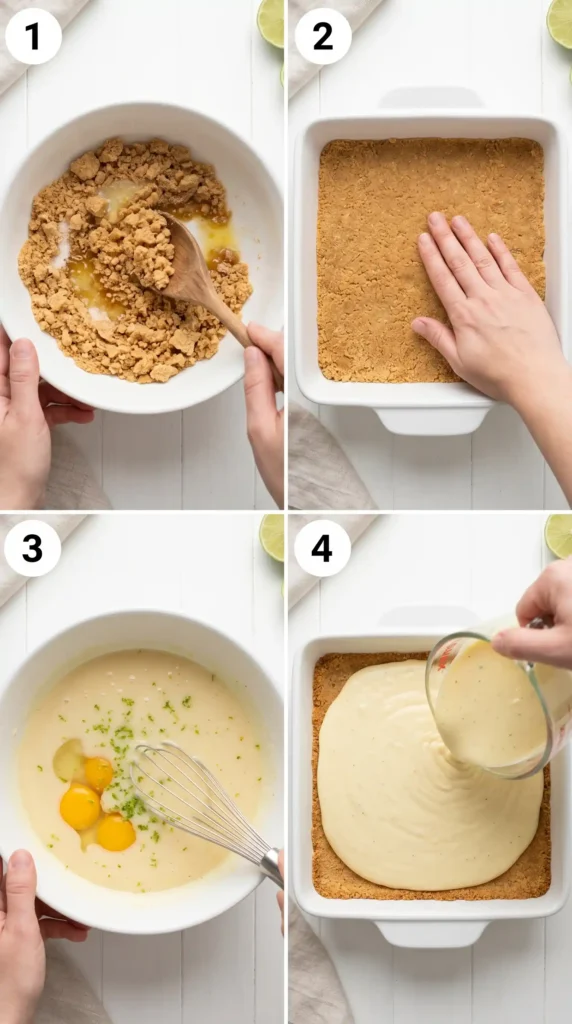
Here is the full process, step by step, with enough detail so nothing surprises you halfway through. These bars are not complicated, but a few specific steps really do matter for getting the right texture and flavor.
Step 1: Preheat the Oven and Prepare the Pan
Set your oven to 325 degrees Fahrenheit (165 degrees Celsius). Do this first so the oven reaches full temperature before you even finish making the crust. A properly heated oven makes a real difference to how evenly the filling sets.
Line a 9×13 inch baking pan with parchment paper, leaving enough overhang on the two long sides to act as handles later. This overhang is the move. It lets you lift the entire slab of bars cleanly out of the pan for cutting without any digging or scraping.
Spray the parchment lightly with nonstick cooking spray as well. The combination of parchment and spray means absolutely nothing sticks and your bars lift out cleanly every single time.
Step 2: Make the Graham Cracker Crust
Combine the 1 and 3/4 cups of graham cracker crumbs, 3 tablespoons of granulated sugar, and 1/4 teaspoon of salt in a medium mixing bowl. Stir them together until evenly mixed. Then pour in the 7 tablespoons of melted unsalted butter.
Mix everything together until every crumb is evenly coated in butter and the mixture feels like damp, clumping sand. Grab a small handful and squeeze it. If it holds together without crumbling apart, you have the right consistency. If it feels too dry, add another half tablespoon of melted butter.
Pour the crust mixture into your prepared pan and spread it out into an even layer. Use the flat bottom of a measuring cup or drinking glass to press it down firmly and compactly. Press the edges in firmly too, not just the center. Loose edges will crumble when you cut the bars.
A firmly packed crust is the foundation of a great bar. Spend an extra minute on this step and press firmly across every inch of the pan. It genuinely pays off when you cut clean, sturdy bars later.
Step 3: Pre-Bake the Crust
Slide the pan into your preheated 325 degree oven and bake the crust alone for exactly 10 minutes. You are looking for the edges to turn just slightly golden and the center to look set and dry rather than raw and crumbly.
This pre-bake step is important. It sets the crust structure so it does not absorb moisture from the filling during the second bake and turn soft. A pre-baked crust stays crisp, holds its shape when cut, and gives you that satisfying crunch that makes every bite better.
Pull the pan out after 10 minutes and set it on a wire rack. Let it cool for about 5 minutes while you make the filling. Do not skip this short cooling time or the warm crust can slightly cook the egg yolks when the filling hits it.
Step 4: Make the Key Lime Filling
Separate your 4 large eggs, saving only the yolks. Drop the yolks into a large mixing bowl. Add the 2 teaspoons of key lime zest directly to the egg yolks before adding anything else. The reason for this matters.
Zest contains concentrated citrus oils, and those oils bond with the fat in the egg yolks when you whisk them together first. This bonding releases more aromatic compounds into the filling and gives you a noticeably more intense lime flavor throughout the entire bar. It is a small step with a real payoff.
Whisk the egg yolks and zest together for a full 2 minutes until the mixture looks slightly pale and thick. Then add both 14 oz cans of sweetened condensed milk and whisk again until fully combined and smooth.
Pour in the 3/4 cup of key lime juice slowly while whisking constantly. The acid in the lime juice reacts with the condensed milk proteins and begins to thicken the filling immediately. You will see it change texture as you whisk. Keep whisking until everything is completely smooth and uniform.
Step 5: Pour and Spread the Filling
Pour the key lime filling over your slightly cooled pre-baked crust. Use a rubber spatula to spread it into an even layer that reaches all four corners of the pan. Tap the pan gently on the counter a couple of times to pop any surface bubbles.
The filling layer should look smooth and glossy at this point. If you see any streaks of unincorporated condensed milk, give it one more gentle pass with the spatula. Even filling means even baking and clean, consistent bars when you cut them.
Step 6: Bake the Filled Bars
Return the pan to the 325 degree oven and bake for 15 to 18 minutes. You are watching for the filling to look mostly set but with a very slight jiggle in the very center when you gently shake the pan. Think of a slightly set gelatin, not a liquid slosh.
Do not overbake Key Lime Pie Bars. Overbaking makes the filling rubbery and grainy instead of silky and creamy. The bars continue to set as they cool, so pulling them a touch early is always the right call. When in doubt, take them out.
The edges should look fully set and the top should have lost its wet sheen. A very slight wobble in the center is your green light to pull them. That wobble disappears completely once the bars chill.
Step 7: Cool at Room Temperature, Then Chill
Remove the pan from the oven and set it on a wire rack. Let the bars cool to room temperature for at least 45 minutes. Do not try to rush this stage by putting warm bars straight into the fridge. That can cause condensation to form on the surface and make the filling weep.
Once the bars reach room temperature, cover the pan loosely with plastic wrap and transfer it to the refrigerator. Chill for a minimum of 2 hours, though overnight chilling gives the absolute best result. The filling firms up completely, the flavors deepen, and the bars cut perfectly clean.
Step 8: Make the Whipped Cream Topping
Right before serving, pour the 1 cup of cold heavy whipping cream into a clean mixing bowl. Add the 2 tablespoons of powdered sugar and the 1/2 teaspoon of vanilla extract. Whip on medium-high speed until firm peaks form, about 3 to 4 minutes.
Keep the cream cold right up until you whip it. Warm cream will not whip up properly and you will end up with something sad and loose rather than thick and fluffy :/. Pull it straight from the fridge into the bowl and work quickly.
Step 9: Slice and Serve
Use the parchment paper overhang to lift the entire chilled slab out of the pan and onto a large cutting board. Use a sharp chef’s knife to cut into 16 even bars. For the cleanest cuts, wipe the knife clean with a damp cloth between each slice.
Top each bar with a dollop of whipped cream, a thin lime slice, and a pinch of extra zest right before serving. This finishing touch takes about 2 minutes and makes the bars look genuinely beautiful. Serve cold and enjoy immediately.
How to Store Key Lime Pie Bars
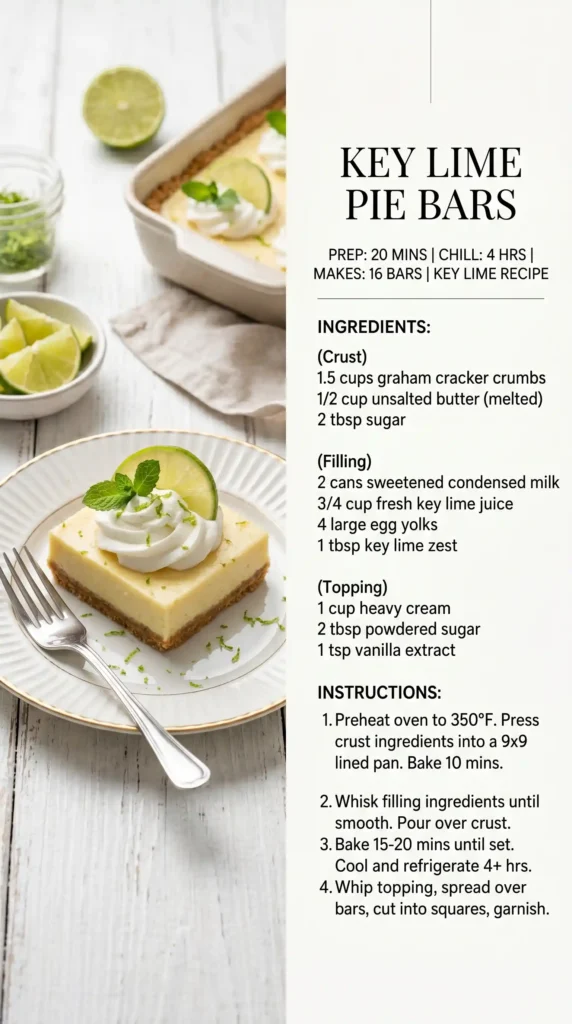
Store bars in an airtight container in the refrigerator for up to 5 days. Keep the whipped cream topping separate and add it only when serving individual bars. Pre-topped bars get soggy faster and the whipped cream deflates overnight.
FYI, these bars also freeze well without the topping. Wrap individual bars tightly in plastic wrap and freeze for up to 2 months. Thaw overnight in the refrigerator, then add fresh whipped cream and serve. The texture holds up surprisingly well after freezing.
FAQs About Key Lime Pie Bars
1. Can I use regular limes instead of key limes?
Yes. Regular Persian limes work and give you a very similar tart citrus flavor. The taste is slightly less floral and a touch more one-dimensional than true key lime, but the bars still come out delicious. Use the same quantity of juice and zest as the recipe calls for.
2. Why do my bars have a rubbery texture?
Overbaking is almost always the culprit. The filling continues to set as it cools and chills, so it should still have a slight wobble when you pull it from the oven. If you bake until the center looks completely firm in the oven, you have already gone too far. Start checking at the 15-minute mark.
3. Can I make Key Lime Pie Bars without egg yolks?
The egg yolks are important for structure and richness in the filling, so skipping them does change the result. Some recipes use a cornstarch slurry as a substitute, but the texture will be slightly different and less creamy. For best results, stick with the egg yolks.
4. Why did my crust turn out soggy?
Two common reasons: the crust was not pre-baked long enough before the filling went in, or the filling was too hot when it hit the crust. Make sure you pre-bake the crust for the full 10 minutes and let it cool for 5 minutes before pouring in the filling.
5. Can I make these bars in a smaller pan?
Yes. An 8×8 inch pan gives you thicker bars with a higher filling-to-crust ratio. Reduce the crust ingredients by about a third and increase the bake time for the filling by 3 to 5 minutes. Check for that slight center wobble to judge doneness rather than going strictly by time.
6. Can I add a meringue topping instead of whipped cream?
Absolutely. A classic meringue topping works beautifully here. Whip 3 egg whites with 1/4 cup of sugar until stiff peaks form, spread over the chilled bars, and torch or broil briefly until golden. Add the meringue just before serving since it does not hold well overnight in the fridge.
Go Make These Today
Key Lime Pie Bars give you everything you love about the classic pie, packaged in a format that is easier to make, easier to serve, and honestly just as good to eat. That bright citrus filling, buttery crumbly crust, and cool whipped cream topping hit every note perfectly.
Whether you need a party dessert, a make-ahead treat, or just something really satisfying to pull out of the fridge on a warm afternoon, these bars deliver every single time. They come together with basic ingredients and about 15 minutes of active work. Line that pan, press that crust, whisk that filling, and get it in the oven. The hardest part is genuinely just waiting for them to chill. And trust me, they are completely worth the wait.
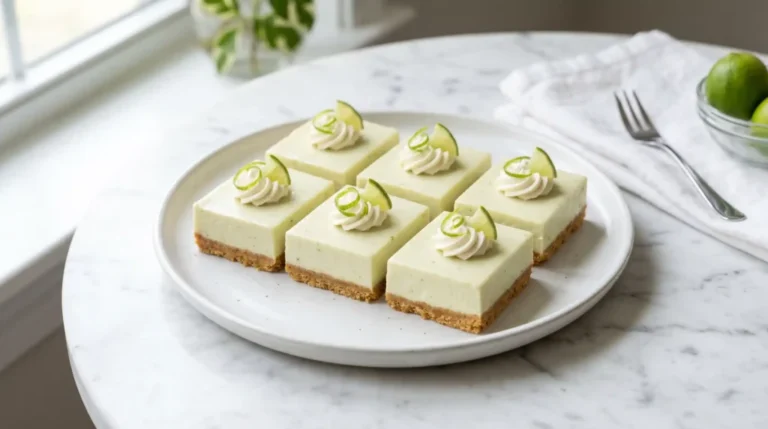
Key Lime Pie Bars
Ingredients
Method
- Preheat the oven to 325°F (165°C) and prepare a 9x13 inch baking pan lined with parchment paper.
- Combine the graham cracker crumbs, sugar, and salt in a bowl. Stir, then add melted butter and mix until crumbly.
- Press the crust mixture into the prepared pan evenly and firmly, then bake for 10 minutes.
- In a mixing bowl, whisk the egg yolks and key lime zest together for 2 minutes.
- Add sweetened condensed milk and whisk until smooth. Slowly add key lime juice while whisking continuously.
- Pour the filling over the cooled crust and spread evenly. Bake for 15 to 18 minutes.
- Let the bars cool to room temperature for at least 45 minutes, then refrigerate for a minimum of 2 hours.
- Whip the heavy cream with powdered sugar and vanilla until firm peaks form.
- Lift the chilled bars from the pan, slice into 16 servings, and top each with whipped cream and garnish as desired.