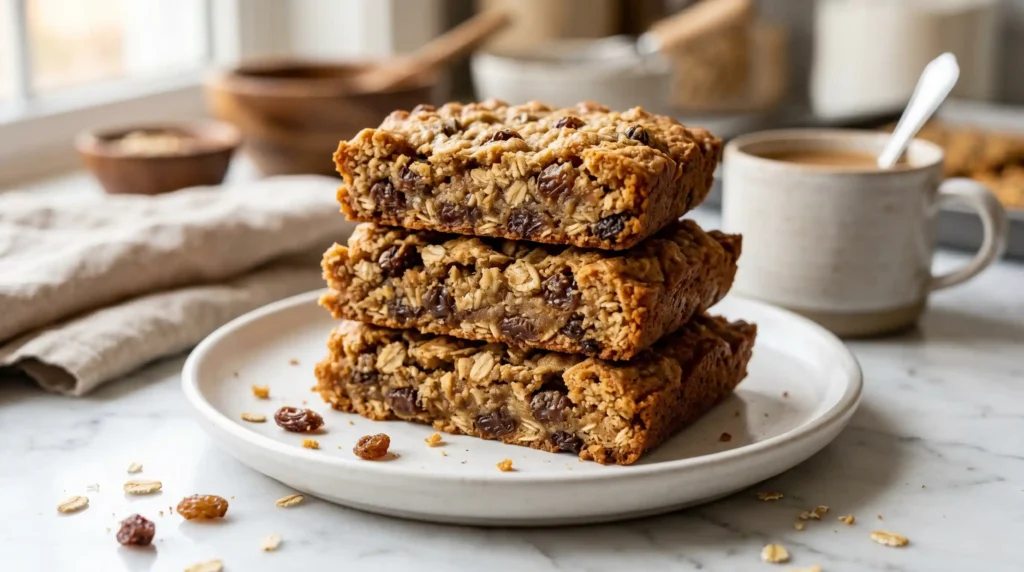
Prep Time: 15 minutes | Bake Time: 25-30 minutes | Servings: 16 bars
Some recipes just feel like home. Oatmeal raisin cookie bars are exactly that. Chewy, golden, packed with plump raisins and warm spices, these bars hit differently than any store-bought cookie ever could. And the best part? You make them in one pan.
I first made these on a rainy Sunday when I had leftover oats and a box of raisins that were about to become a science experiment. The result was so good that my family requested them three weekends in a row. No complaints from me.
If you love the classic oatmeal raisin cookie but want something easier to make and share, this bar version is your answer. Fewer steps, same incredible flavor, and you can cut them into whatever size you want. Fancy that.
What Are Oatmeal Raisin Cookie Bars?
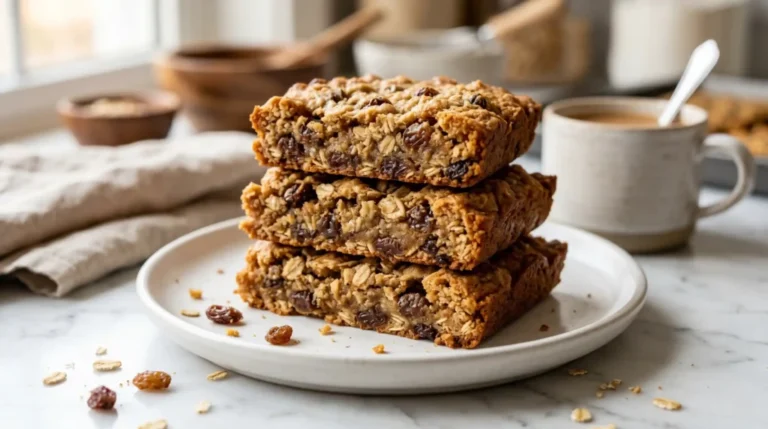
Think of oatmeal raisin cookie bars as everything you love about the classic cookie, but baked in a 9×13 pan instead of dropped individually on a sheet. The texture leans chewy with slightly crisp edges and a soft, gooey center. It is genuinely the best of both worlds.
These bars travel well, slice cleanly, and feed a crowd without you having to scoop out 24 individual cookies. IMO, that alone makes them worth making. You get a warm, spiced, satisfying treat with a fraction of the effort.
The flavor profile hits all the right notes: buttery richness, cinnamon warmth, natural sweetness from the raisins, and that hearty nuttiness from old-fashioned oats. Every bite tastes like someone made them specifically for you.
Ingredients You Need for This Recipe
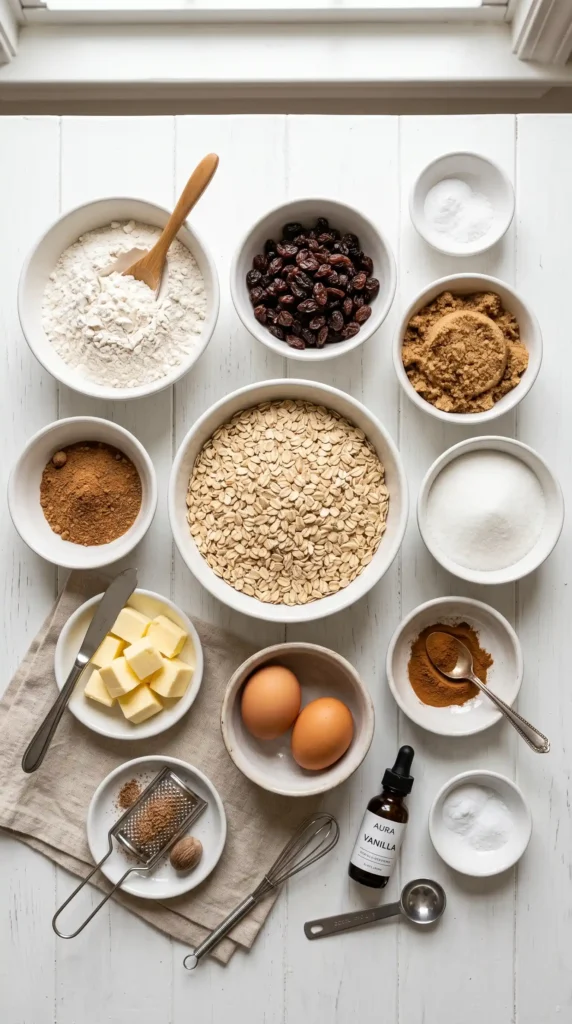
Here is your full ingredient list for 16 bars. Gather everything before you start and you will breeze through the rest:
- 2 cups (180g) old-fashioned rolled oats
- 1 1/2 cups (190g) all-purpose flour
- 1 teaspoon baking soda
- 1 teaspoon ground cinnamon
- 1/2 teaspoon ground nutmeg (optional but recommended)
- 1/2 teaspoon salt
- 1 cup (225g) unsalted butter, softened to room temperature
- 3/4 cup (150g) granulated white sugar
- 3/4 cup (165g) packed light brown sugar
- 2 large eggs, room temperature
- 2 teaspoons pure vanilla extract
- 1 1/2 cups (225g) raisins
FYI, do not swap old-fashioned oats for quick oats here. Quick oats absorb too much moisture and give you a dense, pasty texture instead of those gorgeous chewy bites. Old-fashioned oats are non-negotiable for the best results.
Also, make sure your butter and eggs are at room temperature before you start. Cold butter will not cream properly, and that step is what gives these bars their light, tender texture. Pull everything out about 30 minutes before baking.
Equipment You Will Need
- 9×13 inch baking pan
- Parchment paper or cooking spray
- Stand mixer or hand mixer
- Two large mixing bowls
- Rubber spatula or wooden spoon
- Wire cooling rack
How to Make Oatmeal Raisin Cookie Bars Step by Step
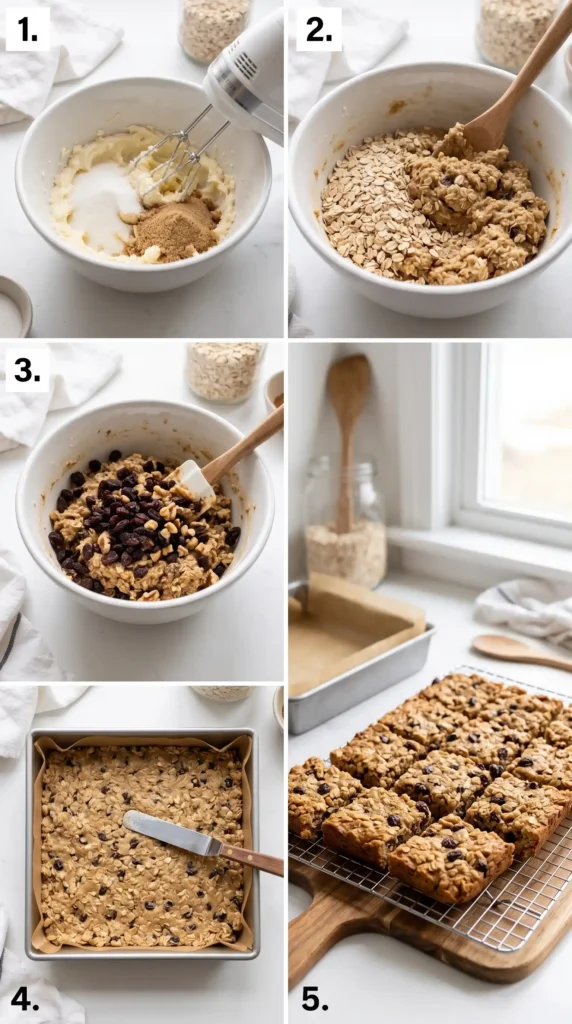
Ready to bake? Let us walk through every single step with as much detail as you need. No guessing, no skipping. Just follow along and you will pull the most perfect oatmeal raisin cookie bars out of your oven in under an hour.
Step 1: Preheat Your Oven and Prepare the Pan
Start by preheating your oven to 350 degrees F (175 degrees C). Give it the full 15 minutes to properly preheat. Sticking a pan into an oven that has not reached temperature is one of the most common reasons bars come out unevenly baked.
While the oven heats up, prepare your 9×13 inch baking pan. Line it with parchment paper, leaving a couple of inches of overhang on both long sides. This creates handles that make lifting the bars out of the pan effortless later. Alternatively, grease the pan thoroughly with butter or cooking spray.
Set the pan aside. Having it ready before your batter is done means you go from mixing bowl to oven without any wasted time. Small habits like this keep the baking process smooth and stress-free.
Step 2: Whisk Your Dry Ingredients
Grab a large bowl and add the 1 1/2 cups of all-purpose flour, 1 teaspoon of baking soda, 1 teaspoon of ground cinnamon, 1/2 teaspoon of nutmeg, and 1/2 teaspoon of salt. Whisk them together until fully combined.
Whisking the dry ingredients separately serves a very real purpose. It distributes the baking soda and spices evenly throughout the flour. If you skip this and dump everything in together, you risk biting into a pocket of pure cinnamon or a section with no leavening at all. Neither is great.
Once mixed, set the bowl to the side. You will come back to it in just a moment. Go ahead and smell it if you want. That cinnamon and nutmeg combination is honestly one of the best scents in baking.
Step 3: Cream the Butter and Sugars
In your stand mixer or a large bowl with a hand mixer, combine 1 cup of softened butter, 3/4 cup of granulated sugar, and 3/4 cup of packed brown sugar. Beat on medium speed for 3 to 4 full minutes.
You want the mixture to look noticeably lighter in color and feel fluffy when you stop the mixer. This creaming process is not just about combining ingredients. It actually beats air into the butter, which helps your bars rise slightly and stay tender. Rushing this step gives you flat, dense bars.
Scrape down the sides of the bowl halfway through with a rubber spatula. Butter likes to cling to the edges and you want every bit incorporated. Take your time here. The mixer is doing all the hard work anyway.
Step 4: Add Eggs and Vanilla
With the mixer on low speed, add 2 large eggs one at a time. Let each egg fully incorporate before adding the next. This gradual addition prevents the batter from curdling and keeps everything emulsified and smooth.
Next, pour in 2 teaspoons of pure vanilla extract and mix for another 30 seconds. The vanilla might seem like a small addition but it rounds out the sweetness and adds a warmth that pulls the whole flavor profile together. Do not skip it or replace it with imitation vanilla if you can help it.
Scrape down the sides again before moving to the next step. At this point your batter should look glossy, smooth, and a little bit irresistible. Resist the urge to eat it all raw. You are almost at the finish line.
Step 5: Add the Dry Ingredients and Oats
With the mixer on its lowest speed, gradually add your flour mixture to the butter mixture. Add it in two or three additions to prevent flour from flying everywhere. Mix only until you no longer see dry streaks of flour. Overmixing activates the gluten and makes your bars tough instead of tender.
Once the flour is just incorporated, add the 2 cups of old-fashioned rolled oats. Fold them in using a rubber spatula rather than the mixer. This keeps the oats whole and intact, which is exactly what you want for that satisfying chewy bite in every bar.
The dough will be thick and a little sticky at this point. That is completely normal and actually a good sign. A thin, runny dough would give you flat, greasy bars. Thick dough means chewy, substantial results.
Step 6: Fold in the Raisins
Now add 1 1/2 cups of raisins and fold them through the dough with your spatula until they are evenly distributed. Make sure you do not have all the raisins clumped in one corner of the bowl. Every bar deserves equal raisin coverage. That is just basic fairness.
If your raisins feel a bit dry or hard, soak them in warm water for 10 minutes before adding them. Drain them thoroughly and pat them dry with a paper towel first. Plump raisins burst with moisture in the finished bar and taste far better than chewy, shriveled ones.
Step 7: Spread Into the Pan and Bake
Transfer your dough into the prepared baking pan. Use a spatula or your slightly dampened hands to spread it out into an even layer. Get it as flat and consistent as you can so every bar bakes at the same rate. Uneven dough means some bars burn while others stay underdone.
Slide the pan into your preheated oven and bake for 25 to 30 minutes. At the 25-minute mark, check on them. The edges should look golden brown and the center should look just set, possibly still slightly glossy. That is your cue to pull them out.
The bars will continue to firm up as they cool, so do not judge doneness entirely by how they look in the pan. If you wait until they look completely firm in the oven, you will overbake them and lose that gorgeous chew. Pull them a tiny bit early and trust the cooling process.
Step 8: Cool and Cut
Let the bars cool in the pan on a wire rack for at least 20 to 30 minutes before cutting. I know the wait is genuinely painful. The smell alone will have you hovering around the kitchen. But cutting too early means the bars fall apart instead of slicing cleanly.
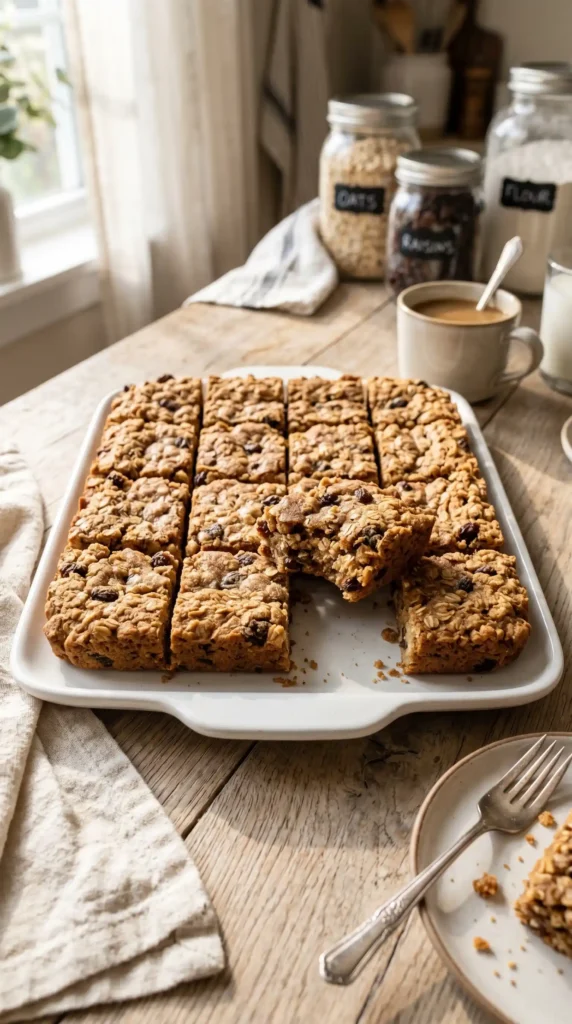
Once cooled, lift the bars out of the pan using your parchment paper handles. Place them on a cutting board and cut into 16 equal bars with a sharp knife. Clean the knife between cuts for the neatest edges. Serve at room temperature and watch them disappear.
Fun Variations to Try
- Chocolate chip addition – swap 1/2 cup of raisins for chocolate chips for a crowd-pleasing twist
- Nuts – fold in 1/2 cup of chopped walnuts or pecans for extra crunch
- Cranberry swap – use dried cranberries instead of raisins for a tart, festive version
- Coconut – add 1/2 cup of shredded sweetened coconut to the dough for extra chew
- Spiced up – add 1/4 teaspoon of ground ginger or cardamom alongside the cinnamon
How to Store Your Oatmeal Raisin Cookie Bars
Store your cooled oatmeal raisin cookie bars in an airtight container at room temperature for up to 5 days. Lay a piece of parchment between layers if stacking to prevent them from sticking together.
These bars also freeze beautifully. Wrap individual bars in plastic wrap and store them in a freezer-safe bag for up to 3 months. Thaw at room temperature for about an hour or pop one in the microwave for 20 seconds for that just-baked warmth.
Tips for the Best Oatmeal Raisin Cookie Bars Every Time
- Room temperature ingredients matter – cold butter and eggs throw off the texture
- Do not overbake – pull them out when the center looks just set
- Use old-fashioned oats only – quick oats make the texture too dense
- Soak dry raisins – plump raisins make every bite more satisfying
- Let them cool fully – patience means clean cuts and better texture
- Line your pan – parchment paper saves you from a sticky disaster
Frequently Asked Questions
Can I use quick oats instead of old-fashioned oats?
You can, but the texture will suffer noticeably. Quick oats are more processed and absorb moisture faster, which leads to a denser, less chewy bar. Old-fashioned rolled oats keep their structure during baking and give you that satisfying bite that makes oatmeal raisin cookie bars so beloved.
Can I make these bars gluten-free?
Yes. Replace the all-purpose flour with a 1:1 gluten-free baking flour blend. Also make sure you use certified gluten-free oats since regular oats can be cross-contaminated during processing. The texture may be slightly different but still very good. Always check your individual ingredient labels to be safe.
Why did my bars come out too dry or crumbly?
Overbaking is the most common culprit. Even 3 to 4 extra minutes in the oven can dry out these bars significantly. Also double-check your measurements, especially the flour. Too much flour makes bars dry and crumbly. Spoon flour into your measuring cup and level it off; never pack it in.
Can I reduce the sugar in this recipe?
You can reduce each sugar by about 2 tablespoons without dramatically affecting the texture. Going much lower than that changes the spread, moisture level, and browning of the bars. The sugars here do more than sweeten; they also affect how the bars bake, so adjust carefully and in small amounts.
How do I know when the bars are done baking?
Look for golden brown edges with a center that appears just set but not wet or jiggly. A toothpick inserted in the center should come out with just a few moist crumbs, not wet batter. Remember the bars continue to firm up as they cool, so err on the side of underdone :).
Can I double this recipe?
Absolutely. Double all the ingredients and use two 9×13 pans rather than trying to crowd everything into one. Two pans placed on separate oven racks will bake evenly. Rotate the pans halfway through baking for the most consistent results across both batches. Great option for bake sales or big gatherings.
Wrapping It Up
These oatmeal raisin cookie bars really do deliver on every level. Chewy texture, warm spice, sweet raisins, buttery richness, and the kind of simplicity that makes baking feel genuinely fun instead of stressful. One bowl, one pan, and about 45 minutes from start to finish.
Whether you make them for a weekend treat, a potluck, a lunchbox, or simply because you deserve something good, this recipe will not let you down. It is the kind of recipe you make once and immediately add to your regular rotation. Go preheat that oven. Your kitchen is about to smell incredible and your future self will absolutely thank you for it.
Oatmeal Raisin Cookie Bars
Ingredients
Method
- Preheat your oven to 350°F (175°C) for 15 minutes and prepare a 9x13 inch baking pan by lining it with parchment paper or greasing it.
- In a large bowl, whisk together the flour, baking soda, cinnamon, nutmeg, and salt until well combined.
- In a stand mixer, cream the softened butter, granulated sugar, and brown sugar on medium speed for 3-4 minutes until light and fluffy.
- Add eggs one at a time, mixing well after each addition. Then, mix in the vanilla extract.
- Gradually add the flour mixture to the butter mixture until just combined. Do not overmix.
- Fold in the oats and raisins until evenly mixed.
- Spread the mixture evenly in the prepared pan and bake for 25-30 minutes, or until the edges are golden and the center is just set.
- Let cool for at least 20-30 minutes before cutting.



