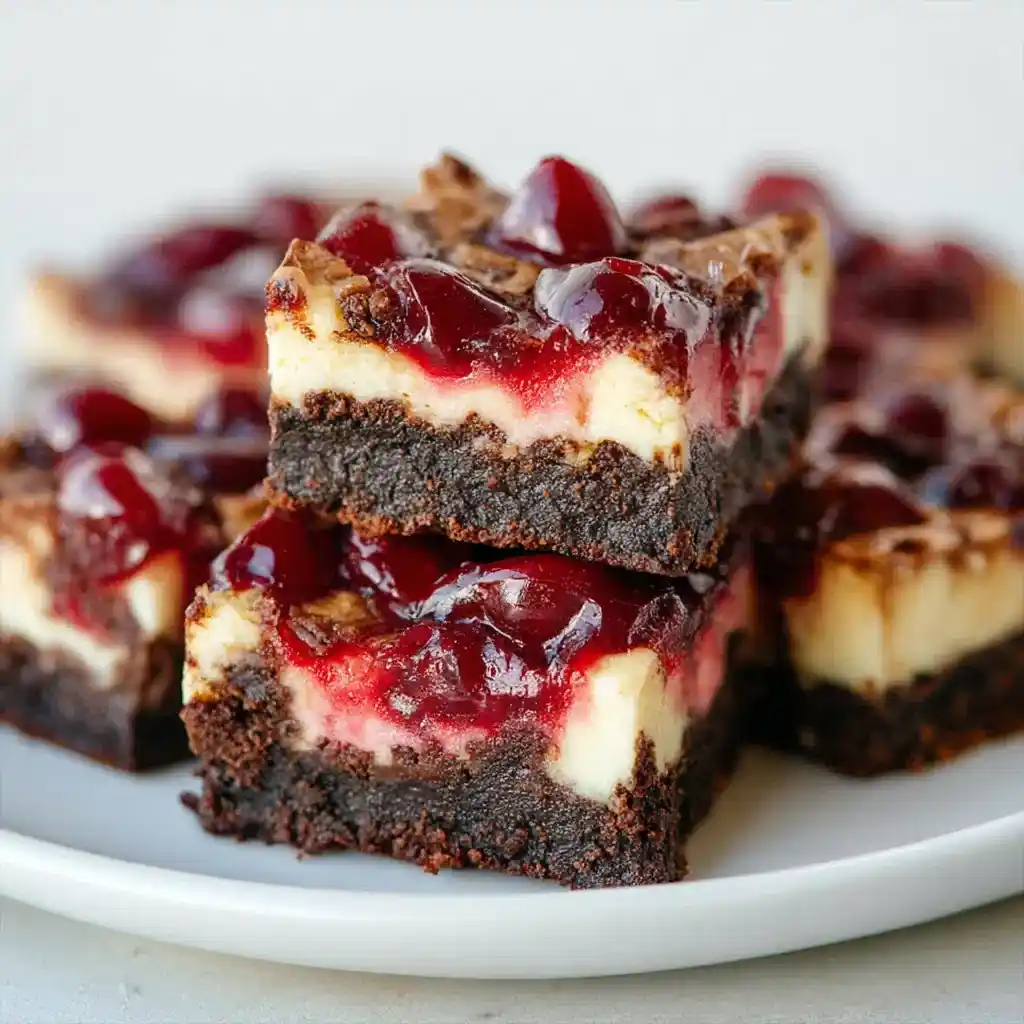
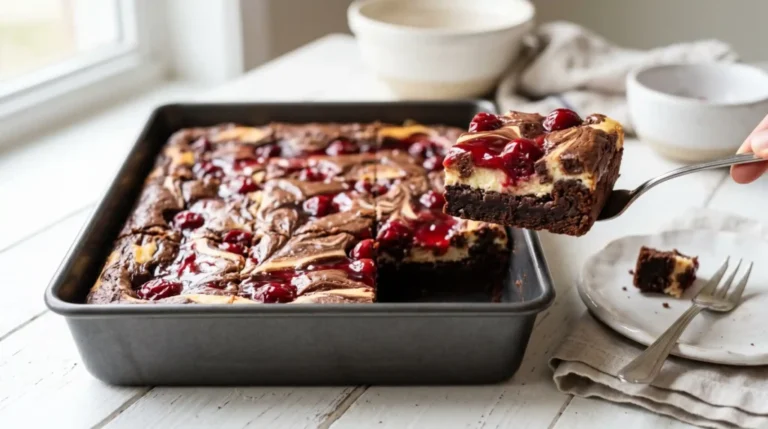
If you’ve never made Cherry Cheesecake Brownies, you’re seriously missing out. These beauties combine three legendary desserts into one pan. Rich fudgy brownies, creamy cheesecake, and sweet cherry filling — all stacked together. Buckle up, because this recipe is about to become your new obsession.
Servings: 16 brownies Prep Time: 20 minutes Bake Time: 45–50 minutes Total Time: About 1 hour 10 minutes (plus cooling)
Why Cherry Cheesecake Brownies Are Worth Every Calorie
Honestly, I made these for the first time on a rainy Sunday. I had leftover cream cheese and a can of cherry pie filling just sitting there. Fast-forward 90 minutes, and my family had devoured the entire pan. No regrets whatsoever.
These Cherry Cheesecake Brownies hit every note — chocolatey, tangy, fruity, and dense. They look fancy but take zero pastry skills. IMO, this is the dessert you bring when you want people to think you’re a kitchen wizard.
Ingredients You’ll Need
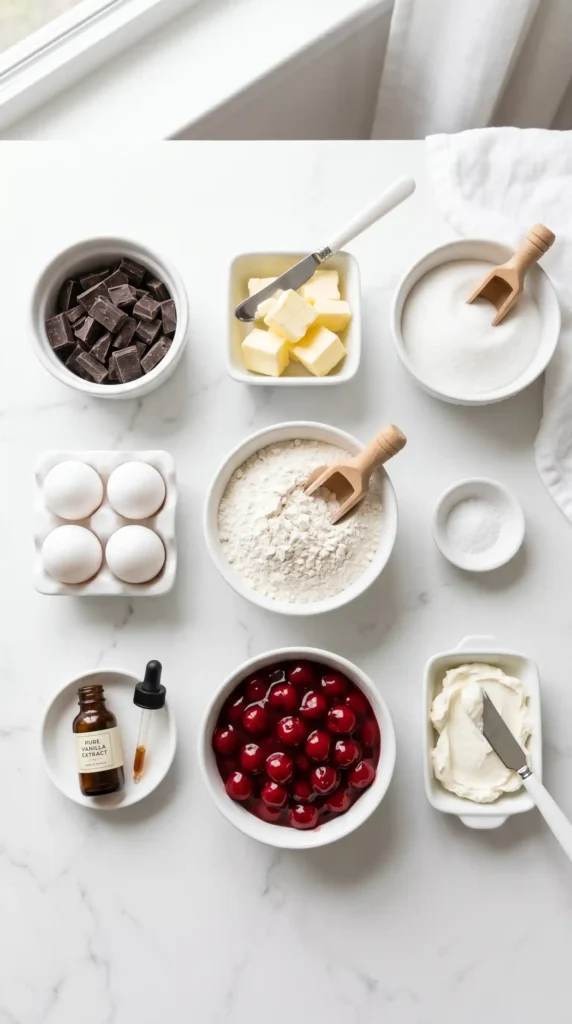
Cheesecake Topping
- 2 (8 oz) packages cream cheese, softened
- 1/2 cup granulated sugar
- 1 large egg
- 1/2 teaspoon vanilla extract
Brownie Layer
- 1 cup butter
- 6 ounces unsweetened chocolate
- 2 cups granulated sugar
- 1 teaspoon vanilla extract
- 1 teaspoon salt
- 4 large eggs
- 1 1/4 cups all-purpose flour
- 1 (21 oz) can cherry pie filling
Equipment You’ll Need
Before we get started, gather what you need. Nothing worse than realizing mid-bake that your pan is dirty. Here’s what to grab:
- 9×13-inch baking pan
- Large saucepan or microwave-safe bowl
- Two mixing bowls
- Electric hand mixer or stand mixer
- Rubber spatula
- Toothpick (for checking doneness)
How to Make Cherry Cheesecake Brownies
Step 1: Prep Your Oven and Pan
Preheat your oven to 350°F (175°C). This step matters more than people think. A fully preheated oven ensures even baking from the very first minute.
Grease your 9×13-inch baking pan generously with butter or non-stick spray. You can also line it with parchment paper, leaving some overhang on the sides. That overhang trick makes lifting the brownies out so much easier later.
Step 2: Melt the Chocolate and Butter
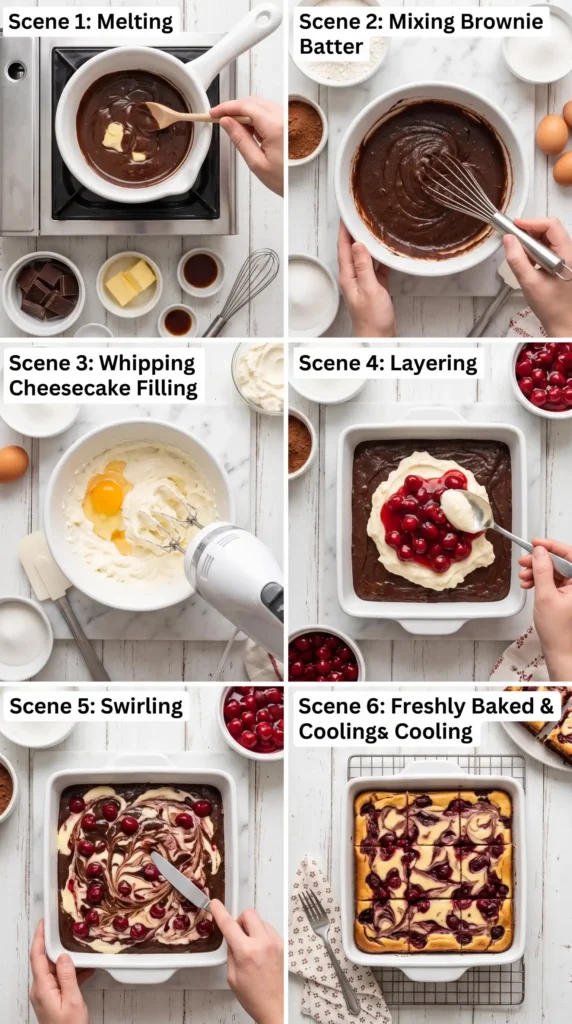
In a large saucepan over low heat, melt the 1 cup of butter and 6 ounces of unsweetened chocolate together. Stir constantly and keep the heat low — you don’t want the chocolate to scorch or seize up. This is not the step to walk away from.
Once it’s fully melted and smooth, remove the pan from the heat. Let it cool for about 5 minutes before adding eggs. Adding eggs too soon will scramble them. Ask me how I know.
Step 3: Build the Brownie Batter
To the cooled chocolate mixture, add 2 cups of granulated sugar, 1 teaspoon of vanilla extract, and 1 teaspoon of salt. Stir everything together vigorously until the sugar is mostly incorporated and the mixture looks glossy.
Now crack in the 4 large eggs, one at a time. Stir well after each egg. This method gives your brownies that beautiful shiny top crust. After all eggs are in, mix until the batter looks thick, smooth, and uniform.
Step 4: Add the Flour
Gently fold in the 1 1/4 cups of all-purpose flour. Use a rubber spatula and fold — not beat — the flour in. Overmixing at this stage activates too much gluten, which makes brownies tough and cakey instead of fudgy.
Stop mixing the moment you no longer see dry flour streaks. The batter will be thick and rich-looking. Reserve about 1 cup of brownie batter in a separate small bowl for later — you’ll need it for the swirl on top.
Step 5: Make the Cheesecake Layer
In a clean mixing bowl, beat together the 2 packages of softened cream cheese and 1/2 cup of granulated sugar using a hand mixer on medium speed. Beat until the mixture is completely smooth and fluffy, about 2 minutes.
Add the 1 large egg and 1/2 teaspoon of vanilla extract to the cream cheese mixture. Beat again until everything is fully combined. Scrape down the sides of the bowl to make sure no lumps are hiding. The mixture should be silky and spreadable.
Step 6: Layer Everything Together
Pour the main brownie batter into your prepared pan and spread it evenly with your spatula. This is your base layer. Take your time here — an even base means every slice gets the right brownie-to-topping ratio. That matters, FYI.
Next, spoon the cheesecake mixture over the brownie layer. Use your spatula to spread it gently and evenly. Don’t press hard — you just want it to sit nicely on top without disturbing the brownie batter beneath.
Step 7: Add the Cherry Pie Filling
Spoon the entire 21 oz can of cherry pie filling over the cheesecake layer. Distribute it as evenly as you can. The cherries add beautiful color contrast and a sweet-tart burst of flavor in every single bite. Don’t skip this — it’s the whole point of the recipe.
Try to spread the cherries right to the edges of the pan. You want that gorgeous cherry layer in every corner, not just the middle. Every slice deserves full cherry coverage.
Step 8: Create the Brownie Swirl
Take the reserved cup of brownie batter and drop spoonfuls of it on top of the cherry layer. Once all the batter is dropped, take a butter knife or skewer and drag it through the layers in long, sweeping S-shaped strokes. Go across the pan horizontally, then vertically.
This creates the stunning marbled swirl effect that makes Cherry Cheesecake Brownies look absolutely gorgeous. Don’t over-swirl, though. About 6–8 passes with the knife is plenty. Over-swirling mixes the layers too much and loses the visual effect.
Step 9: Bake to Perfection
Place the pan in your preheated oven on the center rack. Bake for 45 to 50 minutes. At around the 40-minute mark, start checking on them. The cheesecake layer should look set and slightly golden at the edges.
Insert a toothpick into the brownie section (not the cheesecake part). It should come out with moist crumbs but not wet batter. If it still looks gooey, give it another 5 minutes and test again. Every oven runs a little differently.
Step 10: Cool Completely Before Cutting
This step is where most people go wrong. Pull the brownies from the oven and let them cool in the pan at room temperature for at least 1 hour. Then move the pan to the fridge for another 1 to 2 hours before slicing.
Cold brownies cut cleanly and hold their layers beautifully. Cutting warm Cherry Cheesecake Brownies results in a delicious but messy collapse. The wait is absolutely worth it. (Patience is hard, but trust the process.)
Tips for the Best Results
- Use room temperature cream cheese. Cold cream cheese creates lumps that don’t blend out easily.
- Don’t overbake. The cheesecake layer firms up as it cools, not while it’s baking.
- Use quality chocolate. Since chocolate is the backbone of the brownie layer, good chocolate makes a noticeable difference.
- Chill before slicing. Always refrigerate fully before cutting for clean, picture-perfect slices.
- Store covered in the fridge. These keep well for up to 5 days in the refrigerator.
How to Store Cherry Cheesecake Brownies
Because of the cream cheese layer, these brownies need refrigeration. Store them in an airtight container in the fridge for up to 5 days. Let them sit at room temperature for about 10 minutes before serving for the best texture.
You can also freeze them. Wrap individual slices tightly in plastic wrap, then place in a freezer-safe bag. They freeze beautifully for up to 2 months. Thaw overnight in the fridge when ready to enjoy.
Why This Recipe Works So Well
Have you ever wondered why layered bar desserts are so universally loved? It’s the contrast. Each bite of these Cherry Cheesecake Brownies delivers three distinct textures and flavors working together in harmony.
The dense, fudgy brownie anchors everything. The tangy cheesecake adds creaminess and richness. The cherry filling brings brightness and a little tartness that cuts through all that decadence. It’s a complete dessert experience in a single square.
Variations to Try
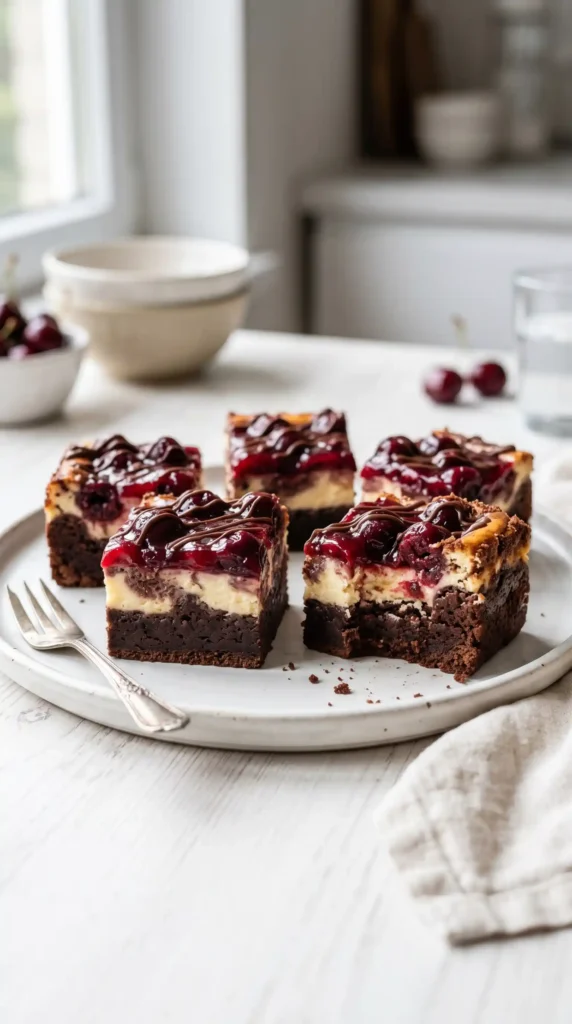
Once you’ve mastered the original recipe, you can start playing around. Here are a few twists worth trying:
- Strawberry version: Swap cherry pie filling for strawberry pie filling.
- Blueberry version: Use blueberry filling for a slightly more tart flavor profile.
- Extra chocolate: Add a handful of chocolate chips to the brownie batter for double chocolate depth.
- Nutty crunch: Sprinkle chopped pecans or walnuts over the top before baking.
- Oreo base: Press crushed Oreos into the bottom of the pan before adding the brownie batter.
Frequently Asked Questions
Q1: Can I use a boxed brownie mix instead of making brownies from scratch? Yes, absolutely. A box mix works just fine and saves time. Prepare it according to package directions, then layer the cheesecake and cherry filling on top as instructed. The result will still be delicious and impressive.
Q2: Do Cherry Cheesecake Brownies need to be refrigerated? Yes, they do. Because the cheesecake layer contains cream cheese and eggs, these brownies must be stored in the refrigerator. Keep them covered in an airtight container and they’ll stay fresh for up to 5 days.
Q3: Can I use fresh cherries instead of canned cherry pie filling? You can, but you’ll need to cook them down first. Combine fresh pitted cherries with sugar and a little cornstarch in a saucepan over medium heat until thickened. The result is similar but a bit more tart and less sweet than the canned version.
Q4: Why did my cheesecake layer crack? Cracking usually happens from overbaking or cooling too quickly. Make sure you don’t overbake and let the brownies cool gradually at room temperature before refrigerating. Cracks don’t affect flavor at all — and the cherry topping covers most of them anyway.
Q5: Can I make Cherry Cheesecake Brownies ahead of time? Absolutely — and they actually taste better the next day. The layers set more firmly overnight in the fridge. Making them a day ahead is a smart move if you’re bringing them to a party or event.
Final Thoughts
Cherry Cheesecake Brownies are everything a dessert should be — easy enough for a weeknight but impressive enough for a dinner party. They look beautiful, taste extraordinary, and feed a crowd of 16 happily.
Once you make these, plain brownies will feel a little boring by comparison. That’s the honest truth. Give this recipe a try this weekend and let the layers work their magic. You won’t regret a single bite.
Cherry Cheesecake Brownies
Ingredients
Method
- Preheat your oven to 350°F (175°C) and grease a 9x13-inch baking pan.
- In a saucepan, melt the butter and chocolate over low heat, then cool for 5 minutes.
- In a mixing bowl, combine sugar, vanilla, salt, and the melted chocolate mixture; mix well.
- Add eggs one at a time, mixing until smooth, then fold in flour gently.
- Reserve 1 cup of brownie batter for the swirl.
- In a clean bowl, beat cream cheese and sugar until smooth; add egg and vanilla and mix until combined.
- Spread brownie batter evenly in the prepared pan.
- Layer the cheesecake mixture over the brownie base and spread evenly.
- Add cherry pie filling evenly on top of the cheesecake layer.
- Drop spoonfuls of reserved brownie batter on top and swirl with a knife.
- Bake for 45-50 minutes, checking for doneness with a toothpick.
- Remove from oven and let cool for at least 1 hour at room temperature, then refrigerate for 1-2 hours before slicing.



