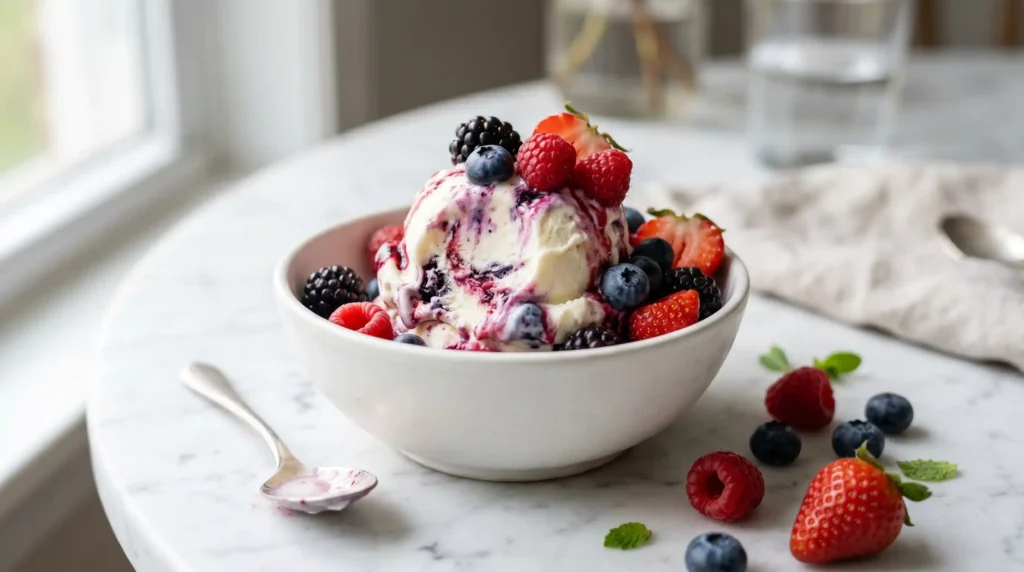
Prep Time: 10 minutes | Freeze Time: 4-6 hours | Servings: 6
Store-bought ice cream is fine. But have you ever made something cold, creamy, and full of real fruit flavor in your own kitchen? This yogurt ice cream recipe with mixed berries takes about 10 minutes of actual effort and delivers a frozen dessert that feels genuinely indulgent.
I first made this on a summer evening when my freezer held zero actual ice cream and I refused to make a grocery run. Greek yogurt, a bag of frozen berries, honey, and a blender. That was it. The result completely surprised me and has been in my regular rotation ever since.
If you want something lighter than traditional ice cream but still satisfying and full of flavor, you just landed in the right place. This recipe skips the heavy cream, skips the ice cream machine, and still gives you a scoopable, vibrant frozen dessert every single time.
What Is Yogurt Ice Cream With Mixed Berries?
This is a no-churn frozen dessert made primarily from Greek yogurt and mixed berries. The yogurt base gives it a tangy creaminess that actually works better here than plain dairy cream. The berries bring natural sweetness, beautiful color, and a bright flavor that cuts right through the richness.
Unlike traditional ice cream which relies on heavy cream and a custard base, this yogurt ice cream recipe with mixed berries stays lighter in texture and calories without sacrificing that satisfying creaminess you want from a frozen dessert. It is also much easier to make at home.
The final texture lands somewhere between a sorbet and a classic ice cream. It scoops well when slightly thawed, has a slightly denser bite than regular ice cream, and tastes intensely of real berries. IMO, that berry flavor punch is what keeps people coming back for second bowls.
Why Greek Yogurt Works Best in This Recipe
Not all yogurt is equal here. Regular yogurt contains significantly more water, which means your ice cream will freeze into an icy, grainy block rather than a creamy, scoopable texture. Full-fat Greek yogurt is thick, protein-rich, and has enough fat to mimic the creaminess of a proper frozen dessert.
The tanginess of Greek yogurt also plays a starring role. It balances the sweetness of the berries and honey beautifully, giving you a more complex, interesting flavor than something made purely sweet. That tang is a feature, not a flaw. Do not try to hide it.
If you only have low-fat Greek yogurt, it will still work but the texture will be slightly icier. Full-fat is genuinely worth it here. The difference in the final scoop is noticeable and worth the small extra cost.
Ingredients You Need-Yogurt Ice Cream Recipe With Mixed Berries
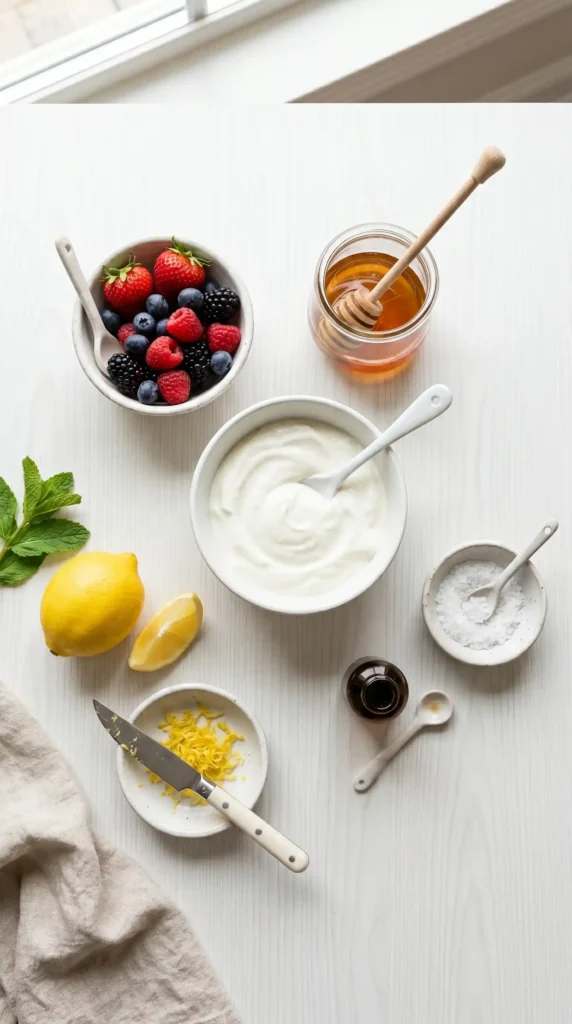
Here is everything you need to make 6 generous servings of yogurt ice cream with mixed berries. Simple list, every item pulls its weight:
- 2 cups (480g) full-fat Greek yogurt
- 2 cups (300g) mixed berries, fresh or frozen (strawberries, blueberries, raspberries, blackberries)
- 3 tablespoons (60g) honey or pure maple syrup, plus more to taste
- 1 teaspoon pure vanilla extract
- 1 tablespoon fresh lemon juice
- Pinch of salt
FYI, frozen berries work just as well as fresh here and are often more economical. If you use frozen, there is no need to thaw them before blending. They actually help the mixture get colder faster and can improve the final frozen texture.
The lemon juice is not just for flavor. The acidity brightens the entire berry flavor and prevents any dullness in the finished ice cream. A squeeze of lemon does more for frozen desserts than most people realize. Do not skip it even if it seems like a tiny detail.
Equipment You Will Need
- A high-powered blender or food processor
- A freezer-safe container with a lid (loaf pan works perfectly)
- Plastic wrap or parchment paper
- An ice cream scoop
- A spatula for scraping the blender
No ice cream machine needed. That is the beauty of this recipe. A good blender handles all the work. If your blender is on the weaker side, let the frozen berries thaw for 5 minutes before blending to make things easier on the motor.
How to Make Yogurt Ice Cream With Mixed Berries Step by Step
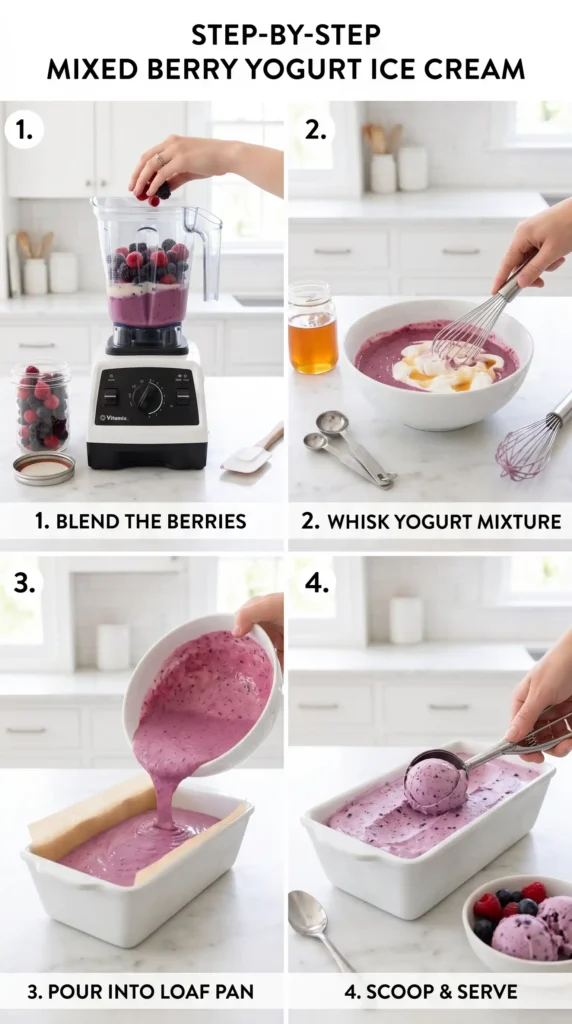
Let us walk through every step in detail. This yogurt ice cream recipe with mixed berries is genuinely straightforward, but the little details at each stage make a real difference in your final texture and flavor. Follow along and you will not be disappointed.
Step 1: Prepare Your Berries
If you are using fresh berries, rinse them under cold water and pat them dry thoroughly with paper towels. Any excess water on your berries dilutes the flavor and adds unnecessary ice crystals to your finished ice cream. Dry berries mean purer, more concentrated flavor in every scoop.
For a mix that works beautifully, combine strawberries, blueberries, raspberries, and blackberries in roughly equal parts. Each berry brings something slightly different. Strawberries add sweetness and body, blueberries add depth and color, raspberries bring tartness, and blackberries contribute a bold, slightly earthy note.
If you are using frozen berries straight from the bag, measure out 2 cups and add them directly to the blender. No prep needed. Frozen berries actually give you a slightly smoother blend because they break down more evenly under the blender blades compared to fresh ones.
Step 2: Blend the Berry Base
Add all your berries to the blender along with 1 tablespoon of fresh lemon juice and a pinch of salt. Blend on high speed for about 30 to 45 seconds until you have a smooth, deeply colored berry puree. Stop and scrape down the sides once if needed.
At this point you have options. If you want a completely smooth ice cream with no berry seeds, pour the puree through a fine mesh strainer and press it through with the back of a spoon. This takes an extra 2 minutes but gives you a silky, seed-free result.
If you do not mind a little texture or enjoy the seeds, skip the straining step entirely. The seeds add a tiny bit of crunch that some people genuinely love in their frozen desserts. Either way, your berry base should look vibrant and smell incredible at this point.
Step 3: Add the Yogurt and Sweetener
Add the 2 cups of full-fat Greek yogurt, 3 tablespoons of honey (or maple syrup), and 1 teaspoon of vanilla extract to the blender with the berry puree. Blend on medium speed for about 20 to 30 seconds until everything combines into a smooth, uniform mixture.
Stop the blender and taste the mixture. Does it need more sweetness? Add another tablespoon of honey and blend again briefly. Prefer more tartness? Squeeze in a little extra lemon juice. This is your moment to personalize the flavor before everything goes into the freezer and adjusting becomes much harder.
The blended mixture should look thick and creamy with a gorgeous deep purple-pink color from the berries. It will smell like a fresh berry smoothie with a hint of vanilla. If it smells good now, it is going to taste even better frozen. That is just a fact.
Step 4: Pour Into Your Freezer Container
Choose a loaf pan, a shallow baking dish, or any freezer-safe container with a lid. Line it with plastic wrap or parchment paper, leaving enough overhang to cover the top surface. This prevents ice crystals from forming directly on the top layer during freezing.
Pour the blended yogurt mixture into the container and use a spatula to smooth the top into an even layer. Tap the container gently on the counter a few times to release any air bubbles trapped in the mixture. Flat, even layers freeze more consistently than uneven ones.
Fold the plastic wrap or parchment paper over the top surface, pressing it lightly against the mixture. This direct contact wrap technique blocks air from reaching the surface, which is the main cause of freezer burn and icy, crystalline textures in homemade frozen desserts.
Step 5: Freeze for at Least 4 to 6 Hours
Place your container in the coldest part of your freezer, which is usually the back or the bottom shelf. Let it freeze for a minimum of 4 hours, but overnight is even better if you have the time. The longer it freezes, the more solidly it sets and the easier it is to scoop.
Resist the urge to check on it every hour. Opening and closing the freezer repeatedly causes temperature fluctuations that can create ice crystals in your ice cream. Set a timer, walk away, and let your freezer do its thing. Patience here is genuinely rewarded.
Step 6: Thaw Slightly Before Scooping
When you are ready to serve, pull the container out of the freezer and let it sit at room temperature for 5 to 8 minutes. This brief thaw softens the outer layer just enough to make clean scooping possible without cracking your scoop or fighting the container.
Run your ice cream scoop under warm water before each scoop for the smoothest, most professional-looking results. Warm metal glides through the frozen yogurt much more cleanly than a cold dry scoop. Serve immediately in bowls or cones and add fresh berries on top if you want a visual pop.
Flavor Variations Worth Trying
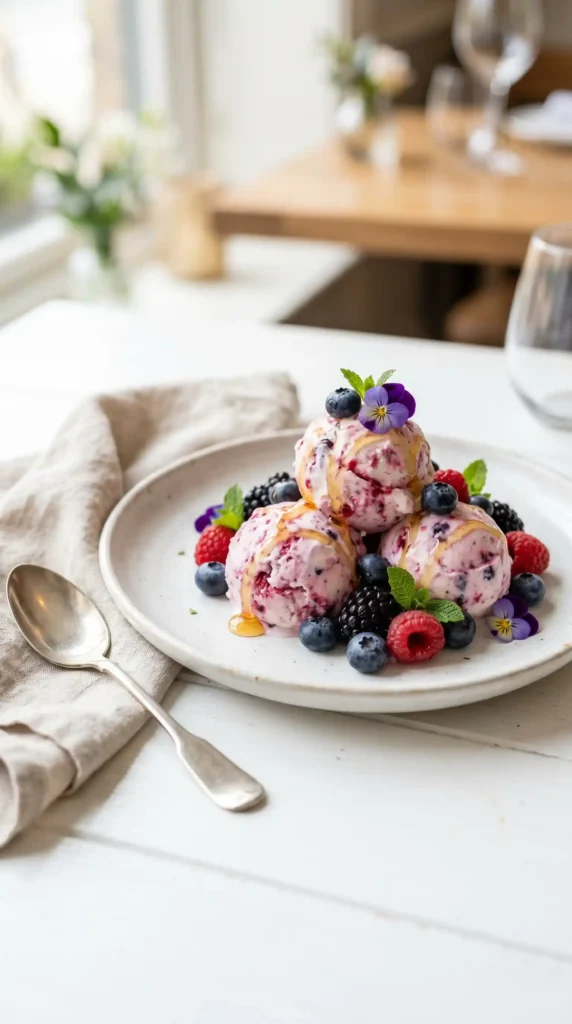
- Mango berry blend – replace half the berries with frozen mango chunks for a tropical twist
- Honey lavender – add 1/2 teaspoon of dried culinary lavender to the blend for a floral note
- Chocolate swirl – drizzle 2 tablespoons of melted dark chocolate into the container before freezing
- Coconut yogurt version – use coconut-flavored Greek yogurt for a dairy-light tropical variation
- Peach and berry – add 1 ripe peach to the blender with the berries for a summery stone-fruit version
Storage Tips
Store your yogurt ice cream with mixed berries covered tightly in the freezer for up to 2 weeks. After that, the texture starts to suffer and ice crystals develop more noticeably. For best results, always keep the surface covered with plastic wrap pressed directly onto the ice cream.
If the ice cream freezes rock solid after several days, let it thaw on the counter for 10 minutes before scooping. The texture may change slightly over time but the flavor stays bright and delicious throughout the full storage window.
Tips for the Best Results Every Time
- Use full-fat Greek yogurt – it delivers the creamiest texture
- Taste before freezing – you cannot adjust sweetness once it is frozen
- Cover the surface directly – prevents ice crystals and freezer burn
- Let it thaw briefly – 5 to 8 minutes makes scooping easy
- Strain the berries – optional but gives you a silkier texture
- Freeze overnight for best texture – a full freeze beats a short one every time
Frequently Asked Questions
Can I use regular yogurt instead of Greek yogurt?
Regular yogurt contains much more water than Greek yogurt, which causes your ice cream to freeze into an icy, grainy texture rather than something creamy and scoopable. If Greek yogurt is not available, strain regular yogurt through a cheesecloth for 2 hours in the fridge to remove excess liquid before using.
Do I need an ice cream machine for this recipe?
No. This yogurt ice cream recipe with mixed berries requires only a blender and a freezer. No ice cream machine, no churning, no special equipment. That is one of the main reasons it is such a practical and approachable homemade dessert option for most home cooks.
Can I use a single type of berry instead of a mix?
Absolutely. All strawberry, all raspberry, or all blueberry versions all work beautifully. The flavor will be more singular and pronounced rather than layered. Raspberry-only gives you the most intensely tart result, while strawberry-only delivers the sweetest, most crowd-pleasing version. Use whatever you have available.
Why is my yogurt ice cream too icy and hard to scoop?
This usually means it either froze too long without a thaw or it contains too much water. Always let it sit at room temperature for 5 to 8 minutes before scooping. If the problem persists, add 1 tablespoon of vodka to the mixture before freezing next time. The alcohol prevents over-hardening without affecting flavor :/.
Is this recipe suitable for people who are lactose intolerant?
Greek yogurt contains less lactose than regular dairy products because the straining process removes much of the lactose-containing whey. Many people with mild lactose sensitivity tolerate it well. For complete lactose avoidance, use a plant-based Greek-style yogurt made from coconut or almond milk and the recipe works just as well.
Can I add mix-ins like chocolate chips or granola?
Yes. Stir mix-ins into the blended mixture right before pouring it into the freezer container rather than blending them. This keeps them whole and distributed evenly. Chocolate chips, crushed graham crackers, chopped nuts, and granola all work well. Add about 1/4 cup of any mix-in per batch and fold gently.
Final Thoughts
This yogurt ice cream recipe with mixed berries is one of those rare recipes that checks every box. Easy, fast, wholesome, and genuinely delicious. Ten minutes of preparation, a few hours in the freezer, and you have a homemade frozen dessert that beats the store-bought version on every level.
The flavor is bold and real because it comes from actual fruit. The texture is creamy because you used the right yogurt. And the whole thing took almost no effort. You can make this on a weeknight and still feel like you did something a little impressive. That is a good deal. Put this recipe on your regular summer rotation. Or your winter rotation, honestly. A bowl of bright, berry-packed yogurt ice cream hits the spot any time of year. Go make it and see what all the fuss is about
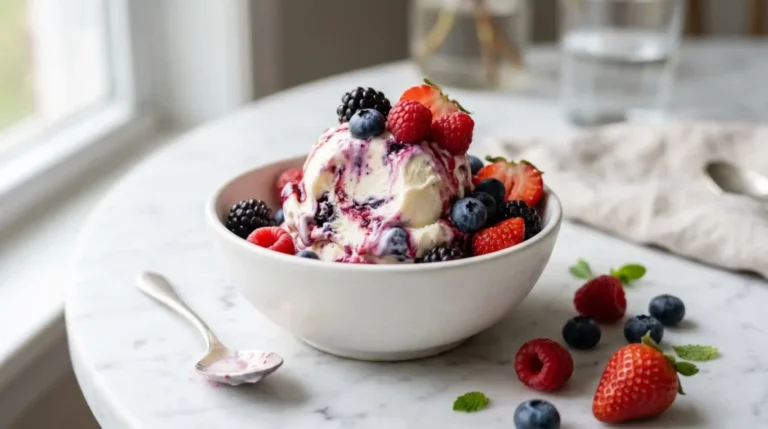
Yogurt Ice Cream with Mixed Berries
Ingredients
Method
- If using fresh berries, rinse and pat dry thoroughly.
- Combine all berries in a blender with lemon juice and salt. Blend until smooth.
- Optionally, strain the berry mixture for a seedless puree.
- Add yogurt, honey, and vanilla to the berry puree in the blender. Blend until smooth.
- Taste the mixture and adjust sweetness or tartness if needed.
- Pour the mixture into a lined freezer-safe container and smooth the top.
- Cover tightly with plastic wrap or parchment paper.
- Freeze for at least 4 to 6 hours, preferably overnight.
- Let ice cream sit at room temperature for 5 to 8 minutes before scooping.
- Run the scoop under warm water for easier serving.