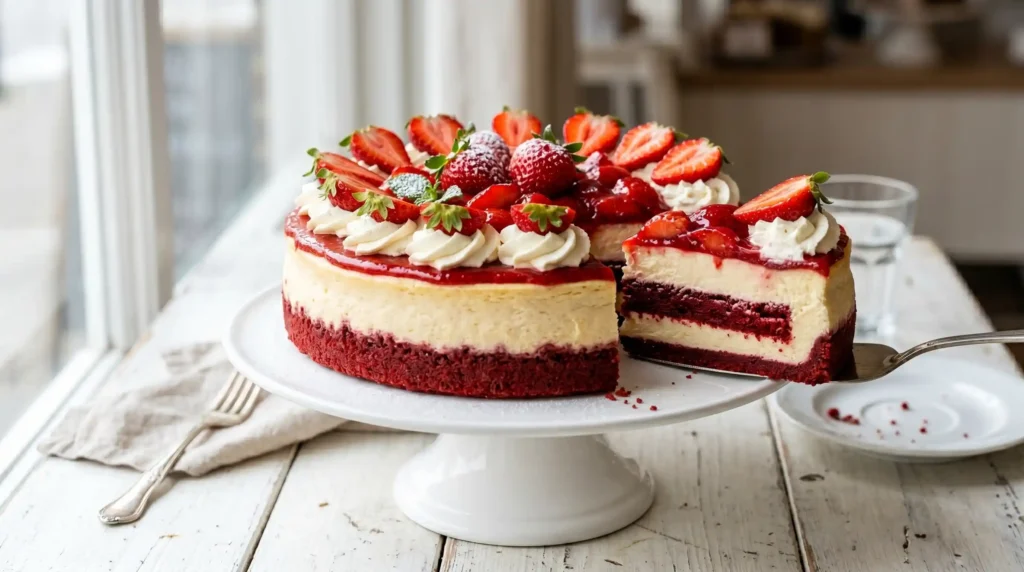
Prep Time: 30 minutes | Chill Time: 6-8 hours (or overnight) | Servings: 10-12 slices
Some desserts just make people stop mid-conversation and stare. Red Velvet Strawberry Cheesecake is exactly that kind of dessert. It’s dramatic, it’s gorgeous, and the moment you slice into it, the room goes quiet.
I made this for the first time at a birthday dinner. The reaction was somewhere between shock and genuine disbelief that I’d made it at home. Honestly? That reaction alone makes every minute of prep time worth it.
What makes this recipe so special isn’t just the looks — it’s the flavor combination. You get the subtle cocoa depth of red velvet, the rich tang of cream cheese filling, and the bright freshness of strawberries all in one slice. Is that not the most perfect dessert combination ever?
Why Red Velvet Strawberry Cheesecake Is Worth Every Step
Let’s be real — cheesecake takes patience. You won’t have this ready in 30 minutes. But the payoff is completely worth it, and most of the work is just waiting for it to chill.
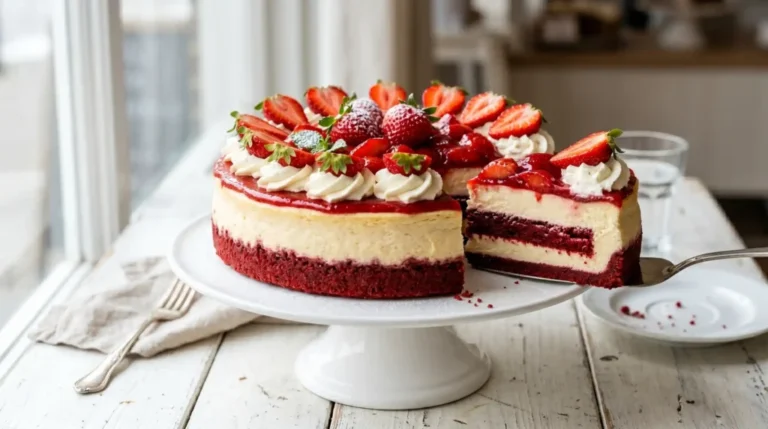
The red velvet base adds a dramatic visual layer that turns a regular cheesecake into something that looks bakery-level professional. And the strawberry topping brings freshness and color that cuts through the richness of the cream cheese filling perfectly.
IMO, the best part is how the three layers balance each other. The chocolate-hinted crust, the dense creamy filling, and the fresh fruit topping each pull their own weight. Nothing overpowers anything else.
What Makes Each Layer Special
- Red velvet crust — subtle cocoa flavor with a gorgeous deep crimson color that holds its shape perfectly when sliced
- Cream cheese filling — rich, dense, and slightly tangy with a smooth texture that contrasts the firmer crust
- Strawberry topping — bright, fresh, and slightly tart, cutting through the richness of the cream cheese layer
- Whipped cream border — optional but adds visual drama and a light creamy texture to each slice
Ingredients for Red Velvet Strawberry Cheesecake
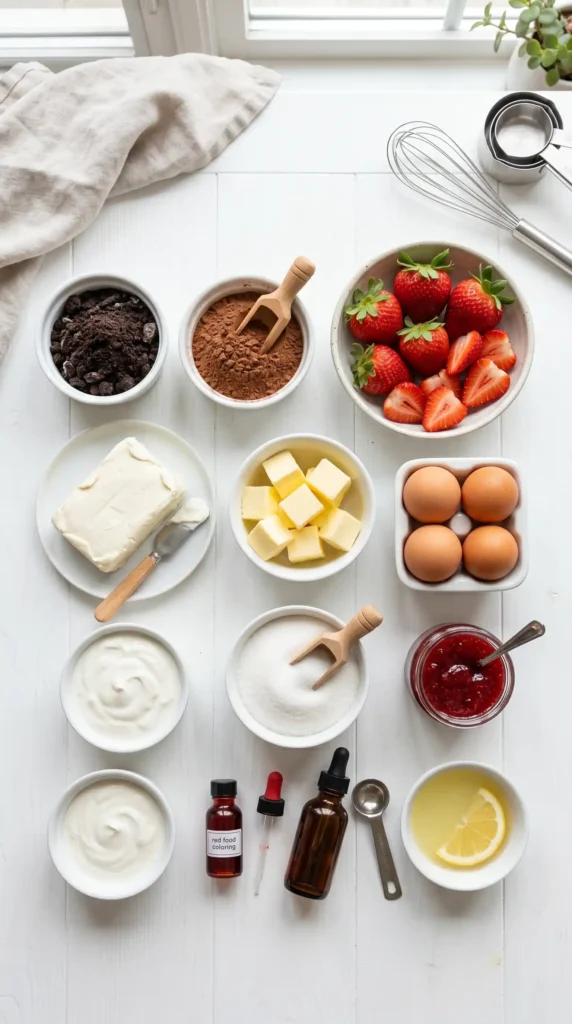
This recipe has three components: the crust, the filling, and the topping. Let’s break them all down clearly so you know exactly what to gather before you start.
For the Red Velvet Crust
- 2 cups Oreo cookie crumbs (about 20-22 Oreo cookies, finely crushed, filling included)
- 2 tablespoons unsweetened cocoa powder
- 1 tablespoon red food coloring (gel food coloring works best for a vivid color)
- 5 tablespoons unsalted butter, melted
- 2 tablespoons granulated sugar
For the Cream Cheese Filling
- 3 packages (8 oz each) full-fat cream cheese, softened to room temperature
- 1 cup granulated sugar
- 3 large eggs, at room temperature
- 1/2 cup full-fat sour cream
- 2 tablespoons all-purpose flour
- 1 teaspoon pure vanilla extract
- 1 tablespoon fresh lemon juice
Now For the Strawberry Topping
- 2 cups fresh strawberries, hulled and sliced (about 300g)
- 3 tablespoons strawberry jam or preserves
- 1 tablespoon fresh lemon juice
- 1 teaspoon granulated sugar (optional, based on strawberry sweetness)
Optional Garnish
- 1 cup heavy whipping cream
- 2 tablespoons powdered sugar
- 1/2 teaspoon vanilla extract
- A few whole fresh strawberries for decoration
Equipment You Need
A few specific tools make this process much smoother:
- 9-inch springform pan — essential for releasing the cheesecake cleanly
- Stand mixer or hand electric mixer
- Food processor or zip-lock bag and rolling pin (for crushing cookies)
- Mixing bowls — at least two large ones
- Rubber spatula
- Roasting pan or large baking dish (for the water bath, highly recommended)
- Aluminum foil
- Offset spatula for smoothing the filling
How to Make Red Velvet Strawberry Cheesecake — Full Step by Step
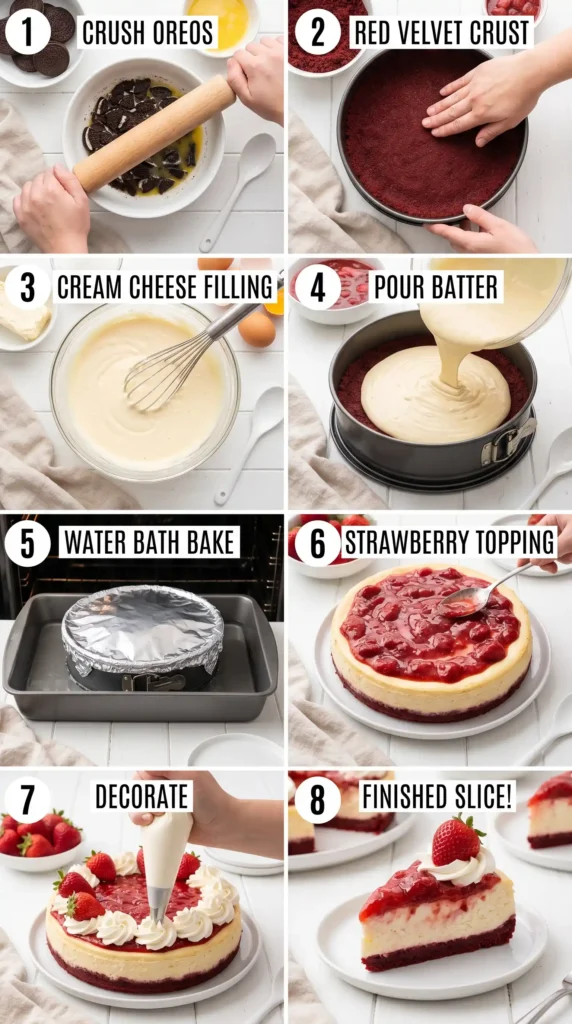
Here’s where we take our time. I’m going to walk you through every stage in plain, easy language so nothing catches you off guard mid-bake. Ready? Let’s build something beautiful.
Step 1: Make the Red Velvet Crust
Start by preheating your oven to 325 degrees Fahrenheit (163 degrees Celsius). This temperature is deliberately lower than a standard bake — cheesecake needs slow, gentle heat to cook evenly without cracking.
Crush your Oreo cookies into fine crumbs. The easiest way: toss them into a food processor and pulse until you get a sandy, uniform texture. No large chunks. If you don’t have a food processor, seal the cookies in a zip-lock bag and roll over them firmly with a rolling pin.
Transfer the crumbs to a mixing bowl. Add the cocoa powder, granulated sugar, and melted butter. Mix everything together until the crumbs feel like damp sand — when you press a small handful together, it should hold its shape without crumbling apart.
Now add the red food coloring. Start with 1 tablespoon and mix well. The color should turn a rich, deep red throughout the crumb mixture. Gel food coloring gives a much more vivid result than liquid food coloring, FYI — so if you have the option, always go with gel.
Press the crust mixture firmly and evenly into the bottom of your springform pan. Use the flat bottom of a measuring cup to press it down firmly. You want a compact, uniform layer about 1/4 inch thick that reaches just slightly up the sides of the pan.
Bake the crust alone for 10 minutes. This pre-bake sets the crust and prevents it from turning soggy once the filling goes in. Remove it from the oven and set it aside to cool while you prepare the filling.
Step 2: Prepare the Cream Cheese Filling
Room temperature ingredients are non-negotiable here. Cold cream cheese creates lumps that never fully blend out, and cold eggs can cause the batter to curdle. Pull everything from the fridge at least 45-60 minutes before you start mixing.
In your stand mixer or large bowl with a hand mixer, beat the cream cheese on medium speed for about 2-3 minutes. You want it smooth, creamy, and completely lump-free before you add anything else. Stop to scrape down the sides with a spatula every 30 seconds or so.
Add the granulated sugar and beat again on medium for another 1-2 minutes until fully incorporated and the mixture looks slightly lighter in color. Don’t rush this stage — properly mixed cream cheese and sugar creates the base for that signature dense-yet-creamy texture.
Add the eggs one at a time, beating on low speed after each addition just until combined. The key word here is ‘just.’ Overmixing the eggs incorporates too much air into the batter, which causes the cheesecake to puff up in the oven and then crack dramatically as it cools. Low and slow.
Add the sour cream, flour, vanilla extract, and lemon juice. Mix on low speed until everything is just combined and smooth. Scrape down the bowl one final time and give it one last gentle mix. Your batter should look silky and pourable.
Step 3: Bake with a Water Bath
A water bath sounds intimidating, but it’s genuinely the single most important thing you can do for a crack-free cheesecake. The steam from the hot water keeps the oven environment moist and ensures the cheesecake bakes gently and evenly.
Wrap the outside of your springform pan tightly with two layers of heavy-duty aluminum foil. The foil prevents water from seeping into the pan. Make sure you bring the foil all the way up the sides of the pan — any gap means water gets in and ruins the crust.
Pour your cream cheese filling over the cooled red velvet crust. Smooth the top with an offset spatula. Place the wrapped springform pan into your large roasting pan, then carefully pour hot water into the roasting pan until it reaches about 1 inch up the side of the springform pan.
Bake at 325 degrees Fahrenheit for 60-70 minutes. The cheesecake is done when the edges look set and slightly puffed, but the center still has a gentle jiggle — like a soft jelly when you nudge the pan. It will continue to firm up as it cools, so don’t overbake it.
Step 4: Cool and Chill
Turn off the oven when the bake time is up, but leave the cheesecake inside with the oven door cracked open for 1 hour. This gradual cooling prevents the dramatic temperature change that causes cracking. Cheesecake hates a sudden chill. :/
After an hour, remove it from the water bath and take off the foil. Run a thin knife or offset spatula around the edge of the pan to loosen the cheesecake from the sides. Don’t remove the springform ring yet — just loosen the seal.
Transfer the cheesecake to the counter and let it cool to room temperature, about another hour. Once it reaches room temperature, cover it loosely with plastic wrap and refrigerate for a minimum of 6-8 hours. Overnight is even better and gives you the best, sliceable texture.
Step 5: Make the Strawberry Topping
While the cheesecake chills, prepare your strawberry topping so it’s ready to go when you’re ready to serve. Hull and slice your strawberries into even pieces. Consistent slices look much more polished on top of the cheesecake.
In a small bowl, combine the sliced strawberries with the strawberry jam and fresh lemon juice. Stir gently to coat every piece of fruit with the glossy jam mixture. Taste it — if your strawberries are a little tart, stir in the teaspoon of sugar.
Let the strawberry mixture sit at room temperature for 15-20 minutes. This resting time allows the berries to release some of their juice and fully absorb the jam coating, creating a gorgeous glossy topping that holds together beautifully when spooned over the cheesecake.
Step 6: Assemble and Serve
When you’re ready to serve, remove the springform ring carefully. Run your knife along the base if needed, then slide the cheesecake onto your serving plate or cake stand.
Spoon the strawberry topping evenly over the top of the cheesecake. If you’re piping whipped cream, beat your heavy cream with powdered sugar and vanilla until stiff peaks form, then pipe a border around the edge using a star tip.
Place whole strawberries strategically on top for a dramatic presentation. Slice your Red Velvet Strawberry Cheesecake with a sharp knife, wiping the blade clean between each cut for those perfect, photogenic slices. 🙂
Key Tips for a Perfect Red Velvet Strawberry Cheesecake
These make the difference between good and outstanding:
- Always use full-fat cream cheese. Low-fat versions have higher water content and result in a softer, less stable filling that doesn’t hold its shape when sliced.
- Room temperature everything — cream cheese, eggs, sour cream. This is the single most common mistake home bakers make with cheesecake.
- Don’t skip the water bath. It takes an extra 5 minutes of setup and saves you from a cracked top that no amount of strawberry topping can fully hide.
- Chill overnight if you possibly can. The texture on day two is noticeably better — denser, creamier, and infinitely easier to slice cleanly.
- Use gel food coloring for the crust. It gives a richer, more vibrant red without adding extra liquid to the mixture.
Fun Variations to Explore
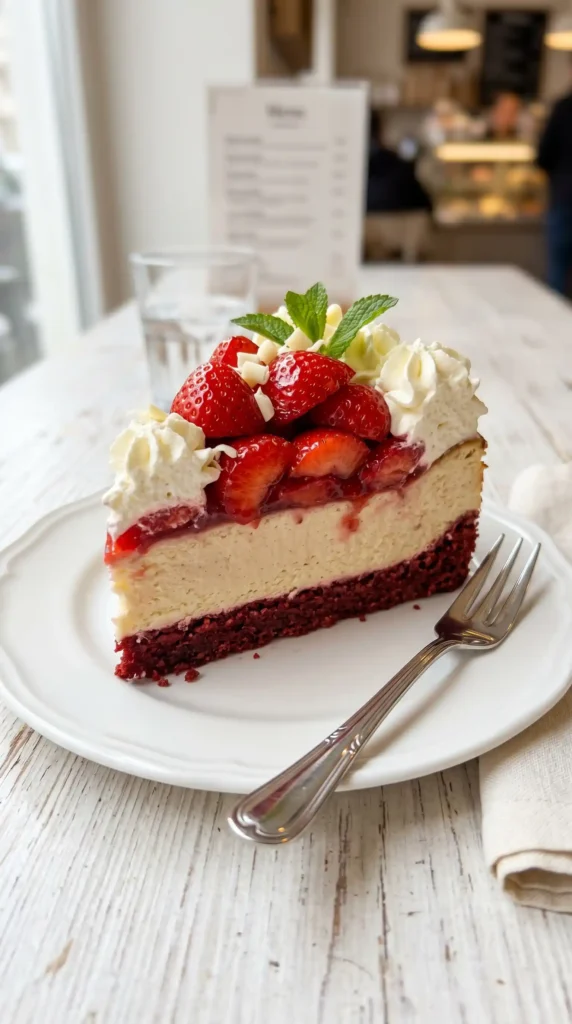
Once you’ve nailed the classic, try these spins on the recipe:
No-Bake Version
Replace the baked filling with a no-bake cream cheese mixture using whipped cream, softened cream cheese, and gelatin to set it. Skip the water bath entirely and chill for 8 hours. Perfect for hot summer days when you’d rather not turn the oven on.
Mini Cheesecakes
Use a muffin tin lined with paper cups and divide the crust and filling into individual portions. Reduce bake time to 20-25 minutes. These are perfect for parties because everyone gets their own serving — no slicing drama.
Chocolate Drizzle Version
Melt 2 oz of dark chocolate with 1 tablespoon of heavy cream and drizzle it over the strawberry topping just before serving. The bittersweet chocolate works brilliantly with both the red velvet base and the fresh strawberries.
Frequently Asked Questions
1. Why did my cheesecake crack on top?
Cracking happens for three main reasons: overmixing the batter (too much air), skipping the water bath, or cooling too quickly. Always use a water bath, mix on low speed when adding eggs, and cool the cheesecake gradually in the oven with the door cracked.
2. Can I make Red Velvet Strawberry Cheesecake ahead of time?
Yes — and you should. Cheesecake actually improves overnight as the flavors meld and the texture firms up properly. Make it the day before your event, add the strawberry topping just before serving, and you’re in perfect shape.
3. Can I use frozen strawberries for the topping?
You can, but fresh strawberries give a much cleaner look and firmer texture. Frozen strawberries release a lot of liquid when they thaw, which makes the topping watery and can make it slide off the cheesecake. If you must use frozen, thaw and drain them very thoroughly first.
4. How long does this cheesecake keep in the fridge?
Stored in an airtight container or covered tightly with plastic wrap, your cheesecake stays fresh in the fridge for up to 5 days. Add the strawberry topping fresh each day rather than storing it on top — it keeps the crust from absorbing excess moisture.
5. Can I freeze Red Velvet Strawberry Cheesecake?
The cheesecake itself freezes beautifully for up to 2 months. Freeze it without the strawberry topping — wrap individual slices in plastic wrap then foil. Thaw overnight in the fridge and add fresh strawberry topping before serving.
6. What if I don’t have a springform pan?
A regular 9-inch round cake pan works in a pinch. Line it with parchment paper, leaving enough overhang to lift the cheesecake out once chilled. It’s trickier to remove cleanly, but it absolutely gets the job done when you’re in a pinch.
Final Thoughts
This Red Velvet Strawberry Cheesecake recipe looks like it came from a high-end dessert shop — and honestly, it tastes better than most of them. You control every ingredient, every layer, and every flavor balance.
Yes, it takes time. Yes, there’s a water bath involved. But this isn’t a weeknight impulse bake — it’s a showpiece dessert that you plan, prep, and then serve with the quiet confidence of someone who knows exactly what they made.
Slice it clean, watch people’s faces, and accept the compliments gracefully. You earned every single one of them.
Red Velvet Strawberry Cheesecake
Ingredients
Method
- Preheat your oven to 325°F (163°C).
- Crush Oreo cookies into fine crumbs.
- Mix crumbs with cocoa powder, sugar, and melted butter until it resembles damp sand.
- Add red food coloring and mix until evenly colored.
- Press the crust mixture into the bottom of a 9-inch springform pan and bake for 10 minutes.
- Beat the room temperature cream cheese until smooth.
- Add sugar and mix until incorporated.
- Add eggs one at a time on low speed.
- Mix in sour cream, flour, vanilla, and lemon juice until smooth.
- Wrap the springform pan with aluminum foil.
- Pour cream cheese filling over the cooled crust and set in a roasting pan filled with hot water.
- Bake for 60-70 minutes or until edges are set with a gentle jiggle in the center.
- Leave the cheesecake in the oven with the door cracked for an hour.
- Remove from the water bath, cool to room temperature, then refrigerate for at least 6-8 hours.
- Combine sliced strawberries with strawberry jam and lemon juice.
- Let sit for 15-20 minutes to develop a glossy topping.
- Remove the springform ring and place cheesecake on a serving plate.
- Top with the strawberry mixture, and pipe whipped cream if desired.
- Slice and serve immediately.



